# Coinshift Overview
Asset management, payments, and accounting. All in one place.
### Introduction
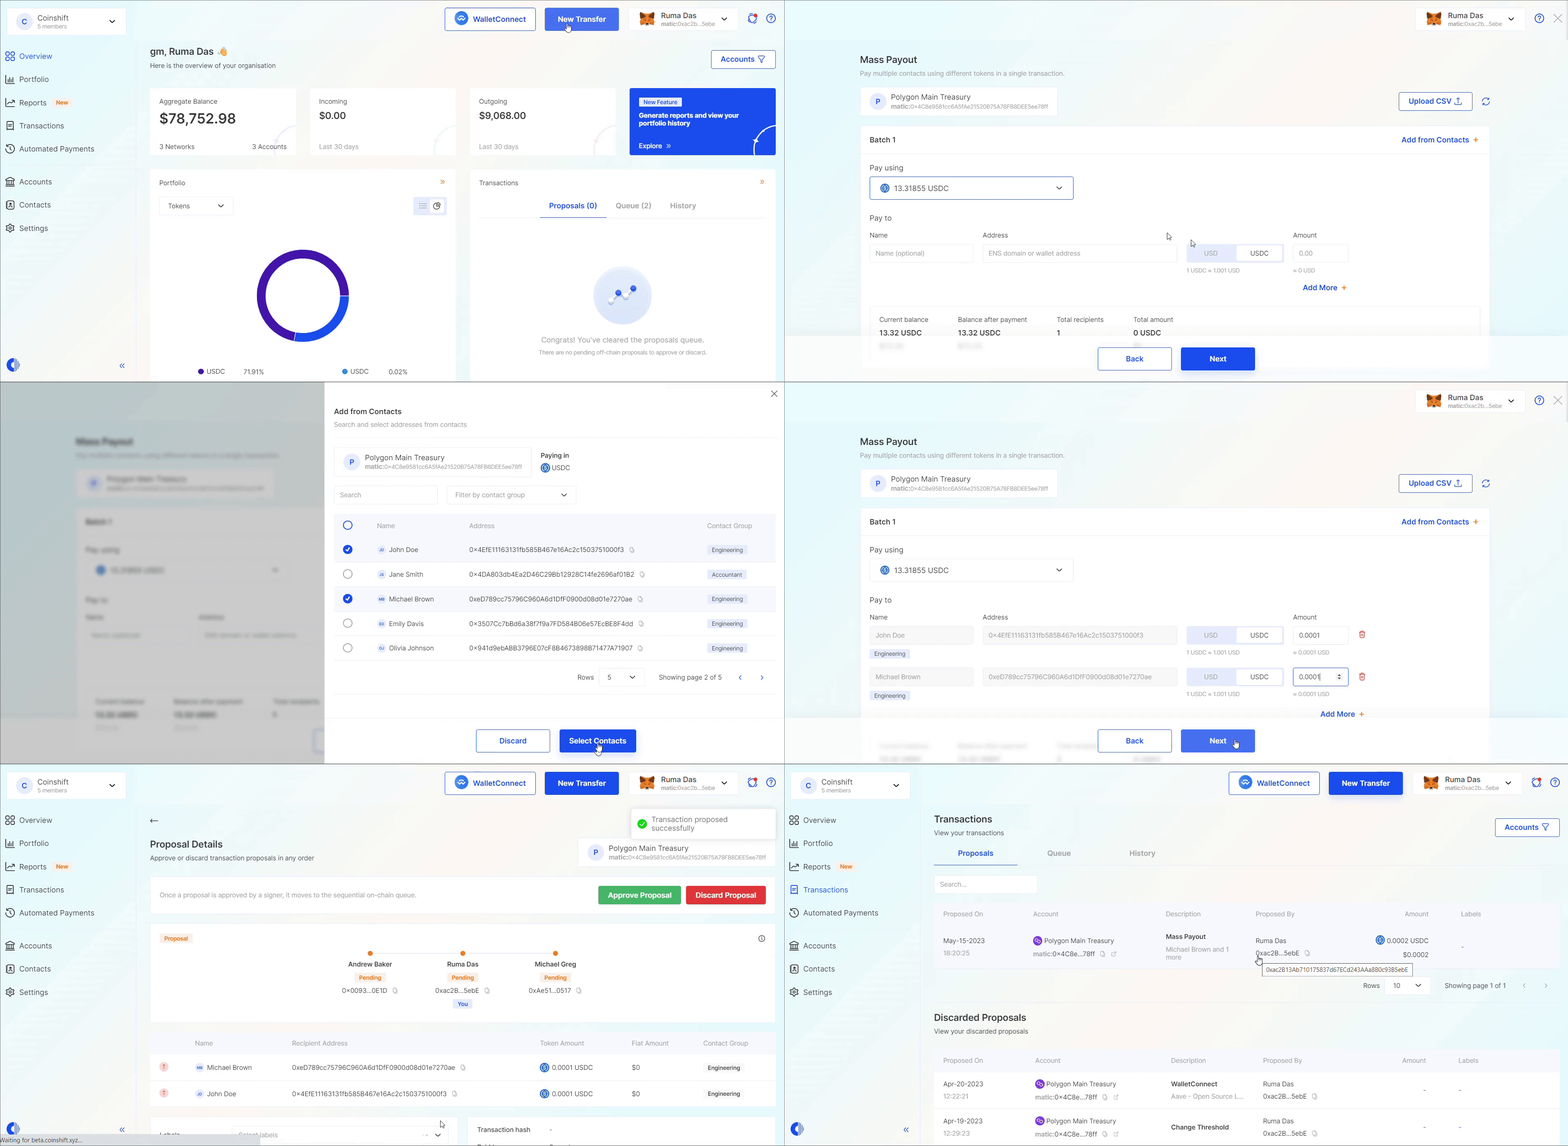
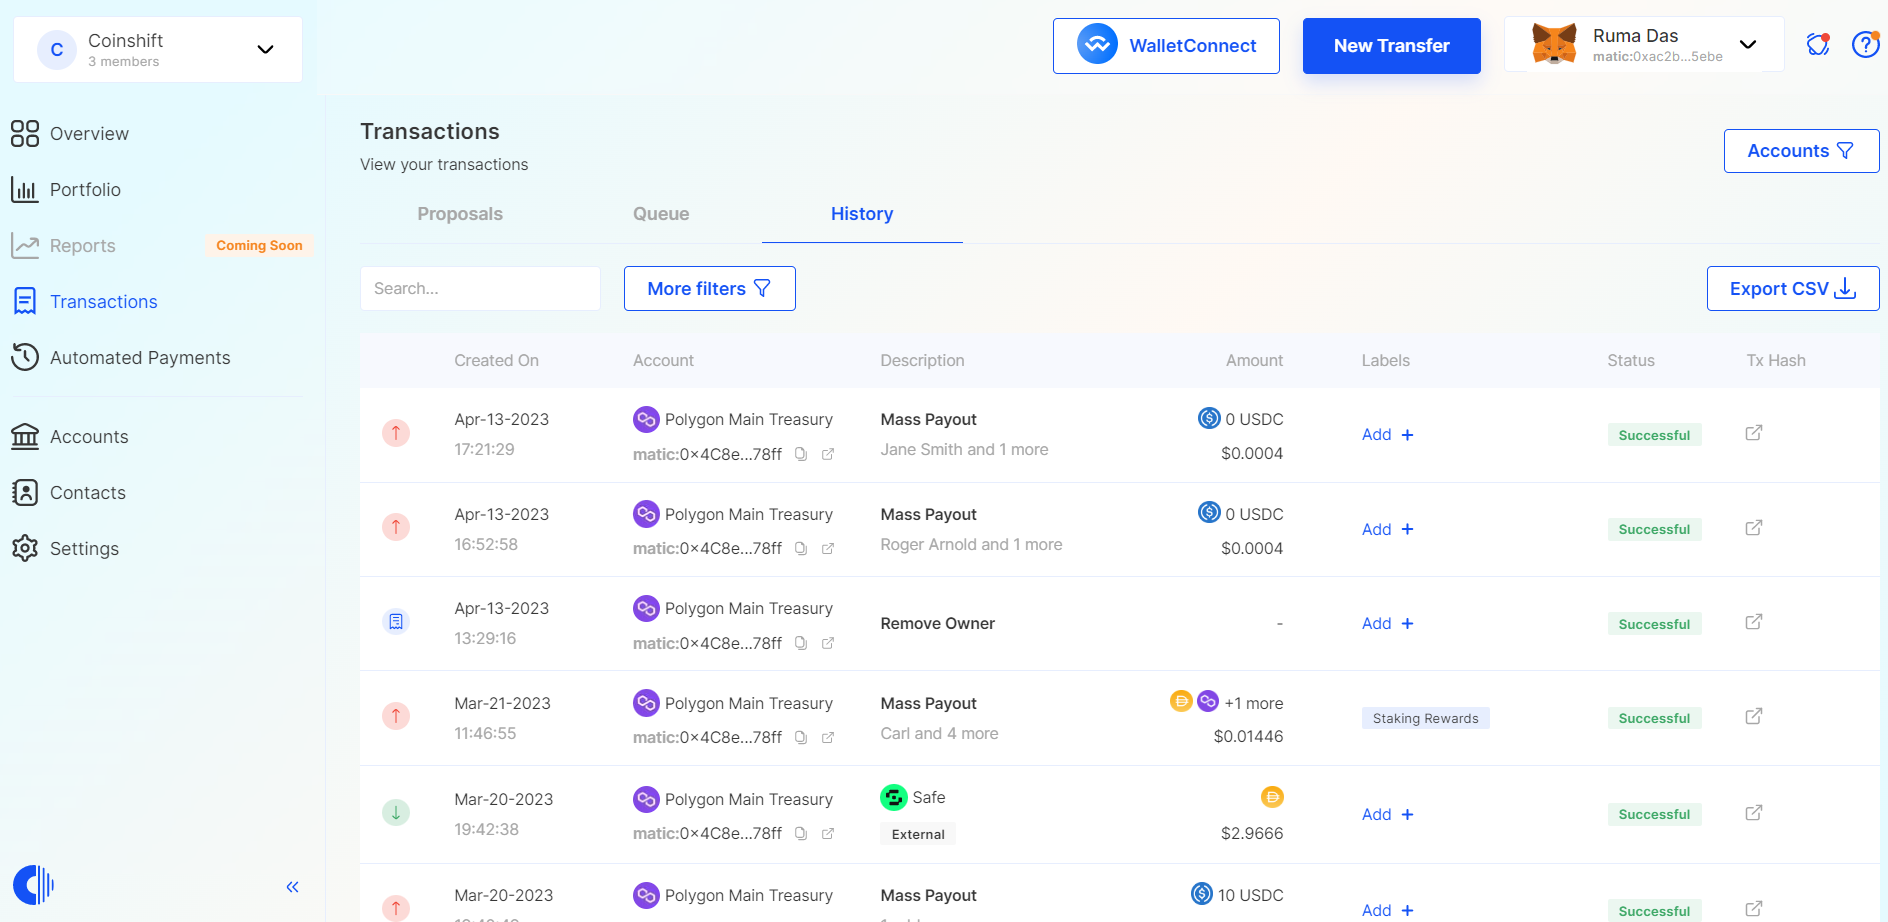
We help any organisation manage their finances on the blockchain. This includes payments, accounting, and asset management — all in one place.
Coinshift envisions a future where businesses are empowered by banking services, but not restricted by the limitations of banks.
We have already won the largest web3 businesses as clients such as Gitcoin, UMA, Aave, and Zapper who manage over a billion dollars on Coinshift.
Here is a detailed guide to navigate Coinshift's Business Platform:
{% content-ref url="/spaces/L2VHMP4lgaamA0WWdSTX" %}
[Business](https://docs.coinshift.xyz/business/)
{% endcontent-ref %}
Coinshift over the years
***
### Investors
In 2022, Coinshift raised $17.5M in a Series A round, with backing from Tiger Global, Sequoia, ConsenSys, and Polygon.
Coinshift Investors
***
### What We’re Building
Coinshift combines three core capabilities into one powerful treasury stack:
| Layer | Description |
| -------------------- | ------------------------------------------------------------ |
| **Payments** | Send and manage funds across teams, blockchains and wallets |
| **Accounting** | Automatically categorize, track, and report onchain activity |
| **Asset Management** | Deploy idle capital into yield-generating strategies |
These modules are unified under a secure, self-custodial interface — no KYC, no hidden fees, no compromise.
***
### The Coinshift Treasury Network
As more capital moves onchain, Coinshift is building a network of treasury participants aligned by one goal: increasing capital efficiency without sacrificing control.
This network includes:
* **Capital Providers:** DAOs, institutions, HNIs, and DeFi-native users
* **Treasury Professionals:** Finance teams, CFOs, controllers, ops leads
* **Yield Generators:** Curators, protocols, and fund managers building on top of Coinshift vaults
Participants are rewarded through shared infrastructure, performance-based incentives, and transparent token economics.
***
### Our Core Assets
**csUSDL**\
A yield-bearing stablecoin that combines real-world yield (T-Bills) with onchain lending. No staking, no lockups, no KYC.\
[*Learn more*](/coinshift-assets/csusdl) *→*
**csUSDC**\
A capital-efficient, over-collateralized stablecoin minted by supplying USDC to the Coinshift Vault. It enables seamless liquidity flow between suppliers and borrowers against assets like wstETH and cbBTC.\
[Learn more](/coinshift-assets/csusdc) →
**SHIFT Token**\
Coinshift’s governance token. SHIFT aligns network participants through value accrual, contribution-based distribution, and real governance power.\
[*Learn more*](/coinshift-assets/shift) *→*
***
### Why It Matters
Traditional finance limits access, abstracts yield, and relies on opaque intermediaries. Coinshift gives you:
* Full custody over your capital
* Transparent yield from real-world and onchain markets
* Powerful tooling for teams managing large balances
* A long-term ecosystem built on open standards
We’re here to help treasuries and indivuals to do more — without compromising on trust, control, or performance.
# csUSDL
Earn real yield with csUSDL, the institutional-grade stablecoin backed by the world’s most secure onchain assets.
## Introduction
csUSDL is a self-custodial, institutional-grade stablecoin for treasuries, DAOs, and individuals seeking transparent yield with conservative risk management.
Built on top of USDL — a fully backed, FSRA-regulated stablecoin issued by Paxos International — csUSDL combines real-world yield from U.S. Treasury bills with onchain lending returns via Morpho Blue.
No lockups. No staking. No KYC or KYB. Just hold csUSDL to start earning.
csUSDL Partners
***
### Key Highlights
* **Backed by Regulated Assets:** USDL is issued by Paxos and fully backed by T-Bills and cash, under FSRA (Abu Dhabi) regulation.
* **Instant Yield Access:** Users can simply swap into csUSDL and start earning — yield accrues daily balances grow automatically.
* **Non-Custodial & Permissionless:** No KYC, KYB, staking, or lockup required.
* **ERC-4626 Native:** Fully compatible in DeFi, ideal for integrations, looping, or collateral use.
* **Transparent & Secure:** All yield sources are onchain and independently verifiable. USDL reserves are published monthly by Paxos and attested by Withum, a top-tier audit firm.
* **Deep Liquidity:** Curve pools and CowSwap aggregators enable seamless conversion to/from USDC.
* **Strategic Partners:** Collaborations with Paxos International, Steakhouse Financial, and Morpho Protocol ensure that csUSDL benefits from top-tier asset and risk assessment, and lending efficiency.
# How csUSDL works
This section explains how funds flow through the system and how csUSDL steadily grows in value over time.
### Introduction
csUSDL is a yield-bearing ERC-4626 token that accrues value through real-world interest (T-Bills via USDL) and onchain lending (via Morpho). It is designed to be permissionless, transparent, and easy to integrate across DeFi.
***
### Capital Flow
Here’s what happens when a user mints csUSDL:
1. **Starter Asset** \
User can start with any asset and swap it to USDL on Cowswap.
2. **Wrapping to wUSDL**\
USDL is wrapped into wUSDL — a non-rebasing, ERC-20 token required for compatibility with DeFi protocols like Morpho.
3. **Vault Deposit**\
wUSDL is deposited into the csUSDL ERC-4626 vault. In return, users receive csUSDL tokens representing their proportional share.
4. **Lending via Morpho Blue**\
The vault supplies wUSDL to a Morpho market, where it is lent to borrowers against overcollateralized positions using blue-chip assets like wstETH and cbETH.
5. **Yield Accrual**\
Vault value increases daily from:
* Daily yield from Paxos’s USDL (T-Bills)
* Real-time lending interest from Morpho
* Additional rewards in SHIFT tokens
Yield is reflected in the rising share price (`convertToAssets()`), not in token balance.
***
### Roles
| Partner | Role |
| -------------- | ---------------------------------------------------------------------- |
| **Paxos** | Issuer of USDL, manages T-Bill reserves, regulated by FSRA (Abu Dhabi) |
| **Morpho** | Leading lending protocol for onchain lending yield generation |
| **Coinshift** | csUSDL distributor, fee recipient, and SHIFT issuer |
| **Steakhouse** | Vault curator and risk manager |
***
### Asset Structure
| Token | Description | Yield Source | Behavior |
| ---------- | -------------------------------- | --------------------------------------------------- | ------------- |
| **USDL** | Paxos-issued stablecoin | RWA (T-Bills) | Rebased daily |
| **wUSDL** | Non-rebasing wrapper for USDL | RWA (T-Bills) | Accrual token |
| **csUSDL** | Coinshift vault token (ERC-4626) | RWA + DeFi Lending Yield + Morpho and SHIFT rewards | Accrual token |
***
### ERC-4626 Mechanics
csUSDL uses the ERC-4626 standard to abstract away the complexity of yield tracking and accounting:
* **Accrual token**: The price of the asset grows in your wallet as the underlying position earns yield
* **Daily compounding**: T-Bill and lending yield accrue continuously
* **Interoperable**: Designed for seamless use across DeFi
***
### Oracle Structure
The value of csUSDL is calculated using two layers of ERC-4626 pricing:
1. **csUSDL → wUSDL**\
Calculated via `convertToAssets()` on the csUSDL vault
2. **wUSDL → USDL**\
Calculated via Steakhouse’s custom ERC4626Feed oracle, reviewed by Morpho and audited by Spearbit (in progress)
3. **USDL → $1.00**\
Peg is enforced onchain via Morpho protocol and offchain via monthly reserve attestations by Paxos.
Example:\
`1.00 csUSDL = 1.01 wUSDL = 1.02 USDL = $1.02`
***
### Up-Only Share Price
csUSDL does not support redemptions below its underlying asset value. Since both T-Bill interest and lending yield are continuously added to the vault, the token’s share price only moves in one direction: up.
There are no rebases, no staking requirements, and no manual reinvestment. Yield simply accrues into the token itself.
# Yield Mechanics
Understand how csUSDL generates, compounds, and distributes yield across real-world assets, lending markets, and token incentives.
### Introduction
csUSDL generates yield from three sources: real-world interest (T-Bills), DeFi lending, and token rewards. These yields are either auto-compounded into the token’s price or claimable by users.
***
### 1. USDL Yield (T-Bill Rebases)
The base yield comes from USDL — a fully backed, regulated stablecoin issued by Paxos. USDL earns interest from a portfolio of U.S. Treasury bills and cash equivalents.
* Yield is distributed via daily rebases by Paxos.
* wUSDL (wrapped USDL) converts this into an accrual model.
* Since csUSDL holds wUSDL, the daily T-Bill yield from USDL accrues automatically and is reflected in csUSDL’s share price.
> This yield is **auto-compounded** into csUSDL and reflected in the `convertToAssets()` share price.
***
### 2. Lending Yield on Morpho
Coinshift deploys deposited wUSDL into Morpho Blue, where borrowers can take loans against overcollateralized assets like wstETH or cbETH.
* csUSDL earns interest paid by borrowers in real time.
* Lending rates are variable and depend on market utilization.
* If utilization is high, lending APR increases.
> This yield is **auto-compounded** and also reflected in csUSDL’s increasing share price.
***
### 3. SHIFT Token Rewards
In addition to interest, csUSDL holders earn SHIFT rewards:
* Coinshift’s native governance token
* 5% of total supply reserved for early csUSDL users
* Accrues over time and will be claimable at token launch and per vesting schedule
* Speculative value until trading begins
> These rewards are **not auto-compounded** and must be claimed manually.
***
### Yield Breakdown (Example)
| Yield Source | Compounding | Estimated APR | Notes |
| ------------------- | ----------- | ----------------- | ----------------------------------- |
| USDL (T-Bill yield) | Auto | \~4.0% | Rebased daily by Paxos, via wUSDL |
| Morpho Lending | Auto | up to 2% | Variable, borrower demand-dependent |
| SHIFT Rewards | Manual | up to speculation | Accrues pre-launch, claimable later |
> APRs are indicative and fluctuate over time.
***
### Summary
* csUSDL grows in value automatically as both T-Bill and lending yields accrue inside the vault.
* Users don’t need to stake, claim, or manage positions — holding csUSDL is enough to earn yield.
* SHIFT tokens are separate, and claimable via external interfaces.
# Why we need csUSDL?
### TL;DR
While most stablecoins just sit idle or rely solely on T-bill yields, csUSDL goes further combining real-world T-bill income and onchain lending yields for stronger, more resilient returns.
No KYB. No KYC. No lockups. Just swap into csUSDL and start earning. Your balance grows daily—no staking or complex setup required.
USDL, the underlying asset, is fully regulated under the FSRA in Abu Dhabi, with compliance baked directly into its smart contracts. So you get permissionless access and regulatory oversight.
In short, csUSDL bridges the best of TradFi infrastructure with DeFi-native access, yield, and composability.
### Stablecoin Market Overview
Stablecoins have established themselves as the most widely adopted product onchain, with projections indicating market growth to $10 trillion by 2030, up from $230 billion today. Tether (USDT) and Circle (USDC) lead the market with a combined 90% share, generating over $10 billion in revenue in 2023. Their success is due to deep liquidity, first-mover advantage, and regulatory compliance. However, this dominance comes at a significant cost:
* **No Yield:** Users earn no returns on their holdings, although issuers benefit from the assets under management.
* **Centralization:** Yield and risk management decisions remain centralized.
* **Complex Strategies:** Users must engage with multiple DeFi platforms to generate yield.
### **The Rise of New Decentralized Stablecoins**
The market is evolving, demanding higher yields, greater governance control, transparency in yield and risk management, and seamless DeFi integration. Among the many stablecoins currently available, decentralized options are growing fastest. These stablecoins aim to maintain a 1:1 peg to the U.S. dollar and typically offer:
* **Base Tokens and Liquid Staking Tokens (LSTs):** Non-yield-bearing base tokens (e.g., DAI, USDe, USD0, USDz) paired with yield-generating LSTs (e.g., sDAI, sUSDe, USD0++, sUSDz).
* **Governance and Incentives:** Tokens like ENA, MKR/SKY, and Usual to engage users.
* **DeFi Integration:** Strong connections with platforms like Morpho, Pendle, and Balancer to enhance yield opportunities.
### **Emerging Stablecoins and LSTs**
1. **MakerDAO / Sky**
* **DAI / USDs** is a decentralized, collateral-backed stablecoin pegged to the U.S. dollar, created by locking over-collateralized crypto assets in smart contracts. If collateral values drop significantly, MakerDAO can mint additional MKR tokens to maintain the peg.
* **sDAI / sUSDs** are yield-bearing derivatives of DAI or USDs, formed when users lock their DAI in the DAI Savings Rate (DSR) module. This module distributes protocol revenue to sDAI or sUSDs holders, allowing them to accrue interest over time. The yield allocation is managed by MakerDAO, which adjusts rates based on market dynamics and redistributes revenue from real-world assets (RWAs) and lending activities.
2. **Ethena:**
* **USDe:** A synthetic dollar-pegged stablecoin built on the Ethereum blockchain, maintaining its 1:1 peg to the U.S. dollar through a sophisticated delta-neutral hedging strategy. This involves holding staked Ethereum (stETH) as collateral and simultaneously opening short positions on Ethereum futures to counteract price volatility and ensure stability.
* **sUSDe:** users can stake USDe to mint sUSDe, which accumulates yield from Ethereum staking rewards and funding rates from derivative positions.
### Limitations of emerging Stablecoins and LSTs
* **Lack of Transparency and User Control**: Base tokens like DAI, USDe, USD0, and USDz do not provide direct yield to users.
* **Opaque Yield Processes**: Yield generation often requires complex steps or lock-ups. Users must engage with liquid staking tokens (LSTs) to earn yield, which rely on intricate and non-transparent asset management strategies.
* **User Control Constraints**: Users only have one choice: to be exposed to the asset selection chosen by the provider. Users cant influence asset utilisation decisions.
### **Challenges Integrating Real-World Assets (RWAs) in DeFi**
Although onchain US Treasury Bills and other RWA-backed assets are gaining traction, their adoption remains limited due to minimal usability within DeFi. Most RWA assets are not accessible in lending and borrowing markets, nor are they available in fixed-rate markets like Pendle or restaking platforms, restricting their strategic potential for DeFi users.
### **csUSDL by Coinshift**
csUSDL addresses these gaps with a unique approach that balances yield generation, stability, user control, and regulatory compliance, all within an intuitive, user-friendly interface.
# Opportunity Size
Defining the Market Opportunity and Revenue Potential for csUSDL
### **Stablecoin Opportunity**:
Stablecoins have demonstrated clear product-market fit and are experiencing rapid market growth. Yet, over 90% of stablecoins today offer no yield, revealing a major opportunity for yield-generating alternatives.
Stablecoin Market Projection
### **Emerging Trends**
Innovative stablecoins like Ethena’s USDe, Usual’s USD0, and Elixir’s deUSD have collectively amassed $9 billion in TVL since February 2024. Their accelerated adoption highlights growing demand for stablecoins that go beyond price stability—delivering yield and composability in DeFi.
### **Coinshift Targets**
Coinshift is strategically positioned to capture value within this evolving landscape and has set ambitious targets for csUSDL:
* **Market Capture:** Reach 0.1% of the projected $16 trillion stablecoin market by 2030.
* **AUM Goal:** Achieve $16 billion in assets under management for csUSDL by 2030.
# Fees & Revenue
How csUSDL generates protocol revenue and aligns long-term value capture with the growth of the Coinshift economy.
### Revenue Streams
Coinshift generates protocol revenue through two primary streams, all enforced transparently onchain:
#### 1. USDL Minting Fee Share
Through a direct partnership with Paxos International, Coinshift earns up to **0.2%** on all USDL minted via the csUSDL platform.
> 📈 **Example:**\
> A 20 bps share on $16 billion AUM would generate **$32 million per year** in revenue.
This model aligns Coinshift’s growth with USDL adoption and creates a stable revenue base.
***
#### 2. Vault Performance Fee
Coinshift may charge a performance fee — a share of the interest borrowers pay to access wUSDL from the vault. csUSDL currently charges **0%**, encouraging capital inflow and growth.
In the future, SHIFT holders will govern this parameter. The target range is **5–10%** of borrower interest.
> 📈 **Example:**\
> At a 10% performance fee on a 2% borrow APY, Coinshift earns an effective 0.2% on AUM — or **$32 million annually** at $16B AUM.
***
### Current Fee Structure (csUSDL)
| Fee Type | Rate | Description |
| ------------------- | --------------- | --------------------------------------------------------- |
| **Mint Fee** | 0% | No fee when minting csUSDL |
| **Redemption Fee** | 0% | No fee when redeeming csUSDL |
| **Performance Fee** | 0% (governed) | Set by governance. Target range: 5–10% of borrow interest |
| **AUM Fee** | 0.2% annualized | Charged on idle wUSDL held in the vault |
***
### Strategic Revenue Alignment
Coinshift’s revenue model is designed to grow alongside csUSDL adoption and vault usage:
* As more users mint USDL via Coinshift, stable revenue grows through the minting fee share.
* As vault utilization increases, performance fees scale with lending demand.
This value flows back to the network through the SHIFT token economy. Governance may direct protocol revenue toward:
* **SHIFT buybacks and burns** to reduce token supply
* **Treasury accumulation** for future development and stability
* **Contributor incentives and partner programs** that increase adoption
The more csUSDL is used, the more value is generated — and the more SHIFT reflects that growth.
# Coinshift USDL Vault
Explore how the csUSDL Vault boosts your USDL earnings with automated lending, dual yields, and advanced risk management.
## Overview
The Coinshift USDL Vault combines the benefits of isolated lending markets and vaults, providing USDL holders with a secure and efficient way to earn yields through lending. Leveraging the Morpho protocol, the vault accepts single-asset USDL deposits and strategically allocates funds across Morpho markets according to risk parameters and optimization strategies defined by curator [Steakhouse Financial](https://www.steakhouse.financial/).
### Key Benefits
**Simplified User Experience**\
Deposit USDL into a single vault without needing to manage multiple lending positions.
**Optimized Yield**\
Steakhouse dynamically reallocates funds across lending markets as conditions shift, maximizing lender returns while keeping risks balanced.
**Transparency and Security**\
Vault logic is immutable and fully executed onchain, ensuring full transparency and robust security. See which collateral assets are used and have the power to veto the curator's choice.
**Robust Risk Management**\
Governance structures ensure comprehensive oversight and adaptable risk management
**Conservative Choice** \
Over-collateralized lending backed by blue-chip assets positions csUSDL as a conservative investment choice.
**Liquidity Amplification**\
csUSDL Vaults enhance liquidity through Morpho’s aggregated system, where multiple vaults share liquidity across markets. This setup ensures that when one vault supplies to a market, liquidity increases not just for that vault but for all connected vaults. As a result, lenders experience greater efficiency, and withdrawal capability compared to traditional isolated lending pools ([read here](https://docs.morpho.org/morpho-vaults/concepts/shared-liquidity/amplifying-liquidity))
**Shared Liquidity** \
csUSDL Vaults address liquidity fragmentation by pooling assets into a single lending market, offering greater liquidity compared to isolated markets. This ensures efficient asset availability for user withdrawals and borrowing, enhancing market stability and performance.
# Characteristics
### 1. Transparent Yield Distribution
csUSDL ensures complete transparency in yield generation derived from:
* **USDL Base Yield**: Up to 5% APY, sourced from cash equivalents and US Treasury Bills
* **DeFi Lending Yield**: Returns from lending USDL against blue-chip assets, including wstETH and cbBTC, in Morpho markets
* **Incentives**: Additional SHIFT tokens awarded for holding csUSDL
Unlike traditional stablecoins, csUSDL’s value appreciates over time through the automatic accrual of dual yields. All yield components are transparently reported using Morpho's innovative platform, ensuring that Coinshift has no control over yield allocation.
### 2. RWA Backing and Stability Benefits
csUSDL’s yield is underpinned by USDL, an RWA-backed stablecoin issued by Paxos International. USDL's stand-out features include:
* **Daily Yield Payouts**: Up to 5% APY for eligible holders – delivered directly to users, without staking contracts or token programs
* **Regulatory Oversight**: Issued by Paxos International and regulated by the Financial Services Regulatory Authority (FSRA) in Abu Dhabi Global Market (ADGM)
* **Transparency**: Monthly audited reports and reserves held solely in US Treasury Bills, ensuring stability and eliminating exposure to fractional reserve banking
Paxos’ proven compliance and expertise—established through projects like PayPal’s PYUSD—bring additional assurance and credibility to csUSDL.
### 3. Efficient Lending Yield and User Control
Coinshift’s csUSDL is built on Morpho's permissionless, non-custodial lending protocol, which supplies over $2 billion in assets. This integration supports:
* **Over-Collateralized Lending**: Lending against blue-chip assets such as wstETH and cbBTC
* **Direct Benefits**: Increased lending yields and better borrowing rates – without passing through DAO governance
### 4. Transparent Asset Management and Selection
csUSDL vaults are curated by **Steakhouse Financial**, experts in stablecoin and RWA strategies. Known for managing programs including MakerDAO’s $2 billion RWA initiative, Steakhouse ensures:
* **Institutional-Grade Management**: Only regulated real-world assets and blue-chip crypto-collateral (e.g., wstETH and cbBTC) are onboarded.
* **Institutional-Grade Collateral:** Assets include wstETH, an [ETH liquid staking token issued by Lido DAO](https://lido.fi/) and a leader in staking with[ 28% market share](https://dune.com/hildobby/eth2-staking); and cbBTC, backed 1:1 by BTC held in custody by Coinbase on the Ethereum network and the clear leader since its launch.
* **User Control**: Unlike tokens such as sDAI or sUSDe, csUSDL allows holders to influence asset allocation and challenge curator decisions, ensuring their holdings align with their preferences.
### 5. Self Custody and Accessibility
csUSDL empowers users with full self custody, providing autonomy and instant access to liquidity. Built on Morpho’s non-custodial and immutable smart contracts, Coinshift Vaults offer:
* Dynamic Allocation: Curators can adjust capital allocation, add or remove markets, and modify fees. These changes are subject to a time delay (ranging from 1 to 14 days), giving users ample opportunity to withdraw their funds if desired. Currently, performance fees are set at 0%, with a planned maximum fee of 5% on future borrowing rates.
* Curators have no ability to access or seize funds, ensuring that control remains with the user at all times.
### 6. Composability and Integration
csUSDL is seamlessly integrated with complex DeFi strategies, allowing investors to maximize yields and leverage DeFi’s composability for strategic gains.
# Lenders & Borrowers benefits
How Lenders and Borrowers benefit from csUSDL.
Lenders come with USDC and mint csUSDL. Borrowers come with blue-ship collateral (selected by Steakhouse) and mint csUSDL. Overall, we are lending a yield bearing stablecoin to blue chip assets.
#### ***Important:***
*For graphical representation and simplicity, **wUSDL** is represented as **USDL**. wUSDL is the wrapped version of USDL, designed for enhanced DeFi composability across multiple chains and ecosystems.*
### Lender Strategy
How Coinshift's USDL Vault Functions and Key Benefits for Lenders
#### Lenders gain:
* **Curated Risk Profiles**
The csUSDL Vault supports only blue-chip collateral, allowing users to choose a secure, tailored lending environment. This ensures lenders can avoid exposure to riskier, long-tail assets, focusing exclusively on high-quality, stable collateral.
* **Transparent**[****](https://docs.morpho.org/morpho-vaults/concepts/benefits-of-morpho-vaults#transparent)
Morpho Vaults are noncustodial with immutable logic and onchain verifiable allocations, ensuring users have full visibility into the markets where their assets are deployed.
* **High Yield Potential**
Earn up to 10% APY through combined returns from the underlying real-world asset and optimized DeFi lending markets via Morpho’s capital-efficient markets. Interest earned by suppliers are optimized by dynamically rebalancing across multiple markets with the best risk-return ratio.
* **Lending Rewards**
Gain token incentives from Coinshift and Morpho, enhancing total returns.
* **Enhanced DeFi Opportunities**
Maximize earning potential by leveraging csUSDL in various DeFi strategies.
### Borrower Strategy
How Coinshift's USDL Vault Functions and Key Benefits for Borrowers
#### Borrowers gain:
* **Low Borrowing Rates**: Access affordable liquidity to fund strategic needs.
* **Borrowing Incentives**: Earn rewards in the form of token incentives from Coinshift and Morpho.
* **Dual Role Flexibility**: Borrow USDL and supply it to the Coinshift vault to mint csUSDL, reaping all associated benefits as a lender.
* **Strategic Leverage**: Maintain asset exposure while borrowing, enabling capital efficiency and continued potential asset appreciation.
* **Tax Efficiency**: Use assets as collateral to access liquidity without triggering taxable events, effectively deferring capital gains.
* **Liquidity During Market Downturns**: Tap into USDL to meet operational or strategic financial needs without selling assets at depressed values, preserving long-term positions for potential market recovery.
# Governance
## Governance
**Owner (Coinshift, Steakhouse Financial, and Paxos International)**
* **Composition**: A 3-of-5 multi-signature committee
* **Responsibilities**: Sets high-level vault strategies and assigns roles.
**Curator (Steakhouse Financial)**
* **Role**: Sets vault parameters such as adding or removing markets, reallocating capital, adjusting performance fees (as a percentage of borrower rates), and setting supply and borrow caps.
* **Function**: Ensures the vault's activities align with risk and optimization strategies. However, actions like adding a market or increasing fees are subject to a time delay (1 to 14 days).
**Allocator (Steakhouse Financial & Public Allocator Contract)**
* **Role**: Dynamically optimizes fund allocation within established parameters.
* **Function**: Adjusts allocations to optimize yields while managing risk.
**Guardian (Coinshift Security Council, later: DAO made up of vault depositors)**
* **Role**: Monitors and provides oversight, with the ability to veto actions within a specified timelock.
* **Function**: Protects user interests by overseeing vault activities and intervening when necessary.
#### **Timelock**
* **Security Feature**: Timelocks introduce a waiting period before significant actions are executed in Morpho Vaults.
* **User Control**: Steakhouse curates with a 7-day delay for changes, giving users time to review. Using[ Aragon DAO guardians](https://forum.morpho.org/t/steakhouse-metamorpho-vaults-are-upgrading-their-guardian-setups-to-fully-trustless/527), capital suppliers can vote to revoke curator actions. This setup keeps the vault non-custodial, ensuring users maintain control and can withdraw assets anytime.[ ](https://forum.morpho.org/t/steakhouse-metamorpho-vaults-are-upgrading-their-guardian-setups-to-fully-trustless/527)
* **Risk Management**: Applies to changes that could increase vault risk (e.g., high LLTV markets, supply cap adjustments).
* **Transparency**: Users can inspect timelock values in the "Read Contract" section of the vault for oversight.
# Vault Roles
While depositing and withdrawing assets from Vaults is permissionless (though each address is managed independently), certain administrative functions require specific user roles. The table below details these roles and their associated permissions.
| Role | Addresses | Description |
| --------- | --------------------------------------------------------------------------------------------------------------------------------------------------- | ----------------------------------------------------------------------------------------- |
| Owner | eth:0xc01Ba42d4Bd241892B813FA8bD4589EAA4C60672 |
|
| Curator | None (owner has the same rights) | |
| Allocator |
0xfeed46c11f57b7126a773eec6ae9ca7ae1c03c9a
0x29d4CDFee8F533af8529A9e1517b580E022874f7
0xfd32fA2ca22c76dD6E550706Ad913FC6CE91c75D
|
Reallocation Bot
Manual Reallocation Multisig Public Reallocator contract
|
| Guardian | [csusdl-guardian.dao.eth](https://app.aragon.org/#/daos/ethereum/csusdl-guardian.dao.eth/dashboard) | Aragon DAO controlled by lenders |
# Token Specification
csUSDL is an ERC-4626 representation of USDL in the Coinshift USDL Morpho Vault. csUSDL allows lenders to deposit USDL to receive csUSDL as a receipt token, while still being fully composable in DeFi ecosystem.
{% hint style="info" %}
[ERC4626](https://eips.ethereum.org/EIPS/eip-4626) is an extension of [ERC20](https://docs.openzeppelin.com/contracts/4.x/erc20) that **proposes** a standard interface for token vaults.\
\
Read more about ERC4626 at[ OpenZeppelin](https://docs.openzeppelin.com/contracts/4.x/erc4626#:~:text=ERC4626%20is%20an%20extension%20of,brings%20a%20number%20of%20subtleties.)
{% endhint %}
### Contract Details
* Contract Name: Coinshift USDL
* Token Symbol: csUSDL
* Token Decimals: 18
* Ethereum Deployment: [0xbEeFc011e94f43b8B7b455eBaB290C7Ab4E216f1](https://etherscan.io/address/0xbEeFc011e94f43b8B7b455eBaB290C7Ab4E216f1)
# csUSDC
Coinshift csUSDC is an over-collateralized and capital-efficient stablecoin issued as a receipt token for supplying Circle’s USDC to the Coinshift USDC Vault.
In collaboration with Steakhouse Financial, Coinshift has launched the Coinshift USDC vault on Morpho Protocol, designed as an ERC-4626 vault to ensure compatibility and efficiency across DeFi ecosystems.
The DeFi landscape is rapidly evolving, incorporating many practices from TradFi, while the demand for blue-chip stablecoins like USDC and USDT continues to grow. However since USDC markets remain overutilized, the borrowing rates for USDC increases significantly (up to unacceptable levels), making it capital-inefficient to borrow against assets like ETH, BTC, or their derivatives (e.g., wrapped tokens, LSTs, and LRTs).
At Coinshift, our goal is to establish a win-win ecosystem for both lenders and borrowers:
* **Lenders** should gain access to competitive yields via efficient lending markets and real-world asset exposure.
* **Borrowers** should benefit from stablecoin liquidity at sustainable and capital-efficient rates.
With csUSDC we bridge the gap between USDC liquidity needs and yield generation for institutions as well as individuals, serving as a robust financial tool to optimize their involvement in DeFi while maintaining stability and efficiency.
#### Benefits for USDC Lenders to Mint csUSDC
* **Liquidity Retention:** csUSDC holders retain the liquid value of their supplied USDC.
* **Multiple Yield Sources**: csUSDC holders accrue yield through high lending APR and rewards in SHIFT and MORPHO emissions, maximizing overall returns.
#### Benefits for Borrowers of USDC from Coinshift USDC Vault
* **Improved Capital Efficiency:** Borrowers can access USDC without incurring excessive collateralization or borrowing costs.
* **DeFi Integration:** The vault is fully compatible with ERC-4626, allowing seamless composability across DeFi protocols.
* **Sustainable Borrowing:** Borrowers can utilize USDC liquidity at more predictable LTV parameters addressing key challenges associated with liquidation.
# Token Specification
csUSDC is an ERC-4626 representation of USDC in the Coinshift USDC Morpho Vault. The vault allows lenders to deposit USDC to receive csUSDC as a receipt token, while still being fully composable in DeFi ecosystem.
{% hint style="info" %}
[ERC4626](https://eips.ethereum.org/EIPS/eip-4626) is an extension of [ERC20](https://docs.openzeppelin.com/contracts/4.x/erc20) that **proposes** a standard interface for token vaults.\
\
Read more about ERC4626 at[ OpenZeppelin](https://docs.openzeppelin.com/contracts/4.x/erc4626#:~:text=ERC4626%20is%20an%20extension%20of,brings%20a%20number%20of%20subtleties.)
{% endhint %}
### Contract Details
* Contract Name: Coinshift USDC
* Token Symbol: csUSDC
* Token Decimals: 18
* Ethereum Deployment: [0x7204B7Dbf9412567835633B6F00C3Edc3a8D6330](https://etherscan.io/token/0x7204B7Dbf9412567835633B6F00C3Edc3a8D6330)
# SHIFT
SHIFT is the governance token of the Coinshift Network, which aims to align stakeholders and accelerate the adoption of Coinshift's products across the EVM ecosystem, including csUSDL and csUSDC.
### Summary
Shift is a decentralized protocol that accelerates the growth of onchain capital and treasury through Real-World Assets (RWAs). SHIFT is the governance token that forms the backbone of the Shift Protocol, aligning stakeholders and driving the adoption of Coinshift’s asset management products. Coinshift’s first asset management product, csUSDL, is a secure, institutional-grade, yield-bearing stablecoin. SHIFT incentivizes asset holders with a sustainable economic model that rewards growth while ensuring token dynamics reflect actual value creation through revenue-based burning and conditional unlocks.
### SHIFT Utility
SHIFT serves 3 core purposes:
1. **Alignment & Rewards:** Primarily, SHIFT is a mechanism for alignment and rewards. Participants who contribute to the growth and success of the protocol—whether by supplying capital, managing treasuries, or facilitating yield generation—are rewarded with SHIFT tokens. These rewards are distributed proportional to the value each participant brings to the protocol. This ensures that incentives are fair and the protocol is sustainable.
2. **Governance Rights:** SHIFT also functions as a governance token. Token holders have the ability to influence key decisions that shape the evolution of the protocol. Governance is exercised through a Senate structure—a fixed body of representatives and stakeholders—responsible for proposing and executing changes to system parameters. Importantly, SHIFT holders are empowered with veto rights over Senate decisions. This governance model allows the protocol to adapt while maintaining checks and balances through community oversight.
3. **Value Capture & Growth:** Finally, SHIFT is a vehicle for value capture and sustainable growth. The protocol employs a tokenomic framework that combines conditional unlocks and revenue-based token burning and buybacks.
About SHIFT
Note : TGE date is subject to change based on market conditions
# SHIFT Tokenomics
Tokenomics
How SHIFT allocates shares
#### SHIFT Token Utility and Governance
The SHIFT token is the governance token for the Coinshift ecosystem, providing holders with the power to:
* Vote on Performance Fees: Decide on csUSDL vault fees.
* Participate in Risk Management: Influence asset selection and borrowing parameters.
#### Revenue Streams and Distribution Strategy
Coinshift generates revenue through:
1. USDL Minting Fees: 20-25 basis points on all USDL minted through csUSDL.
2. Vault Performance Fees: Earnings from csUSDL’s yield generation, initially set at 0% for user adoption.
Long-Term Economic Model and Incentives
How SHIFT distribute revenues
*Disclaimer: Content on this page is subject to change. Work in progress.*
# Mint csUSDL
This guide explains how to mint csUSDL using USDC or by borrowing against blue-chip assets like wstETH or cbBTC.
### Case Study 1: Minting csUSDL with USDC
**Method 1: Direct Swap (Recommended for deposits up to $1M)**
1. Swap USDC directly to csUSDL via [CoWSwap](https://swap.cow.fi/#/1/swap/0xA0b86991c6218b36c1d19D4a2e9Eb0cE3606eB48/CSUSDL).
**Method 2: Minimize Slippage (Recommended for deposits over $1M)**
1. Swap USDC to USDL via the [Curve Pool](https://curve.fi/dex/ethereum/pools/factory-stable-ng-243/swap/).
2. Wrap USDL to wUSDL [here](https://wrap.liftdollar.com/).
3. Deposit wUSDL into the [Coinshift USDL vault.](https://app.morpho.org/ethereum/vault/0xbEeFc011e94f43b8B7b455eBaB290C7Ab4E216f1/coinshift-usdl)
4. You’ll receive csUSDL — yield starts accruing automatically.
### Case Study 2: Minting csUSDL with Blue-Chip Assets
1. Supply wstETH or cbBTC as collateral to [Coinshift USDL Markets](https://app.morpho.org/vault?vault=0xbEeFc011e94f43b8B7b455eBaB290C7Ab4E216f1\&network=mainnet) to borrow wUSDL.
2. Deposit wUSDL into the [Coinshift USDL vault](https://app.morpho.org/ethereum/vault/0xbEeFc011e94f43b8B7b455eBaB290C7Ab4E216f1/coinshift-usdl).
3. You’ll receive csUSDL — yield starts accruing automatically.
# Redeem csUSDL
Redeeming csUSDL is simple and flexible—whether you're exiting to stablecoins or reclaiming blue-chip collateral. Follow the steps below for the most efficient redemption path.
### Case Study 1: Redeeming csUSDL to USDC
**Method 1: Direct Swap (Recommended for deposits up to $1M)**
1. Swap csUSDL directly to USDC via [CoWSwap](https://swap.cow.fi/#/1/swap/0xA0b86991c6218b36c1d19D4a2e9Eb0cE3606eB48/CSUSDL).
**Method 2: Redeem via Vault (Recommended for deposits over $1M)**
1. Withdraw wUSDL from the [Coinshift USDL vault.](https://app.morpho.org/ethereum/vault/0xbEeFc011e94f43b8B7b455eBaB290C7Ab4E216f1/coinshift-usdl)
2. Unwrap wUSDL to USDL [here](https://wrap.liftdollar.com/).
3. Swap USDL to USDC via [CoWSwap](https://swap.cow.fi/#/1/swap/0xA0b86991c6218b36c1d19D4a2e9Eb0cE3606eB48/CSUSDL) or other integrated DEXs.
### Case Study 2: Redeeming Blue-Chip Assets (wstETH or cbBTC)
1. Repay borrowed wUSDL in the [Coinshift USDL vault.](https://app.morpho.org/ethereum/vault/0xbEeFc011e94f43b8B7b455eBaB290C7Ab4E216f1/coinshift-usdl)
2. Unlock and withdraw your blue-chip collateral (wstETH or cbBTC).
# csUSDL Partners
Coinshift collaborates with institutional partners that provide unmatched expertise and infrastructure: Paxos International, Steakhouse Financial and Morpho Protocol.
**1.** [**Steakhouse Financial**](https://www.steakhouse.financial/)
Steakhouse Financial is an **institutional-grade risk manager** with extensive experience working with leading DAOs and financial entities such as Lido and MakerDAO. Specializing in low-risk stablecoin and RWA strategies, they manage MakerDAO’s $2 billion RWA program, establishing them as a trusted, conservative leader in risk management. Their rigorous approach ensures csUSDL’s asset allocation is secure and optimized, making it a reliable and yield-bearing product that meets the stringent requirements of institutional investors while remaining suitable for individuals.
**2.** [**Paxos International**](https://paxos.com/)
Coinshift has partnered with Paxos International, the issuer of **Lift Dollar (USDL)**, a regulated stablecoin backed by T-Bills and cash equivalents. Paxos is already trusted as the issuer behind prominent projects like PYUSD for **PayPal** and **Stripe’s Pay**, underscoring its proven compliance and stability. USDL distributes up to 5% yield generated from its reserves to eligible holders, providing a robust foundation for csUSDL’s yield potential. With regulation by the Financial Services Regulatory Authority (FSRA) in the Abu Dhabi Global Market (ADGM) and transparent monthly audited reports, Paxos enhances csUSDL’s credibility and makes it an attractive choice for institutional investors looking for stability and compliance in their portfolios.
**3.** [**Morpho**](https://morpho.org/)
Coinshift has deeply integrated Morpho, an **innovative lending protocol** known for its efficient peer-to-peer lending model. With over $2 billion supplied through its platform, Morpho enables csUSDL to engage in secure, over-collateralized lending against blue-chip assets including wstETH and WBTC. This integration maximizes yield opportunities while minimizing risk, offering full transparency and control over asset utilization. Morpho’s design, validated by more than 15 extensive audits, aligns with Coinshift’s vision of creating a secure, high-quality, institutional-grade product that meets the expectations of large-scale investors.
# csUSDL Integrations
coming soon
# Trusted Links & Audits
All official contract addresses, audits and verified links for csUSDL, csUSDC, and the broader Coinshift ecosystem.
**Proceed with caution when interacting with any contract or interface associated with csUSDL or Coinshift. To protect yourself:**
* Only use vaults and tools linked here or from [coinshift.xyz](https://coinshift.xyz)
* Verify all token and contract addresses on Etherscan
* Never interact with unknown vault UIs or impersonation sites
***
### Official Interfaces
* **Coinshift Website:**\
* **Coinshift App Login:**\
***
### Coinshift Vaults
* **csUSDL Vault**\
Morpho UI: [View on Morpho](https://app.morpho.org/ethereum/vault/0xbEeFc011e94f43b8B7b455eBaB290C7Ab4E216f1/coinshift-usdl)\
Etherscan: [csUSDL Token](https://etherscan.io/token/0xbeefc011e94f43b8b7b455ebab290c7ab4e216f1)\
Contract: `0xbEeFc011e94f43b8B7b455eBaB290C7Ab4E216f1`
* **csUSDC Vault**\
Morpho UI: [View on Morpho](https://app.morpho.org/ethereum/vault/0x7204B7Dbf9412567835633B6F00C3Edc3a8D6330/coinshift-usdc)\
Etherscan: [csUSDC Vault](https://etherscan.io/token/0x7204b7dbf9412567835633b6f00c3edc3a8d6330)\
Contract: `0x7204B7Dbf9412567835633B6F00C3Edc3a8D6330`
* **Fee Recipient (csUSDL Multisig):**\
`0x255c7705e8BB334DfCae438197f7C4297988085`
***
### Partner References
* **USDL Transparency Reports**\
[liftdollar.com → Transparency](https://liftdollar.com/transparency)
* **USDL Whitepaper**\
[liftdollar.com → Whitepaper](https://liftdollar.com/whitepaper.pdf)
* **wUSDL – Wrapped USDL:**\
`0x7751E2F4b8ae93EF6B79d86419d42FE3295A4559`\
[Etherscan → wUSDL](https://etherscan.io/token/0x7751E2F4b8ae93EF6B79d86419d42FE3295A4559)
* **USDL – Paxos Stablecoin:**\
`0xbdC7c08592Ee4aa51D06C27Ee23D5087D65aDbcD`\
[Etherscan → USDL](https://etherscan.io/token/0xbdC7c08592Ee4aa51D06C27Ee23D5087D65aDbcD)
* **Morpho Audits**\
[docs.morpho.org → Audits](https://docs.morpho.org/morpho-docs/security/audits)
# csUSDL Risk Policy
This section explains how the system handles redemptions, depegs, or stress scenarios, and how risk is mitigated at every layer.
## Risk Management Framework for csUSDL
csUSDL is designed to offer transparent yield, strong redemption guarantees, and resilience against common DeFi risks. Here’s a breakdown of the key risks and how the system mitigates them:
***
### 1. Liquidation Risk
**What It Is:** Borrowers on Morpho post collateral (e.g., wstETH or cbETH) to borrow wUSDL. If collateral prices drop too quickly before liquidation, the vault may suffer losses.
**Mitigation Strategy:**
* A **standard 14% haircut** is applied to collateral values, creating a buffer against price drops.
* In extreme cases, Morpho liquidators can sell collateral to repay the vault.
* These mechanics ensure that lenders (csUSDL holders) are protected even in volatile conditions.
***
### 2. Oracle Risk
**What It Is:** Inaccurate price feeds can cause bad loans, wrongful liquidations, or mispriced redemptions.
**Mitigation Strategy:**
* All pricing is derived entirely onchain using ERC-4626 standard functions:
* `csUSDL → wUSDL`: via Coinshift vault
* `wUSDL → USDL`: via Steakhouse’s audited oracle
* USDL is hardcoded to $1.00 on Morpho
* No single point of oracle failure affects csUSDL valuation.
***
### 3. Liquidity Risk
**What It Is:** Risk that users are unable to redeem csUSDL due to low available liquidity in the vault — especially during periods of high demand or "bank run"-like behavior.
**Mitigation Strategy:**
* Instant redemptions are available as long as the vault has idle wUSDL.
* If utilization reaches 100%, redemptions revert. In that case:
* Users can access secondary liquidity via Curve (coming soon) or CowSwap.
* Morpho increases borrow rates dynamically (4x at full utilization), incentivizing loan repayments and new capital inflows.
* If needed, borrower collateral (e.g., wstETH or cbETH) is liquidated to restore liquidity.
* This mechanism ensures that liquidity self-corrects over time, protecting solvency while offering multiple redemption pathways.
***
### 4. Depeg Risk
**What It Is:** A stablecoin like USDL losing its peg could undermine the value of csUSDL.
**Mitigation Strategy:**
* USDL is fully backed by short-term U.S. Treasuries and cash in regulated custody (Paxos, FSRA-regulated).
* Price is hardcoded at $1.00 on Morpho.
* Multiple redemption offramps:
* Curve pool with \~$20M liquidity and minimal slippage
* 1:1 redemption via Paxos Dashboard (KYB required)
* csUSDL inherits this stability and adds additional protection through overcollateralization.
***
### 5. Smart Contract & Protocol Risk
**What It Is:** Bugs, misconfigurations, or malicious behavior could impact user funds.
**Mitigation Strategy:**
* Morpho has undergone 27 audits by 12 leading security firms.
* Contracts are immutable and hardened through rigorous testing and bug bounty programs ($1.5M in rewards).
* DeFiSafety Score: Morpho achieved a 98% rating, the highest across 300+ protocols. [View Score →](https://defisafety.com/app/pqrs/535)
* Security Framework: All vaults and deployments follow the [Morpho Security Framework](https://morpho.mirror.xyz/7mfZLV0KQpBiHF3QLHyWaQ_7gf_2_WmgMeCvqGY-kpY), which outlines peer review processes, audit coverage, permission controls, and incident response strategies.
* Every vault is reviewed by Steakhouse and subject to strict configuration checks.
***
### 6. Curator Risk
**What It Is:** The collaterals on the Morpho vault is managed by a Curator (currently Steakhouse Financial). This Curator has the ability to add or remove collateral assets. If risky or volatile assets are added without proper oversight, it could impact the safety of the vault.
**Mitigation Strategy:**
* The vault uses Aragon’s guardian system, allowing a single elected guardian to veto changes made by the Curator.
* In the future, this guardian will be elected by SHIFT holders via governance, giving the community control over collateral safety.
* Until then, only blue-chip collaterals (e.g., cbETH, wstETH) are allowed, ensuring conservative risk management.
### Conclusion
csUSDL is built for institutional-grade confidence and DeFi-native efficiency. Through onchain oracles, dynamic vault mechanics, battle-tested collateral strategies, and multiple redemption paths, Coinshift ensures that users can earn yield without compromising on safety, liquidity, or control.
> For more information on risks related to Morpho, see the [Morpho Security Framework](https://morpho.mirror.xyz/7mfZLV0KQpBiHF3QLHyWaQ_7gf_2_WmgMeCvqGY-kpY) and [DeFiSafety Scorecard](https://defisafety.com/app/pqrs/535).
# Coinshift Litepaper
We are collaborating with[ CryptoEconLab](https://cryptoeconlab.io/), a seasoned crypto-native economic research firm that has worked with industry leaders like Filecoin, Qredo, and SaturnLab, on both the finalised Litepaper and the upcoming Whitepaper.
Our Tokenomics Litepaper is available[ here](https://docsend.com/view/h4378xqx2d3gxda8) for an in-depth understanding of our economic model. The Whitepaper, which will include detailed analyses such as airdrop simulation, mathematical frameworks, simulation code, and in-depth economic analysis, is scheduled for completion by end-April 2025.
# Q\&A: Reserves, Lending, and Risk Framework
A breakdown of how Coinshift’s stablecoin stack combines regulated reserves, yield distribution, and onchain lending.
### Custodian & Reserve Structure
**Q: What exactly backs each USDL token?**\
A: Each USDL token is backed 1:1 with USD-denominated assets held in segregated accounts with qualified financial institutions approved by FSRA. The reserves include cash deposits, U.S. Treasury Bills, and U.S. Government Money Market Funds.
**Q: How are the USDL reserves currently allocated?**\
A: Based on the February 2025 attestation, the allocation is approximately:
* 22.7% direct cash deposits
* 7.9% U.S. Treasury Bills
* 69.4% Government Money Market Funds
**Q: Are customer funds segregated from Paxos operational accounts?**\
A: Yes, customer funds are legally segregated in dedicated reserve accounts for the benefit of token holders, creating bankruptcy remoteness from Paxos' operational finances.
**Q: Which banking partners support USDL?**\
A: Paxos has a public partnership with Standard Chartered Bank (SCB) who serve as the on/off ramps for USDL in a Paxos mint account. All financial partners have been approved by the FSRA and comply with their regulatory framework. More information on the Paxos-SCB partnership is available[ here](https://www.sc.com/us/2024/12/11/paxos-and-standard-chartered-lead-the-way-in-stablecoin-reserve-management/).
### Government Money Market Funds Composition
**Q: What specific assets comprise the Government Money Market Funds that hold 69.4% of USDL reserves?**\
A: These are Institutional Stable NAV USD Government Money Market Funds consisting of:
1. Cash
2. U.S. Government securities (USGs)
3. Overnight repurchase agreements overcollateralized by USGs
**Q: What safety measures govern these money market funds?**\
A: Key requirements include:
* Domiciled in non-US jurisdictions
* Weighted average maturities (WAMs) ≤ 60 days
* Weighted average lives (WALs) ≤ 120 days
* FSRA-approved credit ratings
* Value limits agreed with the FSRA
### FSRA Regulatory Framework for Stablecoins (FRTs)
**Q: How does Abu Dhabi's stablecoin regulation compare to other jurisdictions?**\
A: The FSRA framework under Waiver and Notifications Notice 102/2024 is among the most robust globally, requiring:
* Strict 1:1 backing with reserve assets
* Third-party custodians for all reserves
* Regular stress tests and independent audits
* Prohibition of algorithmic stablecoins
* Minimum capital requirements of $2M or annual expenditure (whichever is higher)
**Q: Can yield generated from reserves be distributed to token holders?**\
A: Yes. Unlike some jurisdictions, the ADGM framework explicitly allows yield distribution to token holders, provided this is clearly disclosed—this is a key differentiator of USDL.
**Q: What redemption standards are mandated by FSRA regulations?**\
A: FSRA rules require redemption within T+2 (two business days), though USDL's standard is T+5 with most redemptions processed within hours.
### Business Continuity in Insolvency
**Q: What happens to USDL holders' funds if Paxos becomes insolvent?**\
A: Paxos stablecoins are completely bankruptcy remote, and a Paxos bankruptcy would not affect the redemption process. FSRA regulations mandate a clear liquidation priority:
1. USDL holders receive 1:1 USD redemption (first priority)
2. Yield owed to holders is paid on pro rata basis from remaining reserves (second priority)
3. Other creditors may claim remaining reserves (third priority)
All holders would be able to redeem 100% of their stablecoin balance without going through a creditor process. The detailed insolvency protection framework is outlined in the[ USDL Whitepaper](https://whitepaper.liftdollar.com/USDL-Whitepaper.pdf).
**Q: Would yield distribution continue if Paxos faced financial difficulties?**\
A: Yes, the yield is programmatic on USDL, so the distribution of the yield (currently 3.7% APY) would continue in the event of a bankruptcy. This is because the yield mechanism is built into the smart contract and operates independently of Paxos' operational status.
**Q: Who would oversee the process in an insolvency scenario?**\
A: The FSRA of Abu Dhabi Global Market would directly oversee this process, ensuring compliance with the regulatory framework and protection of token holders' interests.
**Q: What happens to revenue sharing agreements in case of insolvency?**\
A: Revenue sharing arrangements would be subject to legal review in insolvency, but the priority order ensures customer principal is protected first before any other obligations.
### Reserve Reporting & Transparency
**Q: How can the backing of USDL tokens be verified?**\
A: Verification is provided through:
* Monthly attestations by independent accounting firm[ Crowe Mak LLP](https://www.crowe.com/ae)
* Real-time USDL supply monitoring on blockchain explorers ([Etherscan](https://etherscan.io/token/0xbdC7c08592Ee4aa51D06C27Ee23D5087D65aDbcD))
* Detailed monthly reserve composition disclosures by asset type
* Public reserve information published at[ liftdollar.com/transparency](https://liftdollar.com/transparency)
**Q: Are there more frequent monitoring mechanisms beyond the monthly public attestations?**\
A: Yes, the FSRA has oversight to ensure that USDL is always backed 1:1 with cash equivalents, requiring very close to real-time internal reporting. While this monitoring isn't publicly shared, the FSRA's active supervision provides continuous assurance of reserve adequacy.
**Q: Can institutional partners receive more frequent reserve updates?**\
A: Paxos can explore additional reporting arrangements for institutional partners. While the public report is shared monthly, more detailed or frequent reporting options may be available for key partnerships upon contractual agreement.
### Banking Partnerships & Redemption Process
**Q: Which banking partners hold USDL reserves and handle redemptions?**\
A: Paxos' financial partners have been approved by their prudential regulator (FSRA) and are consistent with the regulatory framework. Paxos has a[ public partnership with Standard Chartered Bank (SCB)](https://www.sc.com/us/2024/12/11/paxos-and-standard-chartered-lead-the-way-in-stablecoin-reserve-management/) who serve as the on/off ramps for USDL in a Paxos mint account, enabling unlimited size create/redemptions with T+1 maximum processing time.
**Q: How fast can large-scale redemptions be processed in practice?**\
A: For institutional clients, Paxos can redeem up to 100% of USDL holdings at any time and provide USD, typically within T+1. This is Paxos' legal obligation to clients under the prudential regulation of the FSRA. Most redemptions are processed within hours.
**Q: Where can public information about USDL reserves be found?**\
A: Detailed reserve information is published and regularly updated at[ liftdollar.com/transparency](https://liftdollar.com/transparency), including the monthly attestation reports from the independent accounting firm.
### Redemption Process & Stress Scenarios
**Q: What happens if there's a bank run on USDL?**\
A: There are no predetermined redemption thresholds or limits. Paxos can redeem up to 100% of a client's USDL holdings at any time and provide USD. This is their legal obligation under the prudential regulation of the FSRA. The reserve composition prioritizes high liquidity to handle large-scale redemptions, as detailed in the[ USDL Whitepaper](https://whitepaper.liftdollar.com/USDL-Whitepaper.pdf).
**Q: What's the maximum redemption timeframe for institutional clients?**\
A: Through the partnership with Standard Chartered Bank, Paxos enables unlimited size create/redemptions with T+1 maximum processing time. Most redemptions are processed within hours. For institutional clients, the process is typically faster than the standard T+5 business days timeframe.
**Q: Under what circumstances might redemptions be delayed?**\
A: Delays may occur only in exceptional circumstances:
1. Operational issues with banking partners
2. Enhanced compliance reviews
3. Legal or regulatory concerns
However, the FSRA framework is designed to ensure that even in stress scenarios, redemptions continue to be processed efficiently.
### Morpho Lending: Structure & Roles
**Q: Who are the key parties in the USDL lending ecosystem and what are their roles?**\
A: The lending ecosystem involves several distinct entities with different responsibilities:
* Coinshift: The primary entity and vault owner who has partnered with others to create this lending solution. Coinshift provides the user interface, access to the lending markets, and leads the overall governance. Importantly, Coinshift also serves as the official distribution partner for Paxos USDL.
* [Morpho](https://morpho.org/): The underlying permissionless lending protocol that facilitates the lending and borrowing operations.
* [Steakhouse Financial](https://www.steakhouse.financial/): Professional curator and risk manager who implements the risk management framework and parameters.
* Paxos: USDL issuer responsible for maintaining the stablecoin's reserves and regulatory compliance.
The lending protocol operates independently of Coinshift as a company. In the event Coinshift ceased operations, the lending protocol would continue to function as it's built on Morpho's infrastructure with Steakhouse's risk management.
**Q: What is Coinshift's specific role as vault owner?**\
A: As the primary vault owner on Morpho, Coinshift has several key rights and responsibilities:
* Leading the governance of the Coinshift USDL Lending Vault on Morpho
* Setting strategic direction for the lending markets
* Controlling user access and interface to the lending protocol
* Managing the partnership with Paxos and Steakhouse
* Revenue distribution and management
* Coordinating the implementation of risk parameters
* Overseeing liquidity management
* Driving business development and user acquisition
* Serving as the distribution partner for Paxos USDL, bringing the stablecoin to market
**Q: What is the collective governance structure of the lending protocol?**\
A: Coinshift has partnered with Paxos and Steakhouse to collectively govern the vault on Morpho. Under Coinshift's leadership, the multi-party structure includes these rights:
* Setting and adjusting risk parameters (loan-to-value ratios, liquidation thresholds)
* Controlling which assets can be used as collateral
* Implementing liquidation mechanisms and procedures
* Setting and adjusting interest rates and fee structures
* Managing protocol upgrades and improvements
* Approving parameter changes during crisis scenarios
**Q: What are the specific rights and responsibilities of Steakhouse as the curator?**\
A: Steakhouse Financial as curator has the following responsibilities:
* Performing ongoing risk assessment and market monitoring
* Recommending risk parameter adjustments based on market conditions
* Implementing liquidation mechanisms and overseeing their operation
* Conducting stress tests and scenario analyses
* Providing technical expertise and security oversight
* Coordinating emergency responses during extreme market conditions
* Managing relationships with liquidators and market makers
### Morpho Lending: Risk Management & Crisis Scenarios
**Q: How is risk managed in the lending protocol?**\
A: Risk management is primarily handled by[ Steakhouse Financial](https://www.steakhouse.financial/) as the curator, with several layers of protection:
* Over-collateralization with an 86% loan-to-value ratio (14% buffer)
* Automated liquidation mechanisms that trigger when collateral value falls below threshold
* Robust Chainlink price oracles, with plans to expand to dual oracle systems
* Market monitoring systems that can adjust risk parameters during heightened volatility
Q: What happens if Bitcoin falls by 50% in a matter of minutes? (Crisis situation)\
A: In such an extreme scenario, liquidations could occur at lower prices than the loan value, potentially causing losses for lenders. To mitigate this specific risk, the protocol implements:
* Plans to keep 10-20% in idle liquidity at all times (not available to borrow) to reduce loss during bad debt scenarios
* Insurance cover on bad debt scenarios through[ OpenCover](https://opencover.com/coinshift), an onchain insurance provider that partners with[ Nexus Mutual](https://nexusmutual.io/) which has underwritten $5.5B in cover with 18M+ claims paid
* Reserve fund development through protocol revenue to cover potential shortfalls in catastrophic scenarios
**Q: What specific credit risk mitigation strategies does the lending platform employ?**\
A: For credit risk (potential impairment of deposited assets):
* Rigorous asset selection process with suitability assessment for customer profiles
* Automated 24/7 solvency and price monitoring systems
* Direct connectivity to asset issuers for rapid response to emerging issues
* Regular stress testing of collateral under various market scenarios
**Q: How does the platform address counterparty risk in the lending ecosystem?**\
A: To mitigate counterparty risk (malicious actors behind deposited assets):
* Only lending against sufficiently decentralized or regulated collateral (e.g., staked USDC)
* Comprehensive underwriting of issuer teams, signer processes, and operational controls
* Implementation of a formal counterparty risk framework for crypto assets
* Regular reassessment of counterparty risk factors
**Q: How are oracle and smart contract risks addressed?**\
A: For technical risks:
* Multiple backup and failsafe oracle procedures to prevent improper price updates
* In-house technical expertise for proprietary security audits
* Selection of platforms with minimal code surface area for attack vectors
* Requirement of multiple third-party auditors (10 separate audits for[ Morpho](https://morpho.org/) & Morpho Vaults)
* Implementation of circuit breakers to pause operations if anomalous behavior is detected
# csUSDL FAQs
What is csUSDL?
csUSDL is a yield-bearing, RWA-backed stablecoin powered by Morpho protocol and USDL, a regulated stablecoin issued by Paxos International.
Built for businesses and investors seeking to maximize the potential of their stablecoins, csUSDL is an institutional-grade asset, backed by the confidence of Coinshift’s trusted ecosystem.
* csUSDL represents a tokenized USDL position within Coinshift's vault, which is optimized for blue-chip collateral markets like wstETH and cbBTC, managed by Steakhouse Financial.
* Yields on csUSDL are fully transparent, independently verifiable onchain, and beyond Coinshift’s control.
* csUSDL is permissionless, self-custodial, and adheres to core DeFi principles.
[Learn More](https://docsend.com/v/stwnz/csusdl) about csUSDL and [explore csUSDL](https://app.morpho.org/vault?vault=0xbEeFc011e94f43b8B7b455eBaB290C7Ab4E216f1\&network=mainnet) on Morpho.
What is Coinshift USDL Vault?
Coinshift USDL Vault is a low-risk Morpho vault, curated by Steakhouse Financial, where USDL depositors can earn additional borrow interest from cbBTC and wstETH holders, and rewards in SHIFT and MORPHO tokens.
Who backs csUSDL?
csUSDL is backed by institutional-grade security and expertise through partnerships with:
* **Paxos International**: A regulated bank and issuer of USDL, a stablecoin backed by T-Bills and cash equivalents. Paxos powers trusted projects like PayPal’s PYUSD and Stripe’s Pay, ensuring regulatory compliance and transparent operations.
* **Steakhouse Financial**: A crypto-native financial advisory specializing in stablecoins and RWAs. They manage MakerDAO’s $2B RWA program and operate vaults with up to $60M TVL on Morpho, delivering low-risk, high-security strategies.
* **Morpho Protocol**: A highly audited DeFi platform enabling secure, over-collateralized lending. With $4B in supplied assets and 15+ audits, Morpho ensures transparency and efficient asset utilization for csUSDL.
How does csUSDL maintain its peg and stability?
The underlying wUSDL is allocated to blue-chip collaterals like wstETH and cbBTC. This conservative approach ensures value stability (csUSDL ≥ USDL) and includes complete on-chain transparency.
How is the APR for airdrops calculated?
Airdrop APR decreases with higher TVL, and the 25% ROI is calculated based on a $100M csUSDL TVL target. The SHIFT launch is scheduled for 15th July 2025.
Is csUSDL a hard lock?
csUSDL allows withdrawals anytime. Users always retain their yield and rewards calculated on a daily basis:
* Yield from T-bills and lending markets.
* SHIFT rewards from normal airdrop.
* Morpho rewards.
How to obtain csUSDL?
We recommend acquiring csUSDL either directly through the [**Coinshift UI**](https://coinshift.global/dashboard/deposit), or by simply swapping via the [Balancer B-csUSDC-csUSDL Pool](https://balancer.fi/pools/ethereum/v3/0x10A04efbA5B880e169920Fd4348527C64FB29d4D).
# Redemption & Risk
Understand how redemptions work, how csUSDL maintains liquidity, and why it’s built to resist depegging under stress.
### Introduction
csUSDL is designed to offer reliable liquidity and price stability without compromising on yield.
***
### Redemption Mechanics
Redemptions are permissionless and instant — as long as there is sufficient liquidity in the csUSDL vault.
* Users call `redeem()` on the ERC-4626 vault.
* If the vault holds enough idle wUSDL, it is returned instantly.
* If not, the transaction reverts.
Redemptions follow a first-come, first-served model. Liquidity is returned in wUSDL, which can be unwrapped to USDL and swapped to USDC.
***
### Liquidity Conditions
When the vault is fully utilized (i.e. all wUSDL is lent out on Morpho), redemption requests will revert due to insufficient available liquidity.
In such cases, users have the following options:
* Swap csUSDL on Curve or CowSwap for immediate liquidity
* Monitor utilization and redeem once liquidity is available again
csUSDL relies on Morpho’s market-level withdrawal mechanics. As demand to exit grows, Morpho increases borrow rates, which incentivizes loan repayment and new capital inflows.
If additional liquidity is still not restored, collateral posted by borrowers (e.g. wstETH or cbETH) can be liquidated to repay the vault and enable further redemptions.
***
### Oracle Design & Price Behavior
The csUSDL price is calculated entirely onchain via two ERC-4626 `convertToAssets()` functions:
1. `csUSDL → wUSDL`: from the Coinshift vault contract
2. `wUSDL → USDL`: via Steakhouse’s ERC4626 feed oracle, reviewed by Morpho and audited by Spearbit
3. `USDL → $1.00`: hardcoded to $1.00 in Curve, Chainlink, and internal oracles, based on Paxos’s fully collateralized peg
Example:\
`1.00 csUSDL = 1.01 wUSDL = 1.02 USDL = $1.02`
Because both csUSDL and wUSDL are accrual tokens, and USDL is pegged to $1.00, the price of csUSDL only increases over time.
***
### Depeg Risk
csUSDL is structurally resistant to depegging due to:
* **Fully collateralized design:**\
USDL is backed 1:1 by T-Bills and cash, held in regulated custody by Paxos (FSRA-regulated in Abu Dhabi).
* **Hardcoded price feeds:**\
USDL is treated as $1.00 in the system — enforced via oracle logic, and externally redeemable through Paxos (with KYB).
* **Redemption off-ramps:**
* Curve pool for USDL/USDC (\~$20M depth) allows \~$2M clips at low slippage (\~3bps)
* Paxos Dashboard offers 1:1 USDL-to-USDC redemption with an 8bps fee (KYB required)
***
### Bank Run Scenario
If many users redeem csUSDL at once:
1. The vault’s idle wUSDL is drained.
2. Redemption calls start reverting.
3. Borrow rates on Morpho spike, incentivizing repayment or new deposits.
4. If liquidity remains insufficient, Morpho may liquidate borrower collateral to repay wUSDL to the vault.
This dynamic ensures the system self-corrects over time — while protecting remaining lenders and maintaining solvency.
***
### Summary
| Mechanism | Behavior |
| ---------------- | -------------------------------------------------------- |
| Redemption | Instant if liquidity exists, reverts if not |
| Liquidity Model | First-come, first-served; market-level rebalancing |
| Oracle Path | csUSDL → wUSDL → USDL → $1.00, all onchain |
| Depeg Protection | Paxos 1:1 backing, Curve liquidity, hardcoded USDL price |
| Risk Mitigation | Rate hikes, collateral liquidation, multiple exit paths |
***
### Next Up
* Yield Mechanics
* Minting Guide
# SHIFT Tiger Points (Season 1)
Loyalty system for Coinshift users
### Overview
The Tiger Points Program is a loyalty system for Coinshift users, designed to reward engagement and provide exclusive benefits within the Coinshift ecosystem. \
\
We are excited to announce the launch of Season 1, running for 60 days from October 7, 2024, 11:59 PM UTC to December 7, 2024, 11:59 PM UTC.
#### About Coinshift
Coinshift is a 1:1 SAFE smart account that combines traditional finance security with DeFi. It's your gateway to Real World Assets (RWAs) and DeFi apps, offering exceptional UX, unmatched perks, and ironclad security.
### Coinshift x Paxos USDL x Turtle Club Partnership
Coinshift has partnered with Paxos International's Lift Dollar (USDL), a regulated stablecoin offering up to 5% APY, and Turtle Club, the protocol that offers exclusive boosted rewards to DeFi users. \
\
**Users earn upto 7x Tiger Points, Turtle Points, and USDL yield.**\
\
[**Additional Rewards** \
Earn 2x Safe Points (7th-13th October)](#user-content-fn-1)[^1]
**What Are Tiger Points?**
Tiger Points are Coinshift's loyalty rewards, unlocking exclusive benefits and ecosystem privileges for users.
#### What are Turtle Points?
Turtle points represent a user's contribution to the Turtle DAO. The calculation is based on the amount of revenue the LP has generated for the DAO in protocol partnership fees and will result in the LP's share of $TRT upon TGE event. Learn more [here](https://docs.turtle.club/resources/turtle.club-whitepaper).
Every Coinshift user eligible for Tiger points will get Turtle boosted points exclusively, thanks to the unique partnership between Coinshift and Turtle Club.
**How does the Turtle Club benefit Coinshift users?**
Every Coinshift user is automatically a member of the Turtle Club. This means you'll receive boosted Turtle points on your USDL holdings without any additional sign-up process. Coinshift contributes a 50% booster to the TurtleDAO for all USDL holdings, enhancing your potential to earn Turtle points.
### How to Earn Tiger Points
1. **Deposit USDC -** Send USDC to your self-custodial Coinshift account on Ethereum mainnet.
2. **Buy USDL -** Swap USDC to USDL using ParaSwap and earn 10,000 Tiger Points.
3. **Hold USDL -** Hold at least 100 USDL to get up to 7x boosted Tiger Points.
#### Time-Based Multipliers for USDL
| Asset | Day 0 | Day 30 | Day 60 |
| ----- | ----- | ------ | ------ |
| USDL | 3x | 5x | 7x |
#### Point Calculation Example
USDL Holdings:
* 1,000 USDL held for 60 days
* Initial 30 days: 1,000 \* 30 \* 3x = 90,000 points
* Day 30 boost: 90,000 \* 5/3 = 150,000 points
* Next 30 days: 1,000 \* 30 \* 5x = 150,000 points
* Day 60 boost: (150,000 + 150,000) \* 7/5 = 420,000 points
* Total: 420,000 Tiger Points
#### Additional Partner Rewards
Coinshift has integrated major dapps, such as Morpho, Pendle, [Chorus One](#user-content-fn-2)[^2], and more, to offer boosted rewards.
Each partner may offer unique reward structures.
**Dapp Partner Example**
Using Morpho through Coinshift [might ](#user-content-fn-3)[^3]offer a 2x boost on Tiger Points earned from assets supplied to Morpho.
Stay tuned for specific announcements on Twitter and Discord for each partner's reward structure.
[^1]: [Tarun Gupta](mailto:undefined)Delete
[^2]:
[^3]: [Tarun Gupta](mailto:undefined)might? Yes or no?
# FAQs
#### Q: Can I lose my Tiger Points?
A: Rest assured, your earned Tiger Points are safe and secure. Once you've earned them, they're yours to keep. However, do note that you'll only continue to accumulate new points while holding eligible assets in your Coinshift account.
#### Q: Are Tiger Points transferrable?
A: Tiger Points are designed to be a personal reward for your engagement with the Coinshift ecosystem. As such, they are non-transferrable and uniquely tied to your individual Coinshift account.
#### Q: Are there any special considerations for early adopters or influential users?
A: Absolutely! We deeply value the contributions of our foundational members, including CFOs, CEOs, HNIs, and Web3 influencers. We're crafting exclusive boosts and special acknowledgments for these key members of the Coinshift community. Keep an eye on our official channels for exciting announcements about these tailored benefits.
#### Q: What is Lift Dollar (USDL)?
A: Lift Dollar (USDL) is a yield-bearing ERC-20 stablecoin issued by Paxos International. It offers up to 5% APY through a rebasing mechanism and is regulated by the Financial Services Regulatory Authority (FSRA) of Abu Dhabi Global Market (ADGM). USDL is backed by cash and cash equivalent assets held in segregated reserve accounts.
#### Q: How does the Turtle Club benefit Coinshift users?
A: Every Coinshift user is automatically a member of the Turtle Club. This means you'll receive boosted Turtle points on your USDL holdings without any additional sign-up process. Coinshift contributes a 50% booster to the TurtleDAO for all USDL holdings, enhancing your potential to earn Turtle points.
#### Q: Will other assets be eligible for Tiger and Turtle points in the future?
A: For Season 1, USDL is the primary asset eligible for both Tiger and Turtle points. We will keep our community updated if more assets become eligible in the future.
# Welcome
Explore the Coinshift support docs here!
{% hint style="info" %}
Our detailed guide navigates you through the application, demonstrating key features and functionalities to help you fully optimise your Coinshift experience. Embark on your journey with confidence, knowing you have the necessary insights at your fingertips.
1. For real-time updates, make sure to follow us on [**Twitter**](https://twitter.com/0xCoinshift)**.**
2. Want to join the conversation? Hop into our [**Discord**](https://discord.com/invite/coinshift) and connect with fellow Coinshift enthusiasts.
3. Book a call [here](https://calendly.com/d/g4g-kj9-874/coinshift-demo) with the Coinshift team.
{% endhint %}
Our documentation is neatly organised into multiple sections for your ease:
* **Core Insights**: Dive into essential details about Coinshift.
* **Featured Reads**: Explore articles highlighting key product features.
* **Resource Hub**: Curated content and resources to enhance your understanding.
* **Connect with Us**: Have questions? Reach out directly to our team.
New to Coinshift? Explore the [About Us](/business/about-us/introduction) section to learn more.
Ready to embark on the Coinshift journey? [Start here](/business/getting-started/setting-up-a-new-organisation).
For immediate assistance or queries, visit our [FAQs](/business/faqs/faq-general-information).
# Introduction
Coinshift simplifies treasury operations for users, delivers actionable insights to financial managers, and increases transparency for communities and investors.
We are creating the foundational toolkit for on-chain treasury management covering payments, reporting, and asset management.
Some of the benefits of using Coinshift are:
* **A unified dashboard:** Make payments and generate financial reports across multiple accounts and chains
* **Safe integration:** Self-custody of your assets using the most secure and trusted multi-sig solution
* **Simplified Payments:** Process payroll, grants, and expenses with confidence and ease
* **Accurate and auditable reporting:** Get real-time insights into the health of your treasury, generate financial reports, and increase transparency for your community and investors
* **Coinshift Apps integration**: Seamlessly connect with essential applications to streamline your financial operations and enhance productivity
* **Instant Notifications**: Stay informed and react promptly with real-time notifications about your treasury's activities, ensuring you never miss a beat
* **Human readable data:** Clearly displays the intended actions, giving the 2nd, 3rd, and 4th signers confidence when signing/executing a transaction
* **Custom labels** and **notes:** Increase the transparency and efficiency of treasury record-keeping
Our mission at Coinshift is to increase the financial health of organisations.
# Overview
An overview of what you can do with Coinshift.
[Coinshift](https://coinshift.xyz/) is a non-custodial, multi-chain treasury management application. We add value to our users in three primary ways:
1. We simplify treasury operations for users.
2. We deliver actionable insights to Financial Managers.
3. We increase financial transparency for communities and investors.
#### Simplified Treasury Operations
* [**Mass payments**](/business/coinshift-walkthrough/fund-management/mass-payout)**:** Manage payroll, grants, subscriptions, and more — send crypto assets to 150 addresses in a single transaction and save up to 90% on gas fees.
* [**Stream payments**](/business/coinshift-walkthrough/coinshift-apps/superfluid/stream-payout): Put payroll on autopilot — say goodbye to a 10+ step process including chasing Signers just to run the payroll on time. Delight contributors with real-time money streams that pay every second with [Superfluid](https://www.superfluid.finance/) (accessing via Coinshift Apps).
* [**Interact with dApps**](/business/coinshift-walkthrough/coinshift-apps): Connect with essential dApps and create transactions directly from your Safe, streamlining your financial operations.
* [**Role-based access control**](/business/coinshift-walkthrough/users): Invite any address to your organisation and assign them to read and write permissions.
* [**Global contacts**](/business/coinshift-walkthrough/contact-management): Use an organisation-level address book to save time and reduce errors. Coinshift also supports [ENS](https://ens.domains/).
* [**Proposals**](/business/coinshift-walkthrough/transaction-management/proposals): Non-signers can create proposals, reduce admin time on Signers, and eliminate costly errors.
#### Actionable Insights and Improved Transparency
* [**Unified dashboard**](/business/coinshift-walkthrough/overview)**:** Manage and monitor your assets across blockchain networks in a single dashboard, including [Ethereum](https://ethereum.org/en/), [Polygon](https://polygon.technology/), [Polygon zkEVM](https://polygon.technology/polygon-zkevm), [BSC](https://docs.bnbchain.org/docs/learn/intro), [Optimism](https://www.optimism.io/), [Avalanche](https://www.avax.network/), [Arbitrum](https://arbitrum.io/), [Gnosis Chain](https://www.gnosis.io/), [Base](https://base.org/), and [Celo](https://celo.org/).
* [**Live Portfolio Tracking**](/business/coinshift-walkthrough/portfolio-management)**:** View your entire treasury in real-time and in USD equivalent.
* [**Historical Portfolio Tracking**](/business/coinshift-walkthrough/reporting/portfolio-history)**:** Verifiable, accurate, and auditable historical token balances (in USD) for easy month-end accounting.
* [**Cash Flow Tracker**](/business/coinshift-walkthrough/reporting/cash-flow-tracker)**:** View all incoming and outgoing transactions across all your Safes. Apply transaction label filters to see a breakdown of salaries paid, grants issued, and more. Apply filters on your treasury tokens, such as USDC, ETH, and native tokens.
* [**Historical transactions**](/business/coinshift-walkthrough/transaction-management/export-transactions)**:** Export your entire transaction history for month-end accounting organised with custom [labels](/business/coinshift-walkthrough/label-management) and notes.
**Coming soon:**
* **EOA portfolio tracking**
* **Vesting smart contract tracking and analytics**
* **Payment requests**
* **Automated payments**
# Unified Dashboard
A single app to manage your on-chain treasury. Payments, reporting, and asset management for startups, DAOs, and organisations.
Coinshift's unified dashboard simplifies multi-chain asset management for Safes across 10 different blockchain networks. This all-in-one solution enables tracking, monitoring, reporting, and management of your on-chain treasuries, eliminating the need to switch between platforms.
With [Coinshift](https://coinshift.xyz/), gain access to a complete view of your Safes' balances, transaction history, and asset distribution through a single intuitive interface.
At Coinshift, our primary objective is to deliver a smooth user experience while maintaining the integrity of the self-custody layer, which includes Safes, wallets, and smart contracts.
We prioritise your security and autonomy by never taking custody of your funds, ensuring that you retain full control over your assets.
# First Steps
Your first moves on Coinshift.
To get started, we advise you to go through the following pages sequentially:
{% content-ref url="/pages/BchCLsMmfgQ8jKKZcxQj" %}
[Setting up a New Organisation](/business/getting-started/setting-up-a-new-organisation)
{% endcontent-ref %}
{% content-ref url="/pages/cLGqjwoNTJ1v6aZu68TN" %}
[Setup Notifications](/business/getting-started/setup-notifications)
{% endcontent-ref %}
{% content-ref url="/pages/IXxdnASLmgir9E8kohfQ" %}
[Mass Payout](/business/coinshift-walkthrough/fund-management/mass-payout)
{% endcontent-ref %}
{% content-ref url="/pages/Jh6tfP3LajfrgVBtUxuC" %}
[Portfolio History](/business/coinshift-walkthrough/reporting/portfolio-history)
{% endcontent-ref %}
{% content-ref url="/pages/wBWkAJfKXVCjcXuNGxfG" %}
[Coinshift Apps](/business/coinshift-walkthrough/coinshift-apps)
{% endcontent-ref %}
# Popular Features
Quick links to the most popular sections in our documentation!
## Payouts & Asset Management
{% content-ref url="/pages/IXxdnASLmgir9E8kohfQ" %}
[Mass Payout](/business/coinshift-walkthrough/fund-management/mass-payout)
{% endcontent-ref %}
{% content-ref url="/pages/wBWkAJfKXVCjcXuNGxfG" %}
[Coinshift Apps](/business/coinshift-walkthrough/coinshift-apps)
{% endcontent-ref %}
## Portfolio Tracking & Reporting
{% content-ref url="/pages/5GlujaRmSwsMOKVHLkTs" %}
[Token Portfolio Tracking (ERC-20)](/business/coinshift-walkthrough/portfolio-management/token-portfolio-tracking-erc-20)
{% endcontent-ref %}
{% content-ref url="/pages/5pu8RqOKoE7nVxM2tZPT" %}
[NFT Portfolio Tracking](/business/coinshift-walkthrough/portfolio-management/nft-portfolio-tracking)
{% endcontent-ref %}
{% content-ref url="/pages/Jh6tfP3LajfrgVBtUxuC" %}
[Portfolio History](/business/coinshift-walkthrough/reporting/portfolio-history)
{% endcontent-ref %}
{% content-ref url="/pages/hNidwqHIUz1qyMOiWPfW" %}
[Cash Flow Tracker](/business/coinshift-walkthrough/reporting/cash-flow-tracker)
{% endcontent-ref %}
## Bookkeeping
{% content-ref url="/pages/0on9TAdre7gxctZtruB5" %}
[Export Transactions](/business/coinshift-walkthrough/transaction-management/export-transactions)
{% endcontent-ref %}
# Setting up a New Organisation
Create an organisation in Coinshift to manage your on-chain treasury.
Since Coinshift v2 is currently in closed access, please submit a request to start using the app. You'll hear back from the [Coinshift](https://coinshift.xyz/) team within 24 hours.
Follow the steps below sequentially to set up a new organisation:
Request Access
Submit a request to the Coinshift team for early access.
{% hint style="info" %}
If you are experiencing any issues while accessing the Coinshift app, feel free to contact our customer support team on [Discord](https://discord.com/invite/coinshift) or [Twitter](https://twitter.com/0xCoinshift).
{% endhint %}
# Request Access
Get access to manage the on-chain treasury of your startup, DAO or organisation.
Since Coinshift v2 is currently in closed access, you need to submit a request to start using the application. The team will respond within 24 hours.
Follow these steps to request access.
## **Step 1: Accessing the Coinshift app**
Visit the [Coinshift](https://beta.coinshift.xyz/) app.
## **Step 2: Wallet connection and support**
Click on the **Connect Wallet** button (highlighted above) to connect your preferred wallet. You will see a list of supported browser and hardware wallets.
{% hint style="info" %} The available wallets may vary depending on the network.
{% endhint %}
In this tutorial, we will use the [Metamask wallet](https://metamask.io/) (browser wallet) on the [Polygon](https://polygon.technology/) network (chain).
{% hint style="info" %}
If you are experiencing any issues while connecting your wallet to the app, feel free to contact our customer support team on [Discord](https://discord.com/invite/coinshift) or [Twitter](https://twitter.com/0xCoinshift).
{% endhint %}
## **Step 3: Complete the access request form**
After connecting your wallet, the following screen will appear. To proceed, raise a request to sign up and use the Coinshift app.
Please fill in the following details:
* Name
* Email
* Organisation name
* Twitter Profile
Once completed, click on the **Request Access** button.
## **Step 4: Awaiting approval and verification**
You will see the message below on your screen.
The Coinshift team will verify your details and notify you via email within 24 hours. Once you receive the email, return to the Coinshift app to set up your organisation. Refer to the next article for steps on how to [Sign Up](/business/getting-started/setting-up-a-new-organisation/sign-up) for the app and later [Create a New Organisation](/business/getting-started/setting-up-a-new-organisation/create-a-new-organisation).
# Sign Up
Sign up as a new user and start your journey on Coinshift.
Once you've received an email from the [Coinshift](https://coinshift.xyz/) team granting you access to the app, you can sign up and complete onboarding.
Follow these steps to sign up for the Coinshift application.
## **Step 1: Accessing the Coinshift app**
Follow the link provided in the email that you have received from the Coinshift team or visit the [Coinshift app](https://beta.coinshift.xyz/) directly.
Next, click on the **Connect Wallet** button to connect your wallet.
{% hint style="info" %} Make sure to use the same wallet address that you used for requesting access to the Coinshift app.
{% endhint %}
As your access request has been approved, you will see the option to [Log In](/business/getting-started/logging-in) or **Create an account** once your wallet is connected.
{% hint style="info" %} Currently, it is not possible to log in using smart contract wallets such as Gnosis Safe. Users are advised to use their web3 wallet to login.
{% endhint %}
## **Step 2: Sign Up**
As a new user, click on **Sign Up** to open the signup page. Enter the following details:
* Name
* Email (optional)
* Job title (optional)
## **Step 3: Confirm ownership**
Click on **Sign Up** and sign a message to confirm that you are the owner of the wallet address. This will not trigger a transaction.
{% hint style="info" %} By signing, you won't give Coinshift access to perform any actions on your behalf. Signing is only required to confirm that you are the owner of the wallet address.
{% endhint %}
After signing the message, your user profile is created, and it is connected to the Coinshift app with the desired wallet address.
You will now see the option to create a new organisation on your screen. Read our next article to learn how to [Create a New Organisation](/business/getting-started/setting-up-a-new-organisation/create-a-new-organisation).
# Create a New Organisation
Create an organisation for managing the on-chain treasury assets with your team.
After signing up, create an organisation in [Coinshift](https://coinshift.xyz/) to manage your on-chain treasury. An organisation is where you and your team members can view and manage your on-chain treasury.
Follow these steps to create a new organisation.
## **Step 1: Create a new organisation**
Visit the [Coinshift ](https://beta.coinshift.xyz/)app and connect your wallet.
After connecting your wallet, find the option to create an organisation. Enter your organisation's name and click on **Create**.
Congratulations! You have successfully created your organisation on Coinshift. A prompt will appear on your screen to **Add Accounts** to your organisation. After adding accounts, you can start using Coinshift!
The next section will explain accounts and how to add them to your organisation.
# Create Organisation from Coinshift Dashboard
Create multiple organisations from your Coinshift dashboard.
[Coinshift](https://coinshift.xyz/) allows users to create multiple organisations from their dashboards.
Follow the below steps to create one or more new organisations.
## Step 1: Access the Coinshift dashboard
Click on the **organisation** field at the top right corner of your dashboard. A dropdown menu will appear, select **Switch Organisation** from the options.
## Step 2: Creating a new organisation
On the next screen, you will see a list of organisations that you have previously set up (if any).
To create a new organisation, locate and click on the **Create Organisation** button (highlighted below).
## Step 3: Enter a new organisation name
A window will appear prompting you to enter the name of your new organisation. After entering the name, click **Create**.
Congratulations, you have now successfully created another new organisation in Coinshift!
You can verify your newly created organisation by following **Step 1**.
Repeat this process to create multiple organisations to accommodate your team's requirements.
# Switch Organisations
Switch among the organisations as needed.
[Coinshift](https://coinshift.xyz/) allows you to manage multiple organisations within a single dashboard. You can easily switch between organisations whenever necessary.
Follow the simple steps below to switch between existing organisations:
## Step 1: Access the Coinshift dashboard
Click on the **organisation** field at the top right corner of your dashboard to view the dropdown menu, then select **Switch Organisation**.
## Step 2: Switching organisations
You will see a list of organisations that you have previously set up. Select the organisation you wish to switch to, and then click **Go to Dashboard** to navigate to the selected organisation's dashboard.
The application will then direct you to the dashboard of the newly selected organisation.
# Add Accounts (Safes, Wallets, etc.)
Add one or more accounts from multiple networks to manage crypto assets through Coinshift’s unified dashboard.
After creating a new organisation, you can add accounts to complete the onboarding process. [Coinshift](https://coinshift.xyz/) allows you to add multiple accounts across all supported networks, and conveniently displays data in a unified dashboard.
Within Coinshift, accounts may take the form of Safes, wallets, or smart contracts, all of which facilitate the secure storage of crypto assets.
{% hint style="info" %} Coinshift adheres to a self-custody approach and does not take control over your funds. By leveraging battle-tested self-custody primitives, such as multi-sig Safes, we prioritise the security of your assets.
{% endhint %}
Complete onboarding by adding accounts and inviting members to your organisation.
Add Existing Safes
Discover how to add existing multi-sig Safes for asset tracking, transaction management, and execution.
Learn to integrate browser or hardware wallets (EOAs) for asset tracking and historical transaction management.
coming soon
Add Existing Smart Contracts
Learn how to integrate existing smart contracts, including vesting schedules, DeFi protocols, and more, for asset management.
coming soon
# Add Existing Safes
Add Safes to track assets, manage historical transactions and execute transactions.
Add one or more existing Safes and complete your onboarding.
Follow these steps to add an existing Safe to your organisation on [Coinshift](https://coinshift.xyz/).
## **Step 1:** **Select and add existing Safes to your account**
In the **Add Accounts** section, select the **Add** **Existing Safes** option. A list of automatically detected Safes linked to your wallet will appear. Select the check box adjacent to the desired Safe. You can select as many Safes as you want.
### Step 1. a: Incorporate read-only Safes (optional)
At this step, you can also find the **Add More Safes** option (highlighted in the above screenshot). Optionally, incorporate read-only Safes by using this feature, and track their activities.
{% hint style="info" %} Adding more Safes is an optional step, and you can skip it if you want.
{% endhint %}
To add more Safes, click on the **Add More Safes** button and enter the following details for the Safes:
* Network
* Safe Address
* Name (optional)
Use the **Add More** button (highlighted below) to add as many Safes (read-only) as you want.
After entering the mandatory details, click on **Confirm**.
## **Step 2: Review Safe Signers and invite additional Members**
Examine the wallet addresses of Safe Signers associated with Safe. Optionally, extend invitations to Members for joining the Safe via the **Add More Members** function (highlighted in the below screenshot).
{% hint style="info" %} Adding a Member is an optional step, and you can skip it if you want.
{% endhint %}
To add more Members, click on the button highlighted in the above screenshot. Next, enter the wallet address of the Member whom you wish to add. Add additional Members if necessary by using the **Add More** button (highlighted below).
Once done, click on the **Confirm** button.
## **Step 3:** Confirm Safe details and complete import
Review the summary of the Safe, including its address, threshold, network, and Signers’ addresses.
Click on **Import X Safe** to confirm and complete the import where \[X] corresponds to the number of Safes being imported.
## **Step 4: Verify added Safes**
Once done, you will be redirected to the **Overview** section of your Coinshift dashboard. Verify the added Safe in your organisation via the **Accounts** tab.
After integrating an existing Safe, you can explore the following additional Coinshift features to enhance your experience.
Migrate Data from Coinshift v1 to v2
Choose this option if you have imported an existing Safe from v1 and now wish to migrate the associated data into v2.
# Create a New Safe
Define a Safe and store your organisation's assets.
[Coinshift](https://coinshift.xyz/) **Create a New** **Safe** feature enables you to create a new Safe for your team across various networks the application supports.
{% hint style="info" %} Manage multiple Safes across multiple blockchains all housed in one organisation and view them on one intuitive, unified dashboard.
{% endhint %}
Follow these steps to create a new Safe on Coinshift.
## **Step 1: Initiate Safe creation**
After selecting the **Create a New Safe** option from the **Add Accounts** section. Fill in the required parameters:
* Network
* Safe Name (optional)
* List of Signers
* Threshold (the minimum number of Signers required to approve a transaction)
The Safe will automatically consider the connected wallet address as one of the Signer addresses.
Use the **Add More** option to add more Safe Signer addresses if required, and define the threshold for the Safe.
## **Step 2: Add Members (optional)**
Optionally, add Members to the organisation by clicking the **Add More Members** button.
{% hint style="info" %} Adding a Member is an optional step, and you can skip it if you want.
{% endhint %}
If you wish to add Members, click on the button highlighted in the above screenshot. Enter the wallet address of the Member whom you wish to add. Click on **Add More** button (highlighted below) to include additional Members to the Safe.
{% hint style="info" %} Members added at this stage are not Signers and hence they are not allowed to approve or execute transactions.
{% endhint %}
Select the Safe Signers and Members to whom you wish to send invitations.
## **Step 3: Review summary**
Review the details, and confirm by clicking the **Create** button.
Confirm the transaction triggered from your linked Metamask wallet.
You will be directed to the **Overview** section of your dashboard.
To view the newly created Safe details, navigate to the **Accounts** section of your dashboard.
{% hint style="info" %} Your Safe address will be different from your wallet address.
{% endhint %}
Invitations are sent to other Members/ Signers to join the Safe. View the list of invited Members/Signers in the **Members** section of the dashboard.
For transferring assets to your Safe, refer to the instructions given in the article [Transfer Assets To Your Safe](/business/getting-started/setting-up-a-new-organisation/add-accounts-safes-wallets-etc./create-a-new-safe/transfer-assets-to-your-safe).
# Transfer Assets To Your Safe
Transfers assets from a wallet into your Safe, to safeguard your funds.
Once you set up your Safe, you can transfer funds into it. These steps will guide you through the process of transferring funds into your Safe.
## **Step 1: Locate and copy the Safe's unique address**
Navigate to the **Accounts** section. Here, you will find the list of Safes within your organisation.
Select the Safe you wish to transfer funds to and click the **copy** icon to copy its unique address.
## **Step 2: Initiate and confirm token transfer to Safe**
Next, initiate a token transfer from your wallet to your Safe. Paste the copied address into the recipient field and enter the desired transfer amount.
Confirm the transaction. Once it is done, the assets will be transferred to your Safe.
{% hint style="warning" %} Make sure to select the appropriate network while transferring funds. Failing to do so may result in the loss of funds. Keep in mind that, unlike wallets, Safes do not share a single address across all networks.
{% endhint %}
# Joining an Existing Organisation
How to join an existing organisation with an invitation.
Safe Signers have the ability to invite other users (either as a Signer or Member) to join their organisation. If you have received an invitation to join an existing organisation, you will need to [Sign Up](/business/getting-started/setting-up-a-new-organisation/sign-up) for the [Coinshift](https://coinshift.xyz/) app to accept the invitation. Alternatively, you can decline the invitation if you do not wish to join the organisation.
{% hint style="warning" %} Make sure to use the same Metamask address to sign up for the Coinshift app that the Main Signers used when creating the Safe.
{% endhint %}
If the application still directs you to the [Request Access](/business/getting-started/setting-up-a-new-organisation/request-access) page, there could be two possibilities:
* Incorrect wallet address
* Invitation not sent
Verify your wallet address with your team members. If the wallet address is correct, it's possible that you have not been invited to join the organisation. In this case, ask them to invite you as Signer or Member (whichever is suitable for your role). Refer to our guide for instructions on how to [invite Signers](/business/coinshift-walkthrough/account-management/add-signers) and [Members](/business/coinshift-walkthrough/member-management/add-member) to your organisation.
{% hint style="info" %} The process for joining an existing organisation is the same for both Signers and Members. Invited people can refer to these same steps to Sign up and accept the invitation.
{% endhint %}
Follow the below steps to join an existing organisation and make the most of your Coinshift experience.
## **Step 1: Connect your wallet and Sign Up for Coinshift app**
Connect your wallet with the [Coinshift](https://beta.coinshift.xyz/) app. Once your wallet is connected, you may see a message on your screen directing you to [Sign Up](/business/getting-started/setting-up-a-new-organisation/sign-up) for the application.
Fill in the following details:
* Name
* Email (optional)
* Job Title (optional)
confirm the process by clicking on the **Sign Up** button.
## **Step 2: Accept or decline organisation invitation**
After completing the sign-up process, you can see the invitation to join the organisation, along with a reject button.
Press the **Accept** button if you wish to join the organisation or press **Reject** to decline the offer.
## **Step 3:** **Access the organisation dashboard**
Upon acceptance, you will be redirected to the organisation dashboard.
Check the **Members** section to see your organisation grow as new Signers or Members are added to the list!
# Logging In
Access your Coinshift account.
After joining an existing organisation or creating a new one, you can login to [Coinshift](https://coinshift.xyz/) through the **Log In** page.
## **Step 1: Access the Coinshift app**
Go to the [Coinshift](https://beta.coinshift.xyz/) app.
Click on **Connect Wallet** to connect your Signer wallet to the Coinshift app.
Once your wallet is connected, you can log in by clicking the **Log In** button.
{% hint style="info" %} Please connect your web3 wallet to log in. Currently, it is not possible to log in using smart contract wallets such as Safe.
{% endhint %}
Upon successful login, Coinshift will display all created organisations under the Signer account you logged in with.
You can select the desired organisation (in case you have more than one), and access its dashboard.
# Setup Notifications
Speed up transaction signing by setting up Slack or Discord notifications.
With Slack or Discord notifications for transactions, you can:
* Speed up multi-sig transaction signing
* Reduce the administrative burden of async collaboration
* Get instant notifications at each stage of the transaction lifecycle, giving you peace of mind
## **Notification levels**
As Coinshift offers the capability to aggregate multiple accounts under a single organisation, you can set the notification preferences at the following options:
### **Organisational Level**
Obtain updates about transactions spanning all accounts within the organisation. Consider using this option if the Signers are consistent across multiple Safes, or if your organisation has only 1 or 2 Safes.
**Setup Guides:**
{% content-ref url="/pages/PGluqYC9qAEwBSGeX5YF" %}
[Connect Slack for an Org](/business/getting-started/setup-notifications/connect-slack-for-an-org)
{% endcontent-ref %}
{% content-ref url="/pages/KWkFVLgAeAo7J7y4zxNe" %}
[Connect Discord for an Org](/business/getting-started/setup-notifications/connect-discord-for-an-org)
{% endcontent-ref %}
### **Account Level**
Configure notifications to focus solely on specific account activities. Use this option when each Safe has a different Signers.
**Setup Guides:**
{% content-ref url="/pages/Fj1OPtaJpm1BjO3LK5ZM" %}
[Connect Slack for an Account](/business/getting-started/setup-notifications/connect-slack-for-an-account)
{% endcontent-ref %}
{% content-ref url="/pages/l9p3o6vyLfM7400u0TMq" %}
[Connect Discord for an Account](/business/getting-started/setup-notifications/connect-discord-for-an-account)
{% endcontent-ref %}
Check the following articles to gain further insight into managing the notifications for your Safe accounts:
{% content-ref url="/pages/GGr5ev6oTBpz2mDfqZAp" %}
[Viewing Notifications in Slack and Discord](/business/getting-started/setup-notifications/viewing-notifications-in-slack-and-discord)
{% endcontent-ref %}
{% content-ref url="/pages/7OyA9Zt3tGncUZP4wdfZ" %}
[Change Account Preferences: Disconnect Notifications](/business/getting-started/setup-notifications/change-account-preferences-disconnect-notifications)
{% endcontent-ref %}
{% content-ref url="/pages/goYqZoqdEzUJQilkIiha" %}
[Discord: Adding Coinshift Roles & Bot to private channels](/business/getting-started/setup-notifications/discord-adding-coinshift-roles-and-bot-to-private-channels)
{% endcontent-ref %}
{% content-ref url="/pages/jDLiXTq3J8dIbMWNMrvE" %}
[Discord: Check Your Permissions](/business/getting-started/setup-notifications/discord-check-your-permissions)
{% endcontent-ref %}
{% content-ref url="/pages/dZA3ItKD0erSmuvTiSoZ" %}
[Add Members to Discord Server & Channel](/business/getting-started/setup-notifications/add-members-to-discord-server-and-channel)
{% endcontent-ref %}
Check the FAQ page to know the solution to the most common queries on Notifications:
{% content-ref url="/pages/2DBWwxhhRkKnNmGZpi93" %}
[FAQ: Notifications](/business/faqs/faq-notifications)
{% endcontent-ref %}
# Connect Slack for an Org
Guidelines for setting up and disconnecting a Slack channel at an Organisational level.
Follow the steps outlined below to either set up or disconnect a Slack channel for your organisation within Coinshift.
## Set up a Slack channel
### Step 1: Access Slack via Notifications
Click on the **Connect** button next to the Slack app listed under the **Notifications -> Organisation** under the **Settings** section.
### Step 2: Grant access to a workspace
You will be redirected to Slack, where you'll need to grant access to your Slack workspace.
### Step 3: Select a channel & authorise connection
Choose the Slack channel where you want to receive notifications.
{% hint style="info" %} We recommend you have a dedicated channel for notifications for optimal organisation and clarity. Please set this up in Slack accordingly.
{% endhint %}
Authorise Coinshift to send messages to the selected Slack channel.
### Step 4: Verify Setup
Navigate to **Settings -> Notifications** tab to confirm the successful setup.
Congratulations on completing the setup!
Now that you've successfully integrated Slack with your organisation, you can begin receiving org-level notifications on the specified Slack channel.
## Disconnect Slack channel for an organisation
You can disconnect your Slack channel anytime if you prefer not to receive organisation-level notifications.
To do so, navigate to the **Notifications -> Organisation** under the **Settings** section, and click on the **Disconnect** button associated with the Slack channel.
After this, the channel will be disconnected and you'll stop receiving notifications.
Note that you can reconnect your Slack channel if you decide to enable the notifications again in the future.
Refer to the next article to configure notifications for your organisation on a Discord channel.
# Connect Discord for an Org
Guidelines for setting up and disconnecting Discord at an Organisational level.
Follow the steps outlined below to either set up or disconnect a Discord account for notifications for your organisation within Coinshift.
## Set Up a Discord account
### Step 1: Access Discord via Notifications
Click on the **Connect** button next to the Discord app listed under the **Notifications -> Organisation** under the **Settings** section.
### Step 2: Select Server and Channel & authorise access
You will be redirected to Discord, where you'll need to authorise access to your Discord account.
Choose the Discord server and channel where you want to receive notifications.
{% hint style="info" %} We recommend you have a dedicated channel for notifications for optimal organisation and clarity. Please set this up in Discord accordingly.
{% endhint %}
{% hint style="info" %} If the desired Discord Server isn't visible in the drop-down menu, you may not have the required permissions to access it. Please refer to the [*Discord: Check Your Permissions*](/business/getting-started/setup-notifications/discord-check-your-permissions) guide and reach out to the server owner or administrator for further clarification on your access rights.
{% endhint %}
Allow the Coinshift bot to send messages to the selected Discord channel.
### Step 3: Verify Setup
Navigate to **Settings -> Notifications** tab to confirm the successful setup.
Congratulations, you're done! You have successfully set up your Discord account for your organisation and can start receiving org-level notifications on the given Discord channel.
## Disconnect a Discord account for an organisation
You have the flexibility to disconnect your Discord account setup at any given time if you do not wish to receive organisational-level notifications.
To do so, navigate to the **Notifications -> Organisation** under the **Settings** section, and click on the **Disconnect** button associated with the Discord channel.
After this, the channel will be disconnected and you'll stop receiving notifications.
Note, you can reconnect your Discord account if you wish to enable the notifications again in the future.
# Connect Slack for an Account
Integrate a Slack channel with your Safe account.
Follow the steps below to integrate a Slack channel with your Safe account.
## Step 1: Access Accounts via Notifications
Navigate to the **Notifications -> Accounts** under the **Settings** section. Here, you will see the list of all accounts within your organisation.
Click on the **Connect** button next to the account you wish to link to your Slack.
> By following the steps mentioned in this article, users can configure Slack and Discord alerts for individual accounts to get transaction notifications. These alerts are account-specific, not for the whole organisation.\ Follow the article [*Connect Slack for an Org*](/business/getting-started/setup-notifications/connect-slack-for-an-org) if you wish to set up org-level notifications.
## Step 2: Select Notification Channel
Select your preferred notification channel. For this example, select Slack.
{% hint style="info" %} We recommend you have a dedicated channel for notifications for optimal organisation and clarity. Please set this up in Slack accordingly.
{% endhint %}
## Step 3: Grant access & authorise connection
You will be redirected to Slack, where you'll need to grant access to your Slack workspace.
Choose the Slack channel where you want to receive notifications.
Authorise Coinshift to send messages to the selected Slack channel.
## Step 4: Verify Connection
Navigate to **Settings -> Notifications-> Accounts**, to confirm the connection is established with the desired account.
You can now see the **Manage** button for the selected account.
Read this article to learn how to use the manage option to further [control your notifications](/business/getting-started/setup-notifications/change-account-preferences-disconnect-notifications).
# Connect Discord for an Account
Integrate your Discord account with your Safe account for timely notifications.
Integrate a Discord account with your Coinshift account by following these steps.
## Step 1: Access Accounts via Notifications
Navigate to the **Notifications -> Accounts** under the Settings section. Here, you will see the list of all accounts within your organisation.
Click on the **Connect** button next to the account you wish to link to your Discord account.
If Slack notifications are enabled for that account, you'll see a **Manage** button instead; click on that.
> By following the steps mentioned in this article, users can configure Slack and Discord alerts for individual accounts to get transaction notifications. These alerts are account-specific, not for the whole organisation.
>
> Follow the article [*Connect Discord for an Org*](/business/getting-started/setup-notifications/connect-discord-for-an-org) if you wish to set up org-level notifications.
## Step 2: Select Notification Channel
Select Discord as your preferred channel.
## Step 3: Select Server and Channel & authorise access
{% hint style="info" %} We recommend you have a dedicated channel for notifications for optimal organisation and clarity. Please set this up in Discord accordingly.
{% endhint %}
You will be redirected to Discord, where authorisation is needed to access the desired server.
Choose the Discord server and channel where you want to receive notifications.
{% hint style="info" %} If the desired Discord Server isn't visible in the drop-down menu, you may not have the required permissions to access it. Please refer to the [Discord: Check Your Permissions](/business/getting-started/setup-notifications/discord-check-your-permissions) guide and reach out to the server owner or administrator for further clarification on your access rights.
{% endhint %}
Authorise Coinshift to send messages to the chosen Discord server.
## Step 4: Verify Connection
Return to **Settings -> Notifications-> Accounts** to confirm the connection with the appropriate account.
You can now see the **Manage** button for the selected account.
Read this article to learn how to use this option to further [control your notifications](/business/getting-started/setup-notifications/change-account-preferences-disconnect-notifications).
# Viewing Notifications in Slack and Discord
Access notifications on Slack and Discord.
You can easily view activity notifications related to your organisation or account through the connected Slack and Discord channels.
Follow the below steps to view the incoming notifications:
## Step 1: Notification configuration verification
Ensure that your chosen communication channels (Slack and/or Discord) are appropriately set to your specific account or organisational needs.
For example, in the below screenshot, we have notification channels set up on both Slack and Discord for an account.
## Step 2: Monitor Notifications
When a Signer or member initiates a transaction, a notification similar to the below screenshots will be sent to your specified channels. Each notification contains the following information:
* Organisation Name
* Account Name and Address
* Transaction Type (if any)
* Labels (if any)
* Notes (if any)
**Slack Notification:**
**Discord Notification:**
## Step 3: **Responding to Notifications (Optional)**
It's feasible to directly manage transactions from the notifications received in your Slack or Discord channel.
Note that, to address these transactions, ensure that you possess the requisite permissions on the organisation and/or Safe account.
For example, as a Safe Signer, if you receive a notification similar to the above screenshot, selecting **Approve** or **Reject** will redirect you to your Coinshift dashboard for further action.
# Change Account Preferences: Disconnect Notifications
Disconnect Slack and Discord notifications to stop receiving alerts for your Safe account.
You can discontinue receiving notifications from Slack and Discord (one or both) for an account by following the steps outlined below.
{% hint style="info" %} Follow the same steps to disconnect notifications for Slack and Discord accounts.
{% endhint %}
## Step 1: Access Accounts via Notifications
Navigate to **Notifications -> Accounts** under the **Settings** section. Here, you will see the list of all accounts along with the notification channels set for each.
Click on the **Manage** button next to the account for which you wish to discontinue notifications.
## Step 2: Select the channel to discontinue notifications
A window will appear displaying a disconnect button for the set notification channel.
Click on the **Disconnect** button next to the channel you'd like to stop receiving notifications from and confirm the process.
## Step 3: Verify Disconnection
Return to **Settings -> Notifications-> Accounts** to ensure the connection with the desired account has been severed.
# Discord: Adding Coinshift Roles & Bot to private channels
Configuring Coinshift notifications in private Discord channels.
If you want to receive notifications related to Safes in a private Discord channel, you must grant the necessary permissions to both the Coinshift Roles and Bot.
Follow the steps below to enable permission to receive notifications in a private Discord channel.
## Step 1: Access the Channel Settings
Navigate to the Discord channel that you have integrated with your Coinshift organisation or account.
Click on the channel's **Settings** icon (highlighted in the below screenshot). Once inside the settings, go to the **Permissions** tab.
## Step 2: Grant Permissions to Coinshift Role and Bot
Look for the **Add members or roles** button and click on it.
The below window will appear. Search for and select both the **Coinshift Roles** and **Bot**.
After following these steps, the Coinshift Bot should be able to send transaction notifications to your private Discord channel.
## Step 3: Verify Advanced Permissions (Optional)
If transaction notifications aren't appearing in your selected private channel after integrating the Coinshift Roles and Bot, then navigate to the **Advanced Permissions** section within the interface.
Here, within the **TEXT CHANNEL PERMISSIONS**, ensure the **Send Messages** parameter is appropriately configured, marked either by a "/" or "✅", for both the Coinshift Roles and Bot.
{% hint style="info" %}
If you are experiencing any issues while connecting your private Discord channel to the Coinshift app for notifications, feel free to contact our customer support team on [Discord](https://discord.com/invite/coinshift) or [Twitter](https://twitter.com/0xCoinshift).
{% endhint %}
# Discord: Check Your Permissions
Resolving server access issues in Coinshift Discord integration.
If you're unable to locate the desired Discord server during your Coinshift app integration process (particular step shown in the below screenshot), it's possible that you lack the necessary permissions to access that server.
Consult with your team and identify the Discord server owner. Ask them to [invite you to the designated server](/business/getting-started/setup-notifications/add-members-to-discord-server-and-channel), considering your permissions on the Safe. After accepting the invitation, you can access the server and view its channels.
# Add Members to Discord Server & Channel
Enhance team collaboration by adding your team members into the Discord server and channels for notifications.
If you are the owner or an admin of a Discord Server that's integrated with the Coinshift app for notifications, follow these instructions to invite and onboard your team members who are recognised as Safe Signers or members.
Please note that while the process for inviting members is consistent across both public and private channels, a specific step is required for adding members to the private channels, accessible only to server owners.
## Invite Users to the Discord server (Public Channel)
Navigate to your Discord server.
Click on the dropdown next to the server name and select **Invite People**.
Choose the users you wish to invite or copy the invitation link to share.
Invitees must click on the **Join** button to access the server.
On joining, they will automatically be granted access to all public channels on the server.
Subsequently, users can access their Coinshift dashboard and initiate a connection to the specified Discord server.
## Inviting Users to Private Channels
Navigate to your desired private channel.
Click on the **Invite People** option.
Choose the desired users or share the invitation link.
Invitees will receive a prompt similar to the one described earlier.
Upon clicking the **Join** button, they will be added as a member to the Discord server.
### Granting Access to a Private Channel
Within the private channel, click on the channel's **Settings** icon.
Navigate to the **Permissions** tab. Next, look for the **Add members or roles** button and click on it.
From the displayed list, select the users you wish to grant access to this private channel.
Once this is done, the chosen members will have visibility and can access the private channel within the Discord server.
# Overview
View your portfolio and pending transactions at a glance.
Upon signing in to [Coinshift](https://coinshift.xyz/) and accessing your organisation, you will be directed to the **Overview** page. This section provides a concise summary of your organisation's key metrics and associated details.
The **Overview** page enables you to quickly assess the following information:
1. The Total Number of Accounts and Networks
2. A cash flow expressed as total Incoming and Outgoing (for the Last 30 days)
3. Aggregate balance
4. Asset Distribution
5. Portfolio History
6. Transactions (Proposals, Queue, and History tab)
To further refine the displayed data, you may utilise the **Accounts** button located in the top-right corner of the page. This feature allows for filtering based on specific accounts and networks, ensuring a detailed view of your organisation's performance.
# Users
Understanding users and their roles in Coinshift.
Within the [Coinshift](https://coinshift.xyz/) application, users are responsible for managing and controlling treasury-related activities. Linked to a 'Safe,' users are divided into two primary roles:
* **Signers (Owners)-** The key players in a Safe, forming the core of the multi-signatory team. Responsible for approving or rejecting all on-chain transactions within Coinshift
* [**Members**](/business/coinshift-walkthrough/member-management) **(Non-Signers)-** Enhance treasury operations' efficiency through proposal creation and other contributions without signing rights
Each role comes with its unique set of responsibilities and permissions, promoting efficient treasury management. This role clarity enhances security, workflow, and productivity in the application.
## **Advantages of User roles:**
* **Optimised Efficiency**: By inheriting system-defined permissions, users bypass the need for individual permission settings
* **Productivity and Cost Reduction-** Delegating administrative duties to Members aids in cost reduction and productivity enhancement
* **Enhanced Security**: Limiting access to sensitive data mitigates potential security risks
* **Time-saving-** Assigning routine tasks to Members allows Signers more time for critical duties
* **Minimised Errors**: Distributing tasks among Members reduces the chance of errors
# Portfolio Management
Trace your tokens (ERC-20) and NFTs across multiple accounts and multiple networks.
Gain insights into all your holdings – both fungible ([ERC-20](https://ethereum.org/en/developers/docs/standards/tokens/erc-20/)) and [non-fungible](https://en.wikipedia.org/wiki/Non-fungible_token) (both [ERC-721](https://eips.ethereum.org/EIPS/eip-721) and [ERC-1155](https://eips.ethereum.org/EIPS/eip-1155) token standard) assets – distributed across all your Safes within an organisation, all through a single interface.
Check these two articles to understand your Portfolio better.
Token Portfolio Tracking
Explore this article to check the Live balances in token and USD values across multiple accounts and multiple networks.
Continue reading to learn about how you can keep track of your assets associated with all the Safes in an organisation.
# Token Portfolio Tracking (ERC-20)
Live balances in token and USD values across multiple accounts and multiple networks.
View your entire on-chain treasury assets in real-time, across multiple accounts and networks that [Coinshift](https://coinshift.xyz/) supports.
Key insights provided by the token portfolio tracking section include
* Aggregate balance, and breakdown of assets (stablecoins, ETH, governance/native tokens, and others)
* Token balances per account
* Token balances per network
* Token balances per categories (i.e in stablecoins, ETH & BTC, others)
* Last-fetched prices (real-time or near real-time)
* Enhanced graphical and visual representations
* Ability to hide tokens with USD balance < $0.01
Follow the below steps to understand and refine the portfolio data under various categories:
## Step 1: Go to Portfolio
Navigate to the **Portfolio** section on your dashboard. Upon arrival, the interface will display the aggregate balance and breakdown of assets in [stablecoins](https://www.bitcoin.com/get-started/what-are-stablecoins/), [ETH](https://www.coingecko.com/en/coins/ethereum), and others by default.
## Step 2: Filter Options
The portfolio section offers four filtering options for users to further refine their organisation's data in each category:
* Tokens view
* Categories view
* Accounts view
* Networks view
### Step 2a: Viewing data by Token
To display data by token, choose the **Tokens view** option from the drop-down menu.
The application will present an overview of all assets within the portfolio, including network, current price, token balance, fiat balance, and percentage value.
Switch to the chart view to observe token statistics displayed in a bar chart.
### Step 2b: Viewing data by Categories
To organise data based on categories (stablecoins, ETH & BTC, others), select the **Categories view** from the drop-down menu.
Click on the chart view to see the desired data in a bar chart format.
### Step 2c: Viewing data by Accounts
Choose the **Accounts view** from the drop-down menu to categorise data according to individual accounts.
This option provides a summary of each account, covering essential details such as account name, associated network, balance, tokens, threshold, and more.
To display the account information in a graphical format, switch to the chart view.
### Step 2d: Viewing data by Network
To organise data based on network holdings, select the **Networks view** from the drop-down menu.
This will showcase the organisation's data according to user holdings across various networks.
Similarly, you may opt for the chart view to visualise the organisation's data related to the different networks supported by Coinshift.
## **Step 3: Filter by specific token**
To view your portfolio data for specific tokens, utilise the highlighted option below to apply the desired filter.
## **Step 4: Hide balances less than $0.01**
Utilise the below-highlighted option if you do not wish to see the tokens with balances less than $0.01.
Read the next article to learn [how to manually add additional tokens](/business/coinshift-walkthrough/portfolio-management/token-portfolio-tracking-erc-20/add-additional-tokens) such as your project governance tokens.
# Add Additional Tokens
Manually add tokens that are not in the Coingecko top 1000 list.
Coinshift utilises [Coingecko](https://www.coingecko.com/) to access market data for cryptocurrencies, automatically displaying details for the top 1000 listed tokens. However, if you would like to add tokens not included in the top 1000, kindly follow these steps to view the balance:
## **Step 1: Go to Portfolio**
Access the **Portfolio** section in your dashboard. Within this area, locate and click the **Add Token** button (highlighted in the below screenshot).
## **Step 2: Fill in Token details**
Upon clicking the button, a new window will appear, prompting you to provide the following details:
* Network
* Token Contract Address
After entering the requisite information, click on **Next**.
Please note that correct information will result in a green checkmark.
Conversely, if the submitted details are inaccurate, an error message will appear, indicating the contract address is invalid.
Click **Confirm** to finalise the process and incorporate the token into your portfolio.
# NFT Portfolio Tracking
View NFTs across multiple accounts and multiple networks.
View and track all your [Non-Fungible Tokens](https://ethereum.org/en/nft/) (including both [ERC-721](https://eips.ethereum.org/EIPS/eip-721) and [ERC-1155](https://eips.ethereum.org/EIPS/eip-1155) token standards) by floor price, across multiple accounts and networks that [Coinshift](https://coinshift.xyz/) supports.
NFT Portfolio tracking offers the following features:
1. Switch between a card view and a list view based on your preference.
2. Search by NFT or Collection
3. View NFT grouped by Collection, Account, or Network
4. Spam NFTs are hidden (by default)
Coinshift's multi-safe, multi-chain capabilities offer a holistic view of your treasury by consolidating NFT holdings across all Safes in a single interface.
Follow these steps to explore the NFT section:
## **Step 1: Access the Portfolio Section**
Navigate to the **Portfolio** section on your Coinshift dashboard and select the **NFTs** tab.
### Step 1. a: View by NFT
The **NFTs view** is the default mode, and NFTs are displayed in card view, organised by floor price.
You can switch to list view to see NFTs details i.e. NFT ID, Collection, Network, and Floor Price for each NFT.
Select any NFT from your portfolio to view detailed information about it, including
* Collection Name
* Owner Address
* Floor Price
* Network
* Token Type (ERC 721, or 1155)
* NFT Address
* Description
* NFT Traits
### Step 1. b: View by Collection
Switch to the **Collections view** to group NFTs by collection. This view includes the following information:
* Collection Name
* Number of NFTs you own
* Aggregate Floor Price
Switch to list view to display the information i.e. NFT ID, Collection, Network, and Floor Price about each NFT in the collection you hold.
### Step 1. c: View by Account
Select **Accounts view** to group NFTs by different accounts within an organisation. You can view the aggregate token value (by floor price) of all NFTs associated with a particular Safe.
Toggle to the list view to view the details i.e. NFT ID, Collection, and Floor Price for the NFTs corresponding to each account.
### Step 1.d: View by Network
The **Networks view** groups NFTs based on the different networks that Coinshift supports. Assess the total holdings in each network with this view.
Switch to list view to display the data i.e. NFT ID, Collection, and Floor Price for the NFTs grouped by network.
## Step 2: Search NFTs
Search by collection or NFT by using the below-highlighted field.
# Reporting
Get real-time insights into the health of your treasury, generate financial reports and increase transparency for your community and investors.
Our goal at [Coinshift](https://coinshift.xyz/) is to provide accurate, auditable, and actionable accounting-ready data. Currently, we provide:
Portfolio History
Get historical token balances for your Safes in seconds, both in token value and USD equivalent.
As part of our larger reporting feature set, financial managers can get real-time insights into the health of a treasury, generate financial reports, and increase transparency.
# Portfolio History
Get historical token balances for your Safes in seconds, both in token value and USD equivalent.
Make month ends less painful and better monitor the financial health of your treasury over time.
DAOs and crypto organisations can use Portfolio History to:
* Get token balances for each point in time (currently available in monthly granularity)
* Get USD equivalents of token balances
* View aggregated data by token category ([stablecoins](https://www.bitcoin.com/get-started/what-are-stablecoins/), [ETH](https://www.coingecko.com/en/coins/ethereum) & [BTC](https://www.coingecko.com/en/coins/bitcoin), and others)
* View aggregated holdings for your entire treasury
* View beautiful graphs to monitor your holdings over time
* Download historical balances in csv format
And because [Coinshift](https://coinshift.xyz/) is multi-Safe and multi-chain, you can get a complete picture of your treasury in one place by consolidating token and USD balances across Safes.
Follow these steps to generate a Portfolio History report:
## **Step 1: Go to the Reports section**
Navigate to the **Reports** section on your Coinshift dashboard and select the **Portfolio History** tab.
Here, you'll find a list of previously generated reports.
On this page, you can view details for each generated report:
* Report ID
* Created On (Creation Date)
* Created By (name and wallet address of the member who generated the report)
* Parameters (date range, no. of accounts )
* Status (Completed, Processing, or Failed)
## **Step 2: Create a New Report**
To create a new report, click the **Create Report** button. A window will come up where you can select the date range from predefined timelines.
Set your desired range and click **Create Report**.
Once initiated, the report's status will show as **Processing**. When the report is completed (in several seconds) it will be marked as **Completed.**
## **Step 3: Analyse and View Report**
To view a completed report, click the **View Report** option next to the relevant entry. The report displays organisation data at monthly intervals with three viewing options:
* **Overall:** Displays Safe balances in USD over the selected period
* **Tokens:** Shows balances in all held assets (in USD)
* **Categories:** Provides a concise data breakdown into Stablecoins, ETH & BTC, and Others
{% hint style="info" %} A governance/native token breakdown is coming soon.
{% endhint %}
By default, the report displays balances in USD. Hover over the graph to view the balance at specific points. The bottom of the page provides a more detailed view of each associated Safe's balance across all networks.
### **Step 3.a: Filter data**
You can refine your report data using the following **Filter** criteria:
* Assets (optional)
* Accounts
Apply any combination of these filters to further customise your report.
## **Step 4: Download the Report**
Click the **Download** button to save the report as a CSV file (with PDF support coming soon) for internal accounting or auditing purposes.
The report presents a thorough analysis of each token's monthly balances, enabling an in-depth evaluation of token holdings and their respective changes over time.
# Cash Flow Tracker
Track all transactions by custom labels, tokens, accounts, and more.
Monitor both inflows and outflows of funds by token, labels, and USD values, as well as transaction counts, across multiple accounts and networks supported by Coinshift.
Key Features:
* View aggregate incoming and outgoing balances in USD
* View aggregated cashflow data by token category
* Check cashflow balances as per your organisation’s custom labels (also available as a pie chart breakdown)
* Monitor data from up to 4 quarters (including the current one)
* Export different segments (fiat, token, labels) of your cashflow data individually as CSV files
And because Coinshift is multi-Safe and multi-chain, you can get a complete picture of your treasury in one place by consolidating all incoming and outgoing balances across all Safes.
Follow the below steps to understand and refine the cashflow data or to generate a new report:
## Step 1: Go to the Reports section
Navigate to the **Reports** section on your Coinshift dashboard and select the **Cash Flow** tab.
This section gives an overview of your **organisation's transactions**, highlighting **incoming and outgoing funds in USD, net balance, operational networks,** and **total accounts**.
## Step 2: Create a report for a specific time period
Click on the **Filters** option to create a new report. Upon selection, a dialog box appears, asking you to input values in the following fields:
* Date Range (optional)
* Tokens (optional)
* Labels (optional)
Apply any combination of these filters and hit **Apply Filters**.
For additional refinement, use the **Accounts** filter to display data by specific accounts or networks.
Your dashboard will then reflect your cash flow data accordingly.
### Step 2. a: Incoming and Outgoing
In the **Incoming and Outgoing** section, you'll find a bar chart representing the total value of incoming and outgoing transactions in USD for the selected time period.
For detailed data views, navigate to the **Daily**, **Monthly**, or **Quarterly** tabs.
### Step 2. b: Incoming and Outgoing by Tokens
This section categorises your organisation's balances based on individual assets.
A detailed breakdown (in different tokens) of both inflow and outflow streams can be viewed by hovering over the chart.
### Step 2. c: Incoming and Outgoing by Labels
This section displays fund balances corresponding to the labels defined by your organisation.
The lower section of the page represents incoming and outgoing balances as percentages of the total for each label. This information can be viewed as a pie chart or in a linear format, helping to understand the usage of different labels.
## Step 3: Download the Report
An option to download the report as a CSV file is available at each segment for additional spreadsheet analysis.
This report provides insight into your organisation's financial parameters, including cash flows, revenues, losses, and token balances over time. It equips users with the ability to examine their crypto holdings and revenue patterns, track gains and losses, and observe fluctuations in their asset portfolio.
# Coinshift Apps
Explore supported dApps, and experience human-readable interactions directly from your multi-sig Safes.
In the past, dealing with multi-sig DeFi transactions meant understanding the complicated hex data. Now, with Coinshift Apps, hex data is converted into clear, human-readable sentences, boosting your confidence in transaction signing.
You can navigate to the **Apps** section of their Coinshift dashboard to see the list of different supporting dApps.
Under Apps, interact with the following dApps:
{% content-ref url="/pages/r9Xpv83qYxUjwc3jTunB" %}
[AAVE](/business/coinshift-walkthrough/coinshift-apps/aave)
{% endcontent-ref %}
{% content-ref url="/pages/5HHZNS6i7umLbJQyhrbr" %}
[CoW Swap](/business/coinshift-walkthrough/coinshift-apps/cow-swap)
{% endcontent-ref %}
{% content-ref url="/pages/ON1fSGoOkBr5QJmqSBsq" %}
[Hedgey](/business/coinshift-walkthrough/coinshift-apps/hedgey)
{% endcontent-ref %}
{% content-ref url="/pages/udazHWxoJVgttxiVhuzk" %}
[1inch](/business/coinshift-walkthrough/coinshift-apps/1inch)
{% endcontent-ref %}
{% content-ref url="/pages/cgKl5SQe9ubHhjXqnhFW" %}
[LI.FI](/business/coinshift-walkthrough/coinshift-apps/li.fi)
{% endcontent-ref %}
{% content-ref url="/pages/vfnfXwWp30MrfIs54M6i" %}
[ParaSwap](/business/coinshift-walkthrough/coinshift-apps/paraswap)
{% endcontent-ref %}
{% content-ref url="/pages/HfMyOGTsZtxWss9kMZAe" %}
[Request Finance](/business/coinshift-walkthrough/coinshift-apps/request-finance)
{% endcontent-ref %}
{% content-ref url="/pages/z7RcJ7A5x02GbIcHfB7l" %}
[Superfluid](/business/coinshift-walkthrough/coinshift-apps/superfluid)
{% endcontent-ref %}
{% content-ref url="/pages/wU5ey6oVdFML2s1OhPmh" %}
[Transaction Builder](/business/coinshift-walkthrough/coinshift-apps/transaction-builder)
{% endcontent-ref %}
{% hint style="info" %} Coinshift Apps provide a seamless way for users to access dApps directly from a multi-sig interface. The dApps are integrated inside an HTML iframe, and by leveraging the [Safe Apps SDK](https://docs.safe.global/safe-core-aa-sdk/safe-apps), users can interact with the dApp without leaving the multi-sig interface.
{% endhint %}
Together with existing functionality, our latest release brings a superior multi-sig experience:
* **Proposals -** Signers and non-signers easily create and discard off-chain [proposals](https://blog.coinshift.xyz/feature-spotlight-proposals), avoiding blocked transactions in the multi-sig queue
* **Human-Readable Transactions-** Transactions are decoded into a human-readable format, enhancing confidence for Safe Signers during approvals and execution
* **Decoded Financial Data-** decoded data is translated into financial data, making DeFi bookkeeping possible
* **Transaction Context-** Add custom [labels](/business/coinshift-walkthrough/label-management/add-label) and notes for clarity
* **Notifications-** Get transaction updates on Slack and Discord
* **Gas Estimation-** 95% accuracy rate in gas estimation
Learn how to interact with various dApps in the upcoming articles.
# AAVE
How Coinshift users can lend and borrow assets on AAVE.
[Aave](https://aave.com/) is an open-source, non-custodial liquidity protocol allowing individuals to lend or borrow digital assets. By contributing liquidity to the protocol, you have the opportunity to earn annual interest. Additionally, you can take out loans against the existing collateral, enhancing your financial flexibility.
Using AAVE through Coinshift apps can offer Treasury Managers multiple benefits, including:
* **Yield Opportunities-** Treasury managers can earn interest by supplying their idle assets to AAVE's liquidity pool
* **Flexibility-** Treasury Managers can borrow against deposited assets, offering financial flexibility. For example, financial controllers can supply ETH and borrow USDC for business operations and payroll, without losing the potential gains of ETH
* **Secure-** Coinshift's multi-sig ensures secure transactions by requiring approval from multiple Signers, adding an extra layer of protection
We will now outline the process of how Coinshift users can interact with AAVE directly from their Safe using Coinshift Apps.
## Step 1: Go to Apps and connect your Safe with AAVE
Navigate to the **Apps** section on your Coinshift dashboard.
Locate and click on **AAVE** within the Apps section.
A window will show the list of networks the dApp is live on and supported by Coinshift. You can choose a Safe belonging to any network supported by AAVE.
Select the **Safe** you want to use for this operation and click **Open App** to establish a connection between your selected Safe and AAVE.
## Step 2: Create a Transaction (Supply to AAVE)
The interface will show your token options and balances available for deposit.
Click on the **Supply** button next to the token of your choice, and proceed to enter the deposit amount in the designated field.
For this scenario, we will use USDC to deposit into the AAVE protocol.
**Approve Deposit-** Note that, you need to first approve the deposit before supplying the token. This will trigger a proposal, which needs to be approved by the threshold number of Signers before the deposit is made.
After approval, click again on **Supply** and fill in the deposit amount.
To confirm, click on the **Supply USDC** button. This will prompt a proposal on Coinshift.
*Note that, transaction details are presented in a clear, human-readable format (see screenshot), providing essential information for other Safe Signers to review.*
A proposal will be created for the designated Signers to either **Approve** or **Discard** as necessary. Add any necessary notes and labels, if required.
## **Step 3:** Action on Proposal
Signers can take one of three actions on a proposal:
* **Proposal Rejection-** If any Safe Signer rejects the proposal, it will be discarded Off-Chain.
* **Proposal Approval and Execution-** If the number of votes in favor of the proposal meets Safe's required threshold, the transaction will be submitted to the network.
* **On-Chain Transaction Rejection-** Even after a proposal has been approved, it can still be turned down in the on-chain stage. This can happen if a Safe Signer initially approves the proposal, moving it into the on-chain queue, but other Safe Signers decide to use the [**On-Chain Rejection**](/business/coinshift-walkthrough/transaction-management/on-chain-transaction-rejection) option to stop the transaction.
The proposal has received the necessary signatures, as shown in the screenshot below, and the transaction will be submitted to the network.
## Step 4: Verify your deposit in the AAVE dashboard
Once the transaction is confirmed, you can review the details on the AAVE dashboard. Your tokens have now been successfully deposited.
**Note:** You can follow the similar steps outlined previously to either borrow or withdraw your assets from AAVE.
# CoW Swap
How Coinshift users can create limit orders to swap tokens on CoW Swap.
[CoW Swap](https://swap.cow.fi/#/1/swap/WETH/DAI), built on the [CoW Protocol](https://cow.fi/), acts as a decentralised exchange (DEX) aggregator on the Ethereum blockchain. It offers you the best trade prices by leveraging multiple DEXs and Automated Market Makers, effectively enhancing price efficiency and liquidity in the decentralised finance ecosystem.
Key benefits of using CoW Swap via Coinshift apps for a Treasury Manager include the following:
* **Efficiency-** CoW Swap's limit orders enable automatic transactions at desired prices, crucial in a multi-sig process
* **Streamlined Batch Processing-** With batch transaction capabilities, Treasury Managers can approve and swap tokens simultaneously, enhancing operational efficiency and reducing gas costs
* **Risk Management-** Protection against MEV attacks reduces transaction risk
* **Liquidity-** Access to all on-chain liquidity ensures smooth transactions as it allows you to make transactions more easily and quickly due to the access to a large pool of funds
* **Fair Pricing-** Decentralised and competitive order settlement ensures fair prices, beneficial for treasury managers who are responsible for managing and overseeing a company's financial operations
CoW Swap's limit order feature offers an effective solution to control trading prices, especially useful in a multi-sig process like with Coinshift where not all Signers may be available at once, potentially leading to price slippage. Limit orders prevent this by only executing at the user-specified price.
We will now outline the process of how Coinshift users can interact with CoW Swap directly from their Safe using Coinshift Apps.
## Step 1: Go to Apps and connect your Safe with CoW Swap
From your Coinshift dashboard navigate to the **Apps** section.
Locate and click on **CoW Swap** within the Apps section.
A window will appear showing the list of networks the dApp is live on and supported by Coinshift. You can choose a Safe belonging to any network supported by CoW Swap.
Select the **Safe** (highlighted below) you wish to work with and click on **Open App** to establish a connection between your selected Safe and CoW Swap.
## Step 2: Create a Transaction (Limit Order with CoW Swap)
Limit orders allow traders to buy or sell tokens at a predetermined price or better.
In a buy limit order, a trader sets the maximum price they are willing to spend on a particular token. On the other hand, a sell limit order enables a trader to fix the minimum price they are comfortable accepting for their token. This differs from market orders, where tokens are bought or sold at the most competitive price currently available in the market. Refer to this [link](https://swap.cow.fi/#/faq/limit-order) to learn more about the limit orders in CoW Swap.
To place a limit order, navigate to the **Limit** tab.
Then, select the token and the amount you wish to **sell**, as well as the token you wish to **receive**. CoW Swap will provide a calculated return based on your input.
Set a limit price at which you wish to sell and an expiry date for the order.
Note that, you do not need to trigger separate transactions to approve and swap tokens. You can simply perform these two activities in a single transaction.
Click on **Review limit order**.
Finally, check the limit order details i.e. Limit price, Order duration, select the Order type (Partially fillable, Fill, or Kill), and confirm the order by clicking on the **Place limit** **order** button.
This will prompt a proposal on Coinshift. You can add any necessary notes and labels if required.
*Note that, transaction details are presented in a clear, human-readable format (see screenshot), providing essential information for other Safe Signers to review.*
You can click on the link next to the Order status (for ex, Pending) to view the complete status on CoW Explorer without having to visit the dApp.
A proposal will be created for the designated Signers to either **Approve** or **Discard** as necessary.
## **Step 3:** Action on Proposal
Signers can take one of three actions on a proposal:
* **Proposal Rejection-** If any Safe Signer rejects the proposal, it will be discarded Off-Chain.
* **Proposal Approval and Execution-** If the number of votes in favor of the proposal meets Safe's required threshold, the transaction will be submitted to the network.
* **On-Chain Transaction Rejection-** Even after a proposal has been approved, it can still be turned down in the on-chain stage. This can happen if a Safe Signer initially approves the proposal, moving it into the on-chain queue, but other Safe Signers decide to use the [**On-Chain Rejection**](/business/coinshift-walkthrough/transaction-management/on-chain-transaction-rejection) option to stop the transaction.
The proposal has received the necessary signatures, as shown in the screenshot below, and the transaction will be submitted to the network.
## Step 4: **Monitor your Order status**
You can select the Order status link (Order expires as indicated above) to directly track the order's status (Pending, Open, Fulfill, Expired) within the CoW Explorer.
# Hedgey
Customisable on-chain solutions: Token Vesting & Time Locks for DAOs.
Coinshift supports Hedgey's token infrastructure, focusing on its two primary use cases: **Vesting Plans** and **Time Locks**.
By supporting Hedgey, Coinshift equips Treasury Managers with:
* **Seamless Token Management-** Hedgey streamlines time locks and vesting plan creation
* **Customisation-** Offers flexibility in setting cliff dates, post-vesting lockups, transferability, and more, aligning tokens with organisational objectives
* **Safety-** Hedgey non-custodial approach ensures assets are securely held, specifically in audited escrow contracts
* **Efficiency and Autonomy-** Minimised reliance on intermediaries. Set it and forget it. Tokens will be unlocked automatically based on the cliff dates.
{% tabs %}
{% tab title="Create a Vesting Plan" %}
Vesting plans allow on-chain teams to allocate tokens to their members. These plans are fully on-chain, adjustable, and can be tailored to a team's requirements. They are free for both issuers and recipients to manage. The issuer or administrator can incorporate cliffs, backdated start dates, flexible vesting schedules, and even revoke the plan at any time.
Follow the below steps to create a vesting plan:
## Step 1: Go to Apps and connect to Hedgey
Navigate to the **Apps** section on your Coinshift dashboard.
Locate and select **Hedgey** from the list of dApps.
You will be presented with a window displaying the supported networks. Choose a Safe from any of the networks that are compatible with the Hedgey.
Select the Safe for this operation and click **Open App**.
## Step 2: Choose the User type
Your Safe is now connected to the Hedgey interface.
Select the **User Type**. Assuming you're the **Token Manager** and want to create and manage vesting plans for your team members.
Click on **Get Started** for the Token Manager option.
In the next window, click on the **Vesting Plans** option.
## Step 3: Create a Vesting Plan
If you're an admin, you'll see all vesting plans set up by you in the **Issued Vesting Plans** section.
Team members can check plans received by their token manager in the **Received Vesting Plans** section.
To create a new vesting plan, click on the **Create a Vesting Plan** button.
There are a few steps to set up a vesting plan:
### Step 3. a Vesting Plan setup
To set up a vesting plan, enter/select the following details:
* Select the token or paste the token contract address
* Unlock frequency (linear, periodic, or single)
* For **Linear unlock frequency** choose a vesting term in years or in months. Add a cliff duration (if any) or add "0" for no cliff
* For **Periodic unlock frequency**, select the unlock period schedule (monthly, yearly, or custom) first, and then choose a vesting term in years or in months. Add a cliff duration (if any) or add "0" for no cliff
### Step 3. b Set Up Administration
By default, the application uses the linked Safe address as the Vesting Admin address. If needed, you can select the **Change Vesting admin address** option to assign a different address as the Vesting admin.
This Vesting admin has the authority to stop the vesting plan at any point before it's completed. If the plan is stopped early, any tokens not yet vested will go to the Vesting admin's address.
## Step 4: Add recipients
Enter the recipient's address and amount of tokens they will receive. Select a vesting start date. The vesting start date can be backdated or a future date.
Use the **Add** option to add multiple recipients to the vesting plan or the **Import from CSV** option to upload the recipient's details in bulk via a CSV file.
## Step 5: Review and create a Plan
After entering all details, click on the **Review, Approve and Distribute** buttons. Review the vesting details, and confirm if you are satisfied.
This action will generate a proposal within Coinshift. Attach any relevant notes or labels and then select **Create Proposal**.
*Note that, transaction details are presented in a clear, human-readable format (see screenshot), providing essential information for other Safe Signers to review.*
A proposal will be created for the designated Signers to either **Approve** or **Discard** as necessary.
## **Step 6:** Action on Proposal
Signers can take one of three actions on a proposal:
* **Proposal Rejection-** If any Safe Signer rejects the proposal, it will be discarded Off-Chain.
* **Proposal Approval and Execution-** If the number of votes in favor of the proposal meets Safe's required threshold, the transaction will be submitted to the network.
* **On-Chain Transaction Rejection-** Even after a proposal has been approved, it can still be turned down in the on-chain stage. This can happen if a Safe Signer initially approves the proposal, moving it into the on-chain queue, but other Safe Signers decide to use the [**On-Chain Rejection**](/business/coinshift-walkthrough/transaction-management/on-chain-transaction-rejection) option to stop the transaction.
The proposal has received the necessary signatures, as shown in the screenshot below, and the transaction will be submitted to the network.
Wait for the transaction to complete. Once successfully completed, you can reconnect to the Hedgey dApp via your Coinshift dashboard to confirm the establishment of your new vesting plan.
Select **View details** appearing in the above screenshot for a comprehensive look at vesting recipients and other relevant details.
Use the **View** option next to a specific recipient's name to inspect their vesting schedule. An option to **Revoke** the vesting plan linked to a recipient is also available for your convenience.
{% endtab %}
{% tab title="Create a Time Lock" %}
Time Locks enable token managers to allocate tokens to their community with specified lockup periods. Each recipient can be assigned unique lockup durations, voting rights, and other tailored features. The tokens reside in a vesting contract, while recipients obtain an NFT symbolising their token ownership. These NFTs, redeemable after their respective unlock dates, can be customised upon request.
Follow the below steps to create a time lock:
## Step 1: Go to Apps and connect to Hedgey
Navigate to the **Apps** section on your Coinshift dashboard.
Locate and select **Hedgey** from the list of dApps.
You will be presented with a window displaying the supported networks. Choose a Safe from any of the networks that are compatible with the Hedgey.
Select the Safe for this operation and click **Open App**.
## Step 2: Choose the User type
Your Safe is now connected to the Hedgey interface.
Select the **User Type**. Assuming you're the **Token Manager** and want to create and manage time lock for your team members.
Click on **Get Started** for the Token Manager option.
In the next window, click on the **Time Locks** option.
## Step 3: Initiate a New Time Lock
Check the **Received distributions** section to see the list of NFTs that you have received from your token manager.
To create a new time lock, click on the **Create Time Lock** button.
There are a few steps to set up a time lock:
### Step 3. a: Time Lock set up
To create a time lock fill in the following details:
* **Token-** Either select the desired token from the list or input the token contract address manually
* **Recipients**
* For a single recipient, input the address directly
* To add multiple recipients, click the **Add** button for each additional one
* For bulk additions, utilise the **Populate from CSV** option
* **Amount of tokens-** Specify the amount to be allocated
* **Unlock date-** Choose the date when the tokens will become accessible
## Step 3: Review Distribution details
Review all entered details. If all details are accurate, confirm the transaction.
This action will generate a proposal within Coinshift. Attach any relevant notes or labels and then select **Create Proposal**.
*Note that, transaction details are presented in a clear, human-readable format (see screenshot), providing essential information for other Safe Signers to review.*
A proposal will be created for the designated Signers to either **Approve** or **Discard** as necessary.
## **Step 4:** Action on Proposal
Signers can take one of three actions on a proposal:
* **Proposal Rejection-** If any Safe Signer rejects the proposal, it will be discarded Off-Chain.
* **Proposal Approval and Execution-** If the number of votes in favor of the proposal meets Safe's required threshold, the transaction will be submitted to the network.
* **On-Chain Transaction Rejection-** Even after a proposal has been approved, it can still be turned down in the on-chain stage. This can happen if a Safe Signer initially approves the proposal, moving it into the on-chain queue, but other Safe Signers decide to use the [**On-Chain Rejection**](/business/coinshift-walkthrough/transaction-management/on-chain-transaction-rejection) option to stop the transaction.
The proposal has received the necessary signatures, as shown in the screenshot below, and the transaction will be submitted to the network.
Wait for the transaction to complete. Upon successful completion, recipients can connect to the Hedgey dApp to view their distributions. Refer to the **Next unlock** field to determine the date the NFT will become available for claim.
For viewing the received NFT, select either **View collection** or **View NFT** option appearing on your dashboard.
{% endtab %}
{% endtabs %}
{% hint style="info" %}
*Please contact our customer support on* [*Twitter*](https://twitter.com/0xCoinshift) *or* [*Discord*](https://discord.com/invite/coinshift) *if you are experiencing any issues. We will reply to your inquiry as soon as possible.*
{% endhint %}
# 1inch
How Coinshift users can swap tokens on 1inch.
[1inch](https://app.1inch.io/) network aggregates multiple DeFi sources, offering you centralised access to pooled funds from different platforms. The dApp ensures secure, timely, and efficient operations. It offers competitive token swap rates on various DEXs and offers the facility to determine optimal swap routes among liquidity providers.
Benefits for Treasury Managers accessing 1inch via Coinshift:
* **Enhanced Liquidity-** With access to deep aggregated liquidity pools, ensuring smooth transactions even for large orders
* **Optimised swap rates-** Gain competitive token swap rates by leveraging 1inch's capability to scan various DEXs
* **Strategic trading paths-** Utilise dApp's expertise in identifying the most efficient swap routes across varied liquidity sources
* **Safeguarded operations-** 1inch's emphasis on security ensures swift yet secure transactions
* **Seamless integration-** Directly access 1inch's features through the Coinshift dashboard, simplifying DeFi interactions without the need for multiple platforms
We will now outline the process of how you can interact with 1inch directly from your Safe using Coinshift Apps.
## Step 1: Go to Apps and connect to 1inch
Navigate to the **Apps** section on your Coinshift dashboard.
Locate and select **1inch** from the list of apps.
You will be presented with a window displaying the supported networks. Choose a Safe from any of the networks that are compatible with the 1inch and click **Open App**.
## Step 2: Create a Transaction (Swap with 1inch)
{% hint style="info" %} Currently, Coinshift does not support 1inch limit orders.
{% endhint %}
To swap tokens, navigate to the **Swap** tab.
Choose the source token you want to swap and specify the amount. Select the token you wish to receive in exchange. The application will calculate the amount of the desired token you will receive after the swap.
**Optional:** Select a checkbox and input an alternative wallet address if you prefer to have the newly swapped tokens sent to an address different from your designated Safe address.
Once you've entered these details, click on **Swap**.
The subsequent window will display the swap details. Review these details carefully, and click on **Confirm swap**.
This action will generate a proposal within Coinshift. Attach any relevant notes or labels and then select **Create Proposal**.
*Note that, transaction details are presented in a clear, human-readable format (see screenshot), providing essential information for other Safe Signers to review.*
A proposal will be created for the designated Signers to either **Approve** or **Discard** as necessary.
## **Step 3:** Action on Proposal
Signers can take one of three actions on a proposal:
* **Proposal Rejection-** If any Safe Signer rejects the proposal, it will be discarded Off-Chain.
* **Proposal Approval and Execution-** If the number of votes in favor of the proposal meets Safe's required threshold, the transaction will be submitted to the network.
* **On-Chain Transaction Rejection-** Even after a proposal has been approved, it can still be turned down in the on-chain stage. This can happen if a Safe Signer initially approves the proposal, moving it into the on-chain queue, but other Safe Signers decide to use the [**On-Chain Rejection**](/business/coinshift-walkthrough/transaction-management/on-chain-transaction-rejection) option to stop the transaction.
The proposal has received the necessary signatures, as shown in the screenshot below, and the transaction will be submitted to the network.
## Step 4: Verify your swap in the Coinshift dashboard
Once the transaction is successfully completed, the newly swapped tokens will be visible in your account. You can verify this by checking the **Portfolio** section of your Coinshift dashboard.
# LI.FI
How Coinshift users can swap & bridge tokens on LI.FI.
[LI.FI](https://li.fi/) is a bridge aggregation protocol that simplifies cross-chain interactions. By integrating with DEX aggregators, LI.FI supports any-2-any swaps, aiding in asset transfers across different blockchains.
Below are some potential advantages for a Treasury Manager using LI.FI via Coinshift apps:
* **Ease of Access-** LI.FI on Coinshift allows treasury managers to bridge assets from one chain to another in a single transaction, saving time and gas fees
* **Streamlined Batch Processing-** With batch transaction capabilities, treasury managers can approve and swap tokens simultaneously, enhancing operational efficiency and reducing gas costs
* **Efficiency-** Move and swap liquidity across all chains using the most efficient and cost-effective route for cross-chain transactions
* **Security-** The approval process adds an extra layer of security by requiring threshold signatures
* **Flexibility-** Managers can manage off-chain proposals without incurring network fees
* **Control-** Coinshift allows for real-time tracking of proposals and transactions
We will now outline the process of how Coinshift users can interact with LI.FI directly from their Safe using Coinshift Apps.
## Step 1: Go to Apps and connect your Safe with LI.FI
Navigate to the **Apps** section on your Coinshift dashboard.
Locate and click on **LI.FI** within the Apps section.
A window will appear showing the list of networks the dApp is live on and supported by Coinshift. You can choose a Safe belonging to any network supported by LI.FI.
Select the **Safe** (highlighted below) you wish to work with and click on **Open App** to establish a connection between your selected Safe and LI.FI.
## Step 2: Create a Transaction (Swap and Bridge with LI.FI)
Within Coinshift, transactions begin as proposals, providing flexibility in approvals. Please note that non-signers can create proposals, but only Signers can approve them.
To bridge the token, navigate to the **Exchange** tab.
Select the **source network** and the **token** that you wish to swap. Next, select the **destination network** and **token** that you wish to receive.
Enter the amount of the token to swap, and fill in the wallet address in the **Send to a different wallet** field.
{% hint style="warning" %} Avoid bridging funds to the same Safe address on a different network. It's rare to have identical Safe addresses across networks, and this mistake could result in a permanent loss of your funds.
{% endhint %}
Once you enter the above details, the application immediately displays the amount you will get along with the other bridging details i.e. the exchange path, approximate time, network fee, etc.
Verify the details, and click on **Review bridge**.
Finally, initiate the process by clicking on the **Start bridging** button.
This will trigger the process of creating a proposal on Coinshift.
*Note that, transaction details are presented in a clear, human-readable format (see screenshot), providing essential information for other Safe Signers to review.*
Add any relevant notes and labels to the proposal, and finally, hit the **Create Proposal** button to create an off-chain proposal for your transaction.
Following the creation of a proposal, Safe Signers have the authority to **Approve** or **Discard** the proposal as necessary.
## **Step 3:** Action on Proposal
Signers can take one of three actions on a proposal:
* **Proposal Rejection-** If any Safe Signer rejects the proposal, it will be discarded Off-Chain.
* **Proposal Approval and Execution-** If the number of votes in favor of the proposal meets Safe's required threshold, the transaction will be submitted to the network.
* **On-Chain Transaction Rejection-** Even after a proposal has been approved, it can still be turned down in the on-chain stage. This can happen if a Safe Signer initially approves the proposal, moving it into the on-chain queue, but other Safe Signers decide to use the [**On-Chain Rejection**](/business/coinshift-walkthrough/transaction-management/on-chain-transaction-rejection) option to stop the transaction.
{% hint style="info" %} You are advised to execute the transaction within 5 minutes after the first approval to avoid transaction failure.
{% endhint %}
The proposal has received the necessary signatures, as shown in the screenshot below, and the transaction will be submitted to the network.
Wait for the transaction to complete.
Congratulations, you've successfully executed a swap & bridge transaction in LI.FI via your Coinshift dashboard!
Finally, head over to the desired wallet address and network to see the new token.
# ParaSwap
How Coinshift users can swap tokens on ParaSwap.
[ParaSwap](https://www.paraswap.io/), a decentralised exchange aggregator, offers a simple and secure method to exchange Ethereum-based tokens by consolidating liquidity from numerous decentralised platforms into one unified interface.
Accessing ParaSwap via Coinshift apps offers several benefits to a Treasury Manager, including
* **Best Trading Rates-** ParaSwap provides the best trading rates by sourcing liquidity from various decentralised exchanges (DEXs). Treasury managers can use it to compare the prices offered by the leading DEXs
* **Streamlined Batch Processing-** With batch transaction capabilities, treasury managers can approve and swap tokens simultaneously, enhancing operational efficiency and reducing gas costs
* **High Liquidity and Diversification-** Access to multiple DEXs ensures high liquidity, enabling large trades without drastically impacting market prices. Managers can exchange their Safe assets to diversify their portfolios
* **Reduced Slippage-** By routing trades through the DEX that provides the best rate, ParaSwap minimises the price slippage usually associated with larger trades
* **Risk Mitigation-** Diversifying transactions across different DEXs minimises dependency on any single exchange, reducing liquidity risk
* **Operational Efficiency-** Coinshift's single interface allows treasury managers to manage multiple crypto assets across different protocols saves time and simplifies operations
However, note that since Coinshift offers multi-sig, there may be instances where not all Signers are available when executing a swap. This can potentially lead to slippage issues, where the price at execution differs from the expected price due to a delay in transaction confirmation. Therefore, timing and coordination among Signers are crucial in this setup.
{% hint style="info" %} You are advised to execute the transaction within 5 minutes after the first approval to avoid transaction failure.
{% endhint %}
We will now outline the process of how Coinshift users can interact with ParaSwap directly from their Safe using Coinshift Apps.
## Step 1: Go to Apps and connect your Safe with ParaSwap
Navigate to the **Apps** section on your Coinshift dashboard.
Locate and click on **ParaSwap** within the Apps section.
A window will appear showing the list of networks the dApp is live on and supported by Coinshift. You can choose a Safe belonging to any network supported by ParaSwap.
Select the **Safe** (highlighted below) you wish to work with and click on **Open App** to establish a connection between your selected Safe and ParaSwap.
## Step 2: Create a Transaction (Swap with ParaSwap)
Within Coinshift, transactions begin as proposals, providing flexibility in approvals. Please note that non-signers can create proposals, but only Signers can approve them.
To execute a swap, navigate to the **Swap** tab.
Then, select the **token** and the **amount** you wish to **pay**, as well as the token you wish to **receive**. ParaSwap will provide a **calculated return** based on your input.
Check the prices offered by different exchanges displayed on the right side of the interface.
Upon finalising the details, click on **Review Trade**.
Next, check the swap summary and confirm the process by clicking on **Confirm Trade**.
This will trigger the process of creating a proposal on Coinshift.
*Note that, transaction details are presented in a clear, human-readable format (see screenshot), providing essential information for other Safe Signers to review.*
Add any relevant notes and labels and finally, hit the **Create Proposal** button to create an off-chain proposal for your transaction.
Following the creation of a proposal, Safe Signers have the authority to **Approve** or **Discard** the proposal as necessary.
## **Step 3:** Action on Proposal
Signers can take one of three actions on a proposal:
* **Proposal Rejection-** If any Safe Signer rejects the proposal, it will be discarded Off-Chain.
* **Proposal Approval and Execution-** If the number of votes in favor of the proposal meets Safe's required threshold, the transaction will be submitted to the network.
* **On-Chain Transaction Rejection-** Even after a proposal has been approved, it can still be turned down in the on-chain stage. This can happen if a Safe Signer initially approves the proposal, moving it into the on-chain queue, but other Safe Signers decide to use the [**On-Chain Rejection**](/business/coinshift-walkthrough/transaction-management/on-chain-transaction-rejection) option to stop the transaction.
The proposal has received the necessary signatures, as shown in the screenshot below, and the transaction will be submitted to the network.
Wait for the transaction to complete.
Congratulations, you've successfully executed a swap transaction in ParaSwap via your Coinshift dashboard!
Finally, head over to the **Portfolio** section of your dashboard to see the newly swapped token.
# Request Finance
How Coinshift users can pay invoices raised by employees in a single click by using Request Finance.
[Request Finance](https://www.request.finance/) enables Companies, DAOs, and Freelancers to manage crypto invoices, salaries, and expenses quickly and compliantly. Payments can be in local currencies and processed in crypto.
Below are the potential benefits for Financial controllers by accessing the Request Finance app from their Coinshift dashboard:
* **Real-Time Tracking-** Monitor crypto invoices, salaries, and expenses in real-time for immediate response
* **Efficient Batch Processing-** The ability to approve and pay multiple invoices simultaneously, enhancing operational efficiency and reducing gas costs
* **Flexibility in Payments and Invoicing-** Options for both payments and invoices, catering to diverse business needs
* **Enhanced Collaboration-** Features like proposal creation and multi-signature facilitate teamwork and oversight among team members or departments
We will now outline the process of how you can interact with Request Finance directly from their Safe using Coinshift Apps.
## Step 1: Go to Apps and connect your Safe with Request Finance
Navigate to the **Apps** section on your Coinshift dashboard.
Locate and click on **Request Finance** within the Apps section.
A window will appear showing the list of networks the dApp is live on and supported by Coinshift. You can choose a Safe belonging to any network supported by Request Finance.
Select the **Safe** (highlighted below) you wish to work with and click on **Open App** to establish a connection between your selected Safe and Request Finance.
## Step 2: Log in to Request Dashboard and Access Bills
Log in to your existing Request Finance account. Next, navigate to the **Pay-> Bills** section to find the list of all incoming invoices from vendors or contractors.
Click on **Awaiting payment** to expand and review the invoice details. If the details are correct, you can proceed further.
## Step 3: Batch Approve Invoices
You can perform batch payments, and pay multiple invoices at once in different tokens. However, before proceeding to batch payments, the invoices should be approved.
To do so, navigate to **Batch Action -> Batch Approve** (see the above screenshot). The below screen will appear.
Select the checkboxes against the awaiting payment invoices that you would like to approve, and click the **Approve Invoices** button.
## Step 4: Initiate Batch Payment
You can now see the approved invoices on their dashboard. Click on **Batch Payment**.
The application will allow you to select the invoices that you would to pay now. Once done, finally, click on the **Pay now** button to initiate the payment process.
## Step 5: Connect Safe and Approve Payment
Select your desired Safe account that you wish to use to pay, and approve the payment by clicking on the **Pay** **now** button.
This will trigger the process of creating a proposal on Coinshift.
*Note that, transaction details are presented in a clear, human-readable format (see screenshot), providing essential information for other Safe Signers to review.*
Hit the **Create Proposal** button to create an off-chain proposal for your transaction.
Following the creation of a proposal, Safe Signers have the authority to **Approve** or **Discard** the proposal as necessary. Add any relevant notes and labels if required.
## **Step 6:** Action on Proposal
Signers can take one of three actions on a proposal:
* **Proposal Rejection-** If any Safe Signer rejects the proposal, it will be discarded Off-Chain.
* **Proposal Approval and Execution-** If the number of votes in favor of the proposal meets Safe's required threshold, the transaction will be submitted to the network.
* **On-Chain Transaction Rejection-** Even after a proposal has been approved, it can still be turned down in the on-chain stage. This can happen if a Safe Signer initially approves the proposal, moving it into the on-chain queue, but other Safe Signers decide to use the [**On-Chain Rejection**](/business/coinshift-walkthrough/transaction-management/on-chain-transaction-rejection) option to stop the transaction.
The proposal has received the necessary signatures, as shown in the screenshot below, and the transaction will be submitted to the network.
## Step 7: Verify Payment
Navigate to your Request Finance account via the Coinshift Apps to verify the payment status of the invoice.
Congratulations, you have successfully paid an invoice via your Coinshift dashboard by using the Request Finance app.
All recipients will be notified via email upon successful processing of the invoice.
# Superfluid
Pay recipients by the second with real-time money streams. Change the way you interact with money.
[Superfluid](https://www.superfluid.finance/) is an asset streaming protocol offering subscriptions, salaries, vesting, and rewards to DAOs and crypto-native businesses across the globe. Through the Stream payout service, you can set up, view, modify, and manage multiple real-time payment streams within your Safe, automating payroll processes and cutting down on manual data entry. Once initiated, payment streams remain uninterrupted until you terminate it. Learn more [here](/business/coinshift-walkthrough/coinshift-apps/superfluid/stream-payout).
Using Superfluid via Coinshift apps presents Treasury Managers with several advantages:
* **Composability & versatility-** Leverage the composability of Super tokens built on ERC20 primitives, suitable for diverse financial strategies like borrowing, staking, and more
* **Enhanced capital efficiency-** Real-time netting ensures optimal fund utilisation, with the capability to promptly channel ongoing streams to preferred outlets
* **Protection from MEV-** Superfluid's inherent design offers resistance against Miner Extractable Value (MEV), safeguarding substantial transactions from MEV-associated risks
* **Scalable solutions-** The platform is designed for scalability, facilitating treasury managers in managing an escalating transaction volume seamlessly
* **Cost efficiency-** Transactions happen in real-time for each block without any gas fees, reducing delays and extra costs
Refer to the articles below to learn how to access and use the Superfluid dApp from your Coinshift dashboard.
{% tabs %}
{% tab title="Wrap Tokens" %}
To begin utilising streaming features in Superfluid, it's essential to convert your Safe existing tokens into Super tokens.
Follow the below steps to wrap your tokens.
## Step 1: Go to Apps and connect your Safe with Superfluid
Navigate to the **Apps** section on your Coinshift dashboard.
Locate and click on **Superfluid** within the Apps section.
A window will show the list of networks the dApp is live on and supported by Coinshift. You can choose a Safe belonging to any network supported by Superfluid.
Select the Safe you want to use for this operation and click **Open App** to establish a connection between your selected Safe and Superfluid.
## Step 2: Access Wrap/ Unwrap
Once your Safe is connected to the Superfluid dApp, you have the option to wrap your tokens.
To do this, either click on the **Wrap** button displayed on your dashboard or directly navigate to the **Wrap/Unwrap** section.
## Step 3: Convert tokens into Super tokens
Click on the dropdown menu and choose the token you wish to wrap.
Enter the quantity of the token you intend to wrap.
**Approve Wrap-** To wrap tokens, you must initially authorise the Superfluid protocol to execute the wrapping. This action initiates a proposal. A requisite number of Signers, as determined by the threshold, must approve this proposal before the wrap action is executed.
After approvals, click on the **Wrap** button to finalise the wrapping process.
The wrapping process operates on a 1:1 ratio, meaning for every token you wrap, you will receive an equivalent amount in Super tokens.
This will prompt a proposal on Coinshift. Add any necessary notes and labels, if required.
*Note that, transaction details are presented in a clear, human-readable format (see screenshot), providing essential information for other Safe Signers to review.*
A proposal will be created for the designated Signers to either **Approve** or **Discard** as necessary.
Note that you can discard proposals without needing to pay any network fees.
## Step 4: Action on Proposal
Signers can take one of three actions on a proposal:
* **Proposal Rejection-** If any Safe Signer rejects the proposal, it will be discarded Off-Chain.
* **Proposal Approval and Execution-** If the number of votes in favor of the proposal meets Safe's required threshold, the transaction will be submitted to the network.
* **On-Chain Transaction Rejection-** Even after a proposal has been approved, it can still be turned down in the on-chain stage. This can happen if a Safe Signer initially approves the proposal, moving it into the on-chain queue, but other Safe Signers decide to use the [**On-Chain Rejection**](/business/coinshift-walkthrough/transaction-management/on-chain-transaction-rejection) option to stop the transaction.
The proposal has received the necessary signatures, as shown in the screenshot below, and the transaction will be submitted to the network.
## Step 5: Verify your deposit in the Superfluid dashboard
Once the transaction is successfully completed, an equivalent amount of wrapped tokens (e.g., USDCx in this case) will be credited to your account. You can verify this by checking the **Portfolio** section or by connecting the Safe directly to the Superfluid dashboard.
{% endtab %}
{% tab title="Unwrap Tokens" %}
Stream Recipients will receive USDCx, a wrapped token. To convert (or unwrap) USDCx back to USDC, follow these steps:
Connect your Safe by following the steps mentioned in the **Wrap Tokens** tab and accessing the Superfluid dashboard.
If you are not a registered user of Coinshift, you may connect your wallet containing the wrapped tokens directly to the Superfluid dApp to facilitate the unwrapping process.
## Step 1: Unwrap Token
Navigate to the **Wrap/Unwrap** section.
In the **Unwrap** tab, choose the Super token (e.g., USDCx) from the dropdown menu that you'd like to unwrap.
Enter the desired amount to unwrap and click on **Unwrap** to proceed.
This will prompt a proposal on Coinshift. Add any necessary notes and labels, if required.
*Note that, transaction details are presented in a clear, human-readable format (see screenshot), providing essential information for other Safe Signers to review.*
A proposal will be created for the designated Signers to either **Approve** or **Discard** as necessary.
Note that you can discard proposals without needing to pay any network fees.
## Step 2: Action on Proposal
Signers can take one of three actions on a proposal:
* **Proposal Rejection-** If any Safe Signer rejects the proposal, it will be discarded Off-Chain.
* **Proposal Approval and Execution-** If the number of votes in favor of the proposal meets Safe's required threshold, the transaction will be submitted to the network.
* **On-Chain Transaction Rejection-** Even after a proposal has been approved, it can still be turned down in the on-chain stage. This can happen if a Safe Signer initially approves the proposal, moving it into the on-chain queue, but other Safe Signers decide to use the [**On-Chain Rejection**](/business/coinshift-walkthrough/transaction-management/on-chain-transaction-rejection) option to stop the transaction.
The proposal has received the necessary signatures, as shown in the screenshot below, and the transaction will be submitted to the network.
## Step 3: Verify tokens on the Superfluid dashboard
Once the transaction is confirmed, revisit the **Portfolio** section on your Coinshift dashboard or connect to the Superfluid dApp to verify the corresponding amount of ERC-20 tokens.
{% endtab %}
{% tab title="Send Stream" %}
Easily set up one or multiple payment streams, allowing you to pay recipients on a per-second basis.
Follow the below steps to set up your first money stream.
Connect your Safe by following the steps mentioned in the **Wrap Tokens** tab and accessing the Superfluid dashboard.
## Step 1: Create a Stream
Navigate to the **Send Stream** section. The below screen will appear.
To configure your stream, provide the below details:
* Receiver Wallet Address
* Super Token
* Amount
* Flow Rate (/second, /minute, /hour, /day, /week, /month, /year)
Ensure that the Amount field contains a sufficient value when setting the streaming rate as Yearly or Monthly. An extremely low amount per year or month rounding off to 0 USDC/sec may lead to transaction failure.
Once you've inputted the details, the application will display a summary of the streaming parameters. Ensure all information is accurate and then initiate the stream by pressing the **Send Stream** button.
This will prompt a proposal on Coinshift. Add any necessary notes and labels, if required.
*Note that, transaction details are presented in a clear, human-readable format (see screenshot), providing essential information for other Safe Signers to review.*
Streams operate on a per-second basis, with a month representing 30.4 days and a year accounting for 365 days*.*
A proposal will be created for the designated Signers to either **Approve** or **Discard** as necessary.
Note that you can discard proposals without needing to pay any network fees.
## Step 2: Action on Proposal
Signers can take one of three actions on a proposal:
* **Proposal Rejection-** If any Safe Signer rejects the proposal, it will be discarded Off-Chain.
* **Proposal Approval and Execution-** If the number of votes in favor of the proposal meets Safe's required threshold, the transaction will be submitted to the network.
* **On-Chain Transaction Rejection-** Even after a proposal has been approved, it can still be turned down in the on-chain stage. This can happen if a Safe Signer initially approves the proposal, moving it into the on-chain queue, but other Safe Signers decide to use the [**On-Chain Rejection**](/business/coinshift-walkthrough/transaction-management/on-chain-transaction-rejection) option to stop the transaction.
The proposal has received the necessary signatures, as shown in the screenshot below, and the transaction will be submitted to the network.
## Step 3: Manage Stream via the Superfluid dashboard
After receiving transaction confirmation, reconnect to the Superfluid dApp and navigate to the dashboard. The initiated stream will be displayed within the interface.
{% endtab %}
{% tab title="Modify a Stream" %}
There might be instances where adjustments to a current stream are required. The Superfluid platform provides the **Modify Stream** feature to facilitate changes in Amount and/or Rate for any active stream.
Follow these steps to modify an existing stream.
Connect your Safe by following the steps mentioned in the **Wrap Tokens** tab and accessing the Superfluid dashboard.
## Step 1: Modify Stream
Within the Dashboard, view the list of active streams associated with your connected Safe.
Identify and select the stream you intend to adjust. Click on the **edit** icon corresponding to that stream (as indicated in the provided screenshot).
The stream configuration window will appear. Here, you can modify fields such as Amount and Flow Rate. For the purpose of this guide, we'll update the Amount field.
After making the necessary alterations, confirm the changes by clicking the **Modify Stream** button.
This will prompt a proposal on Coinshift. Add any necessary notes and labels, if required.
*Note that, transaction details are presented in a clear, human-readable format (see screenshot), providing essential information for other Safe Signers to review.*
A proposal will be created for the designated Signers to either **Approve** or **Discard** as necessary.
Note that you can discard proposals without needing to pay any network fees.
## Step 2: Action on Proposal
Signers can take one of three actions on a proposal:
* **Proposal Rejection-** If any Safe Signer rejects the proposal, it will be discarded Off-Chain.
* **Proposal Approval and Execution-** If the number of votes in favor of the proposal meets Safe's required threshold, the transaction will be submitted to the network.
* **On-Chain Transaction Rejection-** Even after a proposal has been approved, it can still be turned down in the on-chain stage. This can happen if a Safe Signer initially approves the proposal, moving it into the on-chain queue, but other Safe Signers decide to use the [**On-Chain Rejection**](/business/coinshift-walkthrough/transaction-management/on-chain-transaction-rejection) option to stop the transaction.
The proposal has received the necessary signatures, as shown in the screenshot below, and the transaction will be submitted to the network.
## Step 3: Confirm Stream adjustments via the Superfluid dashboard
Upon receiving transaction confirmation, please reconnect to the Superfluid dApp and navigate to the dashboard. There, you'll be able to validate the alterations made to the stream within the interface.
{% endtab %}
{% tab title="Cancel a Stream" %}
In response to changing financial or operational scenarios, you might decide to pause or end a stream.
Follow these steps to cancel an existing stream.
Connect your Safe by following the steps given in the **Wrap Tokens** tab and accessing the Superfluid dashboard.
## Step 1: Cancel Stream
Within the Dashboard, you'll be presented with a list of active streams associated with your connected Safe.
Locate and select the stream you aim to terminate. Next, click on the **Stop** icon corresponding to that stream (highlighted in the below screenshot).
This will prompt a proposal on Coinshift. Add any necessary notes and labels, if required.
*Note that, transaction details are presented in a clear, human-readable format (see screenshot), providing essential information for other Safe Signers to review.*
A proposal will be created for the designated Signers to either **Approve** or **Discard** as necessary.
Note that you can discard proposals without needing to pay any network fees.
## Step 2: Action on Proposal
Signers can take one of three actions on a proposal:
* **Proposal Rejection-** If any Safe Signer rejects the proposal, it will be discarded Off-Chain.
* **Proposal Approval and Execution-** If the number of votes in favor of the proposal meets Safe's required threshold, the transaction will be submitted to the network.
* **On-Chain Transaction Rejection-** Even after a proposal has been approved, it can still be turned down in the on-chain stage. This can happen if a Safe Signer initially approves the proposal, moving it into the on-chain queue, but other Safe Signers decide to use the [**On-Chain Rejection**](/business/coinshift-walkthrough/transaction-management/on-chain-transaction-rejection) option to stop the transaction.
The proposal has received the necessary signatures, as shown in the screenshot below, and the transaction will be submitted to the network.
## Step 3: Confirm Stream termination via the Superfluid dashboard
After transaction confirmation, please revisit the Superfluid dApp and navigate to the dashboard. The interface will display the current status of the stream for your verification.
{% endtab %}
{% endtabs %}
# Stream Payout
Put payroll on autopilot and delight contributors with money streams that pay by the second.
## What is Streaming?
**Money streaming** is the concept of real-time continuous money flows. It was coined by *Andreas Antonopoulos* in 2017 (watch his talk [here](https://www.youtube.com/watch?t=1050\&v=gF_ZQ_eijPs\&feature=youtu.be)). Just as streaming changed how we interact and experience music and videos, so too will streaming forever change how we interact with money.
For example, why are salaries paid in monthly intervals? This is because micro-payments by the second weren't possible in the early banking system. With money streaming, contributors and employees can earn **by the second** as they work.
When using a `continuous stream` instead of a `discrete transaction`, a new era of highly capital-efficient yet composable financial primitives and tools is ushered in.
## Streaming for Payroll
Put payroll on autopilot. No more chasing signers to make payroll on time. Reference: Superfluid
## Benefits of Streaming for Organisations
**1) Automate Payroll Management**
An entire year’s payroll can be automated in 2 minutes. Simply create one transaction to set the amount you'd like to pay to each contributor and you're done! No more monthly administrative pain of chasing signers to make payroll on time. Modify or cancel individual streams at any time.
**2) Retain Better Talent**
Differentiate yourself against competitors by offering salary streaming as an option to regular contributors. Contributors get paid by the second and can use the funds as soon as they receive them.
**3) Scalable Payroll**
Run 1000s of streams concurrently. Modify or cancel streams at any time.
**4) Asset diversification**
Organisations can DCA from stablecoins into ETH every second, to maximise the upside potential of ETH in a bull market and vice versa.
## **Benefits of salary streaming for contributors:**
**1) Earn as you work**
Instead of waiting until month-end to be paid, contributors earn money in real time as they work.
**2) Capital Efficient Investing**
For example, employees could dollar cost average (DCA) 10% of their streaming DAI salaries into ETH with one simple ongoing stream. No more weekly or monthly reminders to buy ETH.
{% embed url="" %}
Learn more [here.](https://medium.com/superfluid-blog/coinshift-streamlines-crypto-payroll-with-superfluid-money-streams-20d5cda6d763)
## Use Cases
Money streams are a primitive with limitless use cases. Almost any financial flow can be automated in a trustless manner. A few notable use cases are:
* Payroll
* Vesting contracts
* Royalties
* Automated dollar cost averaging investing
* Subscriptions
* MEV resistant transfers
# Transaction Builder
Simplify your DeFi moves, interact & strategise with smart contracts in a single transaction.
The Transaction Builder is an application designed for batched transactions. With it, you can group multiple actions, from basic token transfers to more advanced smart contract tasks, into one single transaction. This bundled transaction can then be confirmed and executed at once. The application provides a clear visual guide, helping you through the stages of adding, editing, reviewing, and finally submitting your combined tasks.
Using Transaction Builder through Coinshift apps can offer Treasury Managers multiple benefits, including
* **Simplicity & Efficiency-** Bundling several operations into a single transaction, saving time, and reducing complexity
* **Visual Guidance-** An intuitive interface ensures users navigate through the batch creation process effortlessly and with clarity
* **Diverse Use Cases-** Capable of handling a range of transaction types, including smart contract operations
* **Enhanced DEX Interaction-** Streamline processes within decentralised exchanges by converting two-step tasks into a single efficient action
* **Cost Efficiency-** By minimising the number of transactions, potentially reduce associated gas fees and other costs
Follow the below steps to create batch transactions using the Transaction Builder.
## Step 1: Go to Apps and connect to Transaction Builder
Navigate to the **Apps** section on your Coinshift dashboard.
Locate and select **Transaction Builder** from the list of apps.
You will be presented with a window displaying the supported networks. Choose a Safe from any of the networks that are compatible with the Transaction Builder.
Select the Safe for this operation and click **Open App**.
## Step 2: Create a batch transaction
You will be redirected to the main interface of the Transaction Builder.
{% hint style="warning" %} Using the transaction builder requires technical expertise. Ensure you possess sufficient knowledge before initiating or editing any transaction.
{% endhint %}
For this procedure, we have prepared a JSON file embedded with hex data to execute two batched transactions.
* Swap tokens on ParaSwap
* Supply tokens on AAVE
Prepare a similar file that supports your requirement.
Select the **choose a file** option to navigate and upload the desired JSON file.
If the file format is correct, the transaction data will appear on the dashboard, and you'll see a screen similar to the provided screenshot.
Utilise the options at the top to save, download, or delete the complete set of transaction details. Individual transaction edits and deletion options are also available.
After finalising your batch, hit **Create Batch**.
## Step 3: Review and confirm your Transaction
Thoroughly inspect your batch. At this step, you can modify or remove a transaction if necessary.
Once you are satisfied, click **Send Batch**. This action will generate a proposal within Coinshift. Attach any relevant notes or labels and then select **Create Proposal**.
*Note that, transaction details are presented in a clear, human-readable format (see screenshot), providing essential information for other Safe Signers to review.*
A proposal will be created for the designated Signers to either **Approve** or **Discard** as necessary.
## **Step 4:** Action on Proposal
Signers can take one of three actions on a proposal:
* **Proposal Rejection-** If any Safe Signer rejects the proposal, it will be discarded Off-Chain.
* **Proposal Approval and Execution-** If the number of votes in favor of the proposal meets Safe's required threshold, the transaction will be submitted to the network.
* **On-Chain Transaction Rejection-** Even after a proposal has been approved, it can still be turned down in the on-chain stage. This can happen if a Safe Signer initially approves the proposal, moving it into the on-chain queue, but other Safe Signers decide to use the [**On-Chain Rejection**](/business/coinshift-walkthrough/transaction-management/on-chain-transaction-rejection) option to stop the transaction.
The proposal has received the necessary signatures, as shown in the screenshot below, and the transaction will be submitted to the network.
Wait for the transaction to complete. Upon successful completion, you can check your dashboard to verify the desired actions.
{% hint style="info" %}
*Please contact our customer support on* [*Twitter*](https://twitter.com/0xCoinshift) *or* [*Discord*](https://discord.com/invite/coinshift) *if you are interacting with a custom smart contract and the human-readable sentence doesn't show up. We will reply to your inquiry as soon as possible.*
{% endhint %}
# Account Management
Take control of your Safe: A comprehensive guide to account management in Coinshift.
The **Accounts** section of your dashboard allows you to view and manage all your organisation's accounts and Signers.
The following are some of the key activities that you can perform from the **Accounts** section of your dashboard:
Add Accounts
Check this article to create a new or add an existing accounts to your organisation.
In the following articles, we will focus into each of these functions in greater detail, providing you with the knowledge you need to enhance your Coinshift experience.
# Remove Account
Steps to remove an account from an organisation.
Signers can remove an account from their organisation if the account is no longer needed. Prior to initiating the removal process, it is crucial to verify that the account does not contain any remaining balances or to transfer any existing assets to an alternative account.
Follow these steps to remove an account from your organisation:
## **Step 1:** **Accessing the remove account option**
Navigate to the **Accounts** sections. Here you will see a list of all your Safes housed in your organisation.
Identify the account you intend to remove and click on it to expand its options. Locate the ellipsis symbol, and upon clicking, the **Remove Account** option will appear.
## **Step 2:** **Confirm account removal**
Select the **Remove Account** option. A confirmation prompt will emerge, requesting verification of the account's removal. Click the **Remove** button to finalise the process.
Upon completion, the selected account will no longer be visible in the **Accounts** section of your dashboard.
# Add Signers
Expand your team by adding more Signers to your existing Safe.
The Add Signer feature provides the functionality to incorporate new Signers into your Safe. There are two distinct approaches to adding Signers to a Safe:
1. **Define Signers**
2. **Add Signer**
The **Define Signer** approach allows the addition of all Safe Signers during the initial setup of the Safe. The main account holder is responsible for inviting other Signers to participate in the Safe. Further information on specifying Safe Signer during the creation process can be found in these resources: [here](/business/getting-started/setting-up-a-new-organisation/add-accounts-safes-wallets-etc./create-a-new-safe) and [here](/business/getting-started/joining-an-existing-organisation).
The **Add Signer** approach facilitates the addition of a Signer to a pre-existing Safe.
The below steps will guide you through adding a Signer to an existing Safe:
## **Step 1:** **Accessing the Add Signer option**
Navigate to the **Accounts** section. Choose the desired Safe, expand it, and locate the **Add Signer** button (denoted by red in the screenshot below).
## **Step 2: Enter Signer information and create a proposal**
Enter the following information:
* The user's ENS or wallet address
* Change in threshold (if applicable)
Confirm the accuracy of the provided information and click **Create Proposal** to finalise the process.
As you are introducing a new Signer to an existing Safe, Coinshift mandates the approval of other Safe Signers, in accordance with the Safe's threshold.
Selecting **Create Proposal** submits the proposal to other Signers, who can then choose to approve or reject it.
## **Step 3:** Action on Proposal
Signers can take one of three actions on a proposal:
* **Proposal Rejection-** If any Safe Signer rejects the proposal, it will be discarded Off-Chain.
* **Proposal Approval and Execution-** If the number of votes in favor of the proposal meets Safe's required threshold, the transaction will be carried out, and the new Signer(s) will be added to Safe.
* **On-Chain Transaction Rejection-** Even after a proposal has been approved, it can still be turned down in the on-chain stage. This can happen if a Safe Signer initially approves the proposal, moving it into the on-chain queue, but other Safe Signers decide to use the [**On-Chain Rejection**](/business/coinshift-walkthrough/transaction-management/on-chain-transaction-rejection) option to stop the transaction.
Please ensure new Signers follow the steps mentioned in the [Sign Up](/business/getting-started/setting-up-a-new-organisation/sign-up), and [Joining an Existing Organisation](/business/getting-started/joining-an-existing-organisation) articles sequentially. Upon accepting the invitation to join an organisation, they can fully access the Safe and conduct transactions.
# Remove Signers
Removing existing Signers from a Safe.
Safe Signers may need to revoke access for an existing Signer who is no longer affiliated with the organisation and no longer requires access to the Safe.
Follow these steps to remove a Signer from your Safe:
## **Step 1: Select Signer to remove**
Navigate to the **Accounts** section. Select the appropriate Safe, and go to the Safe Signers section, where the list of Signers is displayed.
Click the **Delete** icon (red trash bin within the red square in the screenshot) next to the Signer address to be removed.
## **Step 2:** Confirm removal details and adjust the threshold
A page will appear, showing the address to be eliminated. Carefully review the information.
> Adjust the threshold at this stage, as removing Signers will affect the total number of Safe Signers.
After confirming the details, click **Create Proposal** to initiate the removal process.
## **Step 3:** Action on Proposal
Signers can take one of three actions on a proposal:
* **Proposal Rejection-** If any Safe Signer rejects the proposal, it will be discarded Off-Chain.
* **Proposal Approval and Execution-** If the number of votes in favor of the proposal meets Safe's required threshold, the transaction will be carried out, and the selected Signer will be subsequently removed from the Safe.
* **On-Chain Transaction Rejection-** Even after a proposal has been approved, it can still be turned down in the on-chain stage. This can happen if a Safe Signer initially approves the proposal, moving it into the on-chain queue, but other Safe Signers decide to use the [**On-Chain Rejection**](/business/coinshift-walkthrough/transaction-management/on-chain-transaction-rejection) option to stop the transaction.
# Swap Signers
Swapping out old Signer and onboarding new Signers.
By utilising the **Swap Signer** feature, Safe Signer can transfer ownership to a new party. This is crucial when an existing Signer exits an organisation and a successor is needed.
Follow the steps below to swap Safe Signer:
## **Step 1.** **Accessing the Swap Signer option**
Navigate to the **Accounts** section. Select the desired Safe, and access the Safe Signers section to view the list of Signers.
Select the **Swap** icon (indicated in red in the below screenshot) adjacent to the Signer address to be changed.
## **Step 2:** **Entering new Signer information and create proposal**
A window will appear. Input the new Signer's address, carefully review the details, and click **Create Proposal** to finalise the process.
The remaining Signers can evaluate and either approve or reject the proposal.
## **Step 3:** Action on Proposal
Signers can take one of three actions on a proposal:
* **Proposal Rejection-** If any Safe Signer rejects the proposal, it will be discarded Off-Chain.
* **Proposal Approval and Execution-** If the number of votes in favor of the proposal meets Safe's required threshold, the transaction will be carried out, resulting in the previous Signer being replaced by the new one.
* **On-Chain Transaction Rejection-** Even after a proposal has been approved, it can still be turned down in the on-chain stage. This can happen if a Safe Signer initially approves the proposal, moving it into the on-chain queue, but other Safe Signers decide to use the [**On-Chain Rejection**](/business/coinshift-walkthrough/transaction-management/on-chain-transaction-rejection) option to stop the transaction.
Please ensure that the newly added Signers follow the steps mentioned in the [Sign Up](/business/getting-started/setting-up-a-new-organisation/sign-up), and [Joining Existing Organisation](/business/getting-started/joining-an-existing-organisation) articles sequentially. Upon accepting the invitation to join an organisation, they can fully access the Safe and conduct transactions.
# Change Safe Name
Modify the default name of your Coinshift Safe.
[Coinshift ](https://coinshift.xyz/)assigns the default name "Gnosis Safe" to all new Safes. In the **Accounts** section, you can change your Safe's name to something more fun or meaningful via the **Name** field.
Follow these steps to customise the name of your Safe:
## **Step 1:** **Accessing the Safe edit option**
Navigate to the **Accounts** sections. Here you will see a list of all your Safes housed in Coinshift.
Choose the Safe you wish to rename and click on the edit icon (highlighted in the below screenshot).
## **Step 2: Changing the Safe name**
An editable box will appear, allowing you to enter a new name for the selected Safe.
After entering the desired name, click on the checkmark to finalise the process.
By following these steps, you will successfully update your Safe's name for a more personalised and organised experience.
# Change Threshold
Adjust the Safe's threshold.
At [Coinshift](https://coinshift.xyz/), the term **threshold** refers to the minimum number of signatures required from Safe Signers to authorise a transaction. The Safes, designed for multiple Signers, utilise multi-signature functionality for secure and transparent transactions.
When creating a Safe, it is essential to specify the Safe's Signers and establish its threshold. *The threshold is expressed as X out of Y Signers, meaning that X out of Y Signers must approve a transaction for execution.*
Safe Signers can adjust the threshold as needed.
Follow these steps to modify the threshold value:
## **Step 1: Accessing the change threshold** option
Navigate to the **Accounts** section. Select the desired Safe and expand it. Now, click on the ellipses, and the **Change Threshold** option will become visible (highlighted in red in the accompanying screenshot).
## **Step 2: M**odify the threshold and create proposal
To modify the threshold, open the drop-down menu and choose from the available options.
{% hint style="info" %} Assigning multiple Signers to a Safe is highly recommended, as it substantially increases security and promotes transparency in treasury management through the decentralisation of control.
{% endhint %}
Click the **Create Proposal** button to generate a proposal for other Safe Signers to review and either approve or reject.
## **Step 3:** Action on Proposal
Signers can take one of three actions on a proposal:
* **Proposal Rejection-** If any Safe Signer rejects the proposal, it will be discarded Off-Chain.
* **Proposal Approval and Execution-** If the number of votes in favor of the proposal meets Safe's required threshold, the transaction will be carried out, resulting in an adjusted threshold accordingly.
* **On-Chain Transaction Rejection-** Even after a proposal has been approved, it can still be turned down in the on-chain stage. This can happen if a Safe Signer initially approves the proposal, moving it into the on-chain queue, but other Safe Signers decide to use the [**On-Chain Rejection**](/business/coinshift-walkthrough/transaction-management/on-chain-transaction-rejection) option to stop the transaction.
# Adding a Safe as a Non-Signer
Add Safe in read-only mode and monitor its activities.
[Coinshift](https://coinshift.xyz/) provides users with the ability to monitor Safe's transactions and balance without granting permission to initiate or sign transactions.
By adding a Safe as a Non-Signer, users can access the Safe in a read-only mode, which allows for efficient tracking of Safe activities.
## **Prerequisites:**
* [x] Ensure you have access to the Coinshift v2 app. If not, refer to the article to [request early access](/business/getting-started/setting-up-a-new-organisation/request-access) from the team.
* [x] Sign up for the Coinshift app. Read the article to learn how to [Sign Up](/business/getting-started/setting-up-a-new-organisation/sign-up).
* [x] Create an organisation within Coinshift. Follow the link to learn how to [create an organisation](/business/getting-started/setting-up-a-new-organisation/create-a-new-organisation).
All three prerequisites must be satisfied before adding a Safe as a Non-Signer.
Follow these steps to add a Safe as a Non-Signer:
## **Step 1:** Accessing add existing Safes option
Go to **Add Accounts -> Add Existing Safes**. You will see the below screen.
## **Step 2:** Entering Safe details
Click on **Add More Safes** (highlighted in the above screenshot). A window will appear where you must enter the following details for the Safes:
* Network
* Safe Address
* Name (optional)
## Step 2. a: Adding multiple read-only Safes
Use the **Add More** button to add multiple Safes (read-only) for the same or different networks.
For example, we have added four Safes with each one associated with a distinct network among the variety of networks supported by Coinshift.
Once done, click on **Confirm**.
## **Step 3:** Deselecting Safes (if any)
The application will display the list of added Safes. Deselect any Safes you do not wish to track and click **Next**.
## **Step 4: I**nviting Members
Optionally, you can invite Members to join the organisation at this stage.
## **Step 5:** Reviewing Safe summary and importing Safes
Review the summary of the Safe, including its address, threshold, network, and Signers’ addresses.
Click on **Import X Safes** to confirm and complete the import where \[X] corresponds to the number of Safes being imported.
## **Step 6:** Verifying added Safe in Coinshift dashboard
Upon completion, you will be redirected to the **Overview** section of your Coinshift dashboard.
Verify the added Safe in your organisation via the **Accounts** tab.
# Filter A Safe
Filtering Safes based on networks and accounts.
Coinshift's **Accounts** section provides you with an efficient way to filter your Safes on various parameters.
Follow these steps to filter your Safes and make the best use of your time on Coinshift.
## **Step 1:** Access **the account filter option**
Navigate to the **Accounts** section. Your Coinshift dashboard displays all the Safes associated with your organisation across multiple supported networks.
Here, you'll find an **Accounts** button with a filter symbol (denoted by red below). Click on it to proceed.
## **Step 2: Setting filtering parameters**
You'll be presented with options to filter your Safes based on the network they are on or by the specific Safes themselves.
You can use either or both of these filter options together.
In the example below, only the [Polygon](https://polygon.technology/) network is displayed, and within that, only one particular Safe is selected.
Once you've selected your preferred filters, click **Apply Filters** to complete the process.
## **Step 3. Applying account filters**
The selected Safe will load, providing you with the information you need to manage it effectively.
If you wish to remove a filter, simply click on the **Accounts** button again to clear it.
# Transaction Management
Understanding transactions in Coinshift in detail.
Transactions, as the core of all operational inflow and outflow, play a crucial role in the financial activities of businesses and organisations. In an increasingly complex business landscape, it is important to have a robust transaction management and monitoring system to accurately track, audit, and manage each transaction across the organisation.
[Coinshift](https://coinshift.xyz/) offers a simple interface designed to meet this need, allowing organisations to easily manage their financial operations. The application's foundation is its Safes, which are multi-signature wallets requiring only a pre-set threshold of signatures for transaction execution. This streamlines the process, eliminating the need for unanimous owner approval.
In situations where transactions are approved by other Safe Signers, and further investigation into the transaction details is required, Coinshift provides a user-friendly dashboard for easy access to the necessary information. This level of transparency and control ensures professional and efficient financial management within the organisation.
The **Transaction** section in Coinshift provides detailed information regarding each transaction, allowing users to understand who initiated it when it occurred, and the rationale behind it. Key data fields include:
* Created On
* Description
* Safe Address along with Name (if any)
* TX Hash
* Amount
* Status
* Executed By
* Labels (if any)
* Notes (if any)
Under the **Transaction** tab, you will find various sections providing insights into ongoing (**Proposals**), queued (**Queue**), or past (**History**) transactions.
Proposals
Learn about proposals that Safe Signers or Members have initiated.
Continue reading to learn about these in more detail.
# Proposals
What is a Proposal in Coinshift.
A **proposal** within the [Coinshift](https://coinshift.xyz/) application represents a well-structured suggestion or request for action pertaining to a Safe. Proposals helps crypto organisations better manage their multi-sig treasury transactions on top of [Safe](https://gnosis-safe.io/). Proposals reduce the administrative burden on signers, minimise errors, increase flexibility, and lower gas fees.
With Coinshift, any user within an organisation can create and edit a proposal. Only a Safe signer can accept a proposal with one simple click, moving it on-chain and into the Queue. Once the multi-sig approval threshold is reached, the transaction executes and appears in History.
And because Coinshift is multi-safe and multi-chain, your Proposals, Queue, and History tabs will consolidate transactions from all Safes added to your organisation across all supported networks.
Coinshift Proposals help address a number of common pain points when managing your treasury, including the following:
Coinshift Proposals have been developed to address several common challenges faced when managing a treasury, including:
* Reducing the administrative burden on Signers
* Reducing the potential for errors
* Enhance flexibility
* Decreases gas fees
**Future Enhancements**
Coinshift plans to introduce several enhancements in the future. These upgrades will allow Signers to group multiple proposals into a single transaction, thereby saving time and gas fees.
Additionally, users will be able to schedule proposals, further automating recurring operations like monthly salary payments for crypto organisations.
To learn more about monitoring [Active and discarded proposals](/business/coinshift-walkthrough/transaction-management/proposals/active-and-discarded-proposals), please refer to our subsequent article.
# Proposal Management
Understand how the proposal works in Coinshift.
[Proposals](https://blog.coinshift.xyz/feature-spotlight-proposals) are an integral component of Coinshift's approach to simplifying treasury management.
Now let us understand how the proposal management process happens in [Coinshift](https://coinshift.xyz/):
## 1. Create a Proposal
In Coinshift, any member of the organisation - including both Signers and Members - can initiate a proposal. This usually occurs when the organisation desires to modify the core parameters of a Safe such as adding or removing a Signer or initiating a Mass or Stream Payout.
## 2. View the Proposal
When a proposal is initiated, it is not directly sent to other Safe Signers for approval. Instead, Safe Signers are notified of the new proposal and can review the details at their convenience from the dashboard under the **Transaction** section-> **Proposals** tab.
## 3. Action on Proposals
After receiving a proposal notification, Safe Signers can either **approve** or **discard** the proposal.
If a proposal is approved, Coinshift moves the proposal on-chain and places it into the transaction **queue** for execution. These transactions must be executed in the order they are queued.
If a proposal is rejected, it is moved to the **Discarded Proposals** section on the dashboard. This action occurs off-chain and does not require a gas fee.
## 4. Threshold
Each Safe requires a predefined threshold by the organisation. This threshold represents the minimum number of Signers required to execute a transaction. Once this threshold is met, the transaction is automatically submitted to the network.
Note that, the threshold must be met for both approval and rejection of a transaction.
# Active And Discarded Proposals
View and manage active and discarded proposals in Coinshift.
Users can follow the steps outlined below to access the list of **Active** or **Discarded** proposals within the [Coinshift](https://coinshift.xyz/) app.
## **Step 1:** Access Proposals (under Transactions)
Navigate to the **Transactions** section, where you will find the **Proposals** tab. The interface will resemble the provided screenshot.
The upper portion of the page displays a list of **Active Proposals**, while the lower portion houses the **Discarded Proposals**.
Please be aware that Coinshift incorporates **Multi-safe** and **Multi-chain** capabilities, enabling your dashboard to present a consolidated view of transactions from all Safes associated with your organisation across all supported networks under the **Proposals**, **Queue**, and **History** tabs.
## **Step 2:** Approve or reject proposals as a Signer
Within the **Active Proposal** section, Signers are granted the ability to select proposals for either **approval** or **rejection**.
Following approval, the proposal will advance to the **Queue**, where it will be prepared for execution.
# Queue
Review the list of transactions pending execution.
In [Coinshift's](https://coinshift.xyz/) multi-sig Safes, queued transactions require manual execution. To maintain the state and balance of your Safe effectively, transactions must be executed in the order they are queued. If a transaction is executed out of order, it will be frozen until resolved.
To avoid this issue, examine the **Nonce** field and execute transactions with smaller nonce values before progressing to those with higher nonce values.
For additional clarification, we highly recommend watching the below GIF closely. It explains why it's important to execute the transactions in the right order.
Observe the cautionary message displayed when a user attempts to execute the most recent transaction without first processing the existing queued transactions.
Upon receiving the necessary number of signatures, which meets Safe's threshold, a transaction is ready for execution.
Click on the transaction.
Locate and select the **Execute** option to submit the transaction to the network.
Successfully executed transactions will appear in the **History** tab.
Signers who fulfill Safe's threshold with their transaction approval may utilise a streamlined command called **Approve and Execute**. This command allows the Signer to approve and execute the transaction in one step, rather than performing two separate actions.
# History
Review the transactions associated with all the Safes in your organisation.
The **History** tab displays a record of all transactions, both successful and unsuccessful, that were submitted to the network.
This includes transactions from all Safes linked to your organisation on every supported network.
The **Proposal**, **Queue**, and **History** tabs are purposefully situated within the **Transaction** section, as they represent the three distinct stages a typical transaction undergoes within the [Coinshift](https://coinshift.xyz/) app.
# Filter Transactions
Explore the advanced filtering options for transactions.
Use the filter options available in the **History** tab of [Coinshift](https://coinshift.xyz/) for easy and accurate transaction data analysis. Coinshift's advanced filtering system allows you to refine transaction data based on two key criteria:
* By Account
* By one or more fields
Employ these filter options individually or in combination for a more targeted data output.
## **Filter Transactions by Account**
To access account-specific data, click on the **Accounts** button (denoted by red in the below screenshot).
This action opens up the associated accounts and their corresponding networks. Choose the desired account by checking the box adjacent to its address.
Upon applying the filter, the transaction data will be updated to reflect your selection.
## **Refine Transactions by One or More Fields**
To filter the data based on one or more fields, click on the **More filters** button (denoted by red below) located under the **Transaction** section-> **History** tab.
A window will appear on the right side of your screen, requesting filter values corresponding to the following criteria:
* Date Range (optional)
* Token (optional)
* Label (optional)
* Transaction Type (optional)
* Transaction Mode (optional)
* Status (optional)
Input values for any of the designated fields and click the **Apply Filters** button to update the transaction data accordingly. Utilising these advanced filtering options will enhance your organisation's efficiency and time management.
# Export Transactions
Export your organisation's historical transaction data as a CSV file.
[Coinshift's](https://coinshift.xyz/) **Export** feature enables you to conveniently download your transaction history data as a CSV file onto your device.
Follow the below process to access this functionality:
Navigate to the **History** tab (under the **Transactions** section). Locate and select the **Export CSV** button (denoted by red in the below screenshot).
Upon selection, a CSV file containing detailed transaction data and fields will be downloaded to your device.
# Add Labels and Notes
Organising transactions with labels and notes.
[Coinshift](https://coinshift.xyz/) allows you to enhance treasury management within your organisation by enabling the addition of **labels** and **notes** to transactions.
This feature allows you to annotate critical information for any transaction, irrespective of its status in the **Proposal**, **Queue**, or **History** tab, promoting easy communication and collaboration throughout your organisation.
Follow the steps below to incorporate notes and labels into a transaction:
## Step 1: Locate the labels and notes section
Navigate to the **Transaction** section. Choose a transaction from the **Proposal,** **Queue**, or **History** tab. You will find the labels and notes fields situated at the bottom of the page.
## Step 2: Input labels and notes for transactions
Prior to adding a label, you are required to define it. Refer to our guide for detailed instructions on [label creation](/business/coinshift-walkthrough/label-management/add-label). Enter any appropriate remarks in the **Notes** field.
Once completed, the transaction will be labeled accordingly. To review the notes associated with a transaction, simply expand the transaction information.
By adding labels and notes, you can enhance communication within your treasury management processes.
# On-chain Transaction Rejection
Explore the steps to reject an on-chain transaction.
Signers possess the ability to decline a transaction in case they identify an error or consider it inappropriate for execution.
A transaction may be rejected provided it has not yet attained consensus (i.e., approval by the required number of Signers). It is important to note that rejections are recorded on the blockchain (on-chain) and will incur gas fees.
Follow the below steps to reject a transaction on-chain.
We assume that a proposal has already been created and has received approval from one of the Safe Signers. The selected Safe has a threshold of 2/3.
To initiate the rejection process, select the particular **Queued** transaction. Next, navigate to the **On-chain Rejection** tab in your dashboard (highlighted below).
Within this tab, you will find a **Reject** button. Click on this button to reject the transaction.
The transaction has been rejected by one of the Safe Signers (see the attached screenshot). It will now require an additional signature for rejection, in line with the 2/3 threshold set for the particular Safe.
The remaining Safe Signers will then see a **Reject & Execute** button on their dashboard. They should click this button to submit the rejected transaction to the network.
Upon submission, the transaction will be officially rejected on-chain. The status of this action can be tracked directly from your respective dashboards.
# Fund Management
Learn about the various methods for transferring funds through Coinshift.
Payouts are one of Coinshift's core services. Using this service, users can transfer assets to any exchange account or non-custodial wallets with comparable network fees and seamless experiences. [Coinshift](https://coinshift.xyz/) offers these customisable payment options:
* Single Payout
* Mass Payout
* Batch Payout
Explore these payment methods to enhance your asset transfer experience.
## [**Single Payout**](/business/coinshift-walkthrough/fund-management/mass-payout/mass-payout-in-a-single-token)
Coinshift is primarily designed for organisations seeking to efficiently manage [mass transactions](/business/coinshift-walkthrough/fund-management/mass-payout) to streamline their payment processes. However, it also accommodates payouts to individual users.
To initiate a single payout, input the recipient's wallet or ENS address and confirm the transaction when prompted. If the recipient is a registered contact within your organisation, their address can be easily selected. Enter the transfer details and amount, then confirm the transaction to complete the process.
## [**Mass Payout**](/business/coinshift-walkthrough/fund-management/mass-payout)
The Mass Payout feature allows fund transfers to multiple recipients- up to 150 wallets in a single transaction. This limit ensures manageable gas costs during the process.
Coinshift offers three methods for inputting recipient details for mass payouts:
* **Upload CSV -** Import recipient information from a CSV file
* **Add from Contacts -** Utilise recipient details from your existing [Contacts](/business/coinshift-walkthrough/contact-management) section
* **Add More -** Manually input one or more recipients' wallet addresses
These options provide flexibility and convenience for executing mass payouts on the Coinshift application.
## [Batch Payout](/business/coinshift-walkthrough/fund-management/mass-payout/mass-payout-multiple-tokens)
The [Add Batch](/business/coinshift-walkthrough/fund-management/mass-payout/mass-payout-multiple-tokens) feature allows for the creation of multiple batches within a single transaction, providing the flexibility to assign different cryptocurrencies for each batch. This enables the transfer of various tokens (e.g., USDT, MATIC, DAI, USDC, etc) to multiple recipients in a single transaction.
# Mass Payout
Transfer funds to multiple recipients with Mass Payout.
[Coinshift](https://beta.coinshift.xyz/)'s **Mass Payout** feature streamlines asset transfers to multiple users within a single transaction.
{% hint style="info" %} Coinshift allows you to transfer assets to up to 150 recipients in a single transaction.
{% endhint %}
The **Batch Payout** option further enhances this functionality, enabling payments to various users in different tokens.
Explore the following articles in this section for more information:
MassPayout in a Single Token
Learn to transfer a single token to one or multiple users.
# Mass Payout in a Single Token
Sent tokens to single or multiple recipients in a single transaction.
This article outlines the steps to perform a Mass Payout in a single token.
## **Step 1:** **Initiate mass payout by selecting Safe address**
Click on **New Transfer** appearing on your dashboard. You can see the below screen.
Select the Safe address you want to work with, then click on the **Mass Payout** option.
## **Step 2: Enter token and recipient details**
A window will appear where you need to fill in the following details:
* Pay using (Token type)
* Pay to (Recipient Name (optional), and Address)
* Amount
Fill in the recipient details (one or many) required for the mass payout.
Once you are done, click **Next**.
## **Step 3:** **Review and confirm the mass payout summary**
Carefully review the transaction details displayed on the **Summary** page. Optionally, add **Labels** and **Notes** in the designated section.
If the summary is accurate, click **Create Proposal**.
## **Step 4: Await Safe Signers' approval and monitor transaction status**
The proposal will be created. Safe Signers must approve the proposal to execute the transaction.
Monitor the transaction status (success or failure) from the dashboard.
Refer to the subsequent articles to learn about [mass payouts in different tokens to multiple users](/business/coinshift-walkthrough/fund-management/mass-payout/mass-payout-multiple-tokens).
# Mass Payout (Multiple Tokens)
Pay multiple recipients in multiple tokens in a single transaction.
More than just paying multiple recipients in a single transaction, you can make payments across different tokens by adding batches.
{% hint style="info" %} Coinshift allows transferring different tokens to up to 150 recipients in a single transaction via Mass Payout.
{% endhint %}
Follow these steps to conduct a Mass Payout with multiple tokens on Coinshift.
Click on **New Transfer** on your dashboard. Select the **Safe** you wish to use for the transaction and then choose the **Mass Payout** option. These are the same steps outlined previously. Refer to the [Mass Payout in a Single Token](/business/coinshift-walkthrough/fund-management/mass-payout/mass-payout-in-a-single-token) article if necessary.
## **Step 1: Initiate multiple token mass payout and add batches**
You can see the below screen if you have followed the above steps correctly. Now, click on **Add Batch** (highlighted in the below screenshot).
## **Step 2: Input recipient details for different token batches**
Use batch payment when paying in different tokens. (e.g., **MATIC** and **USDC** in this example).
Add the recipient's details and the amounts to transfer in each batch.
Once completed, click **Next**.
## **Step 3: Review batch details and check the mass payout summary**
Carefully review the details for all created batches. Optionally, add **Labels** and **Notes** in the designated section.
If the summary is accurate, click **Create Proposal**.
## **Step 4: Await Safe Signers' approval for multiple token payouts**
The proposal is created, and Safe Signers must approve it to execute the transaction.
Check the transaction status via the **History** tab on the dashboard.
---
[Next Page](/llms-full.txt/1)
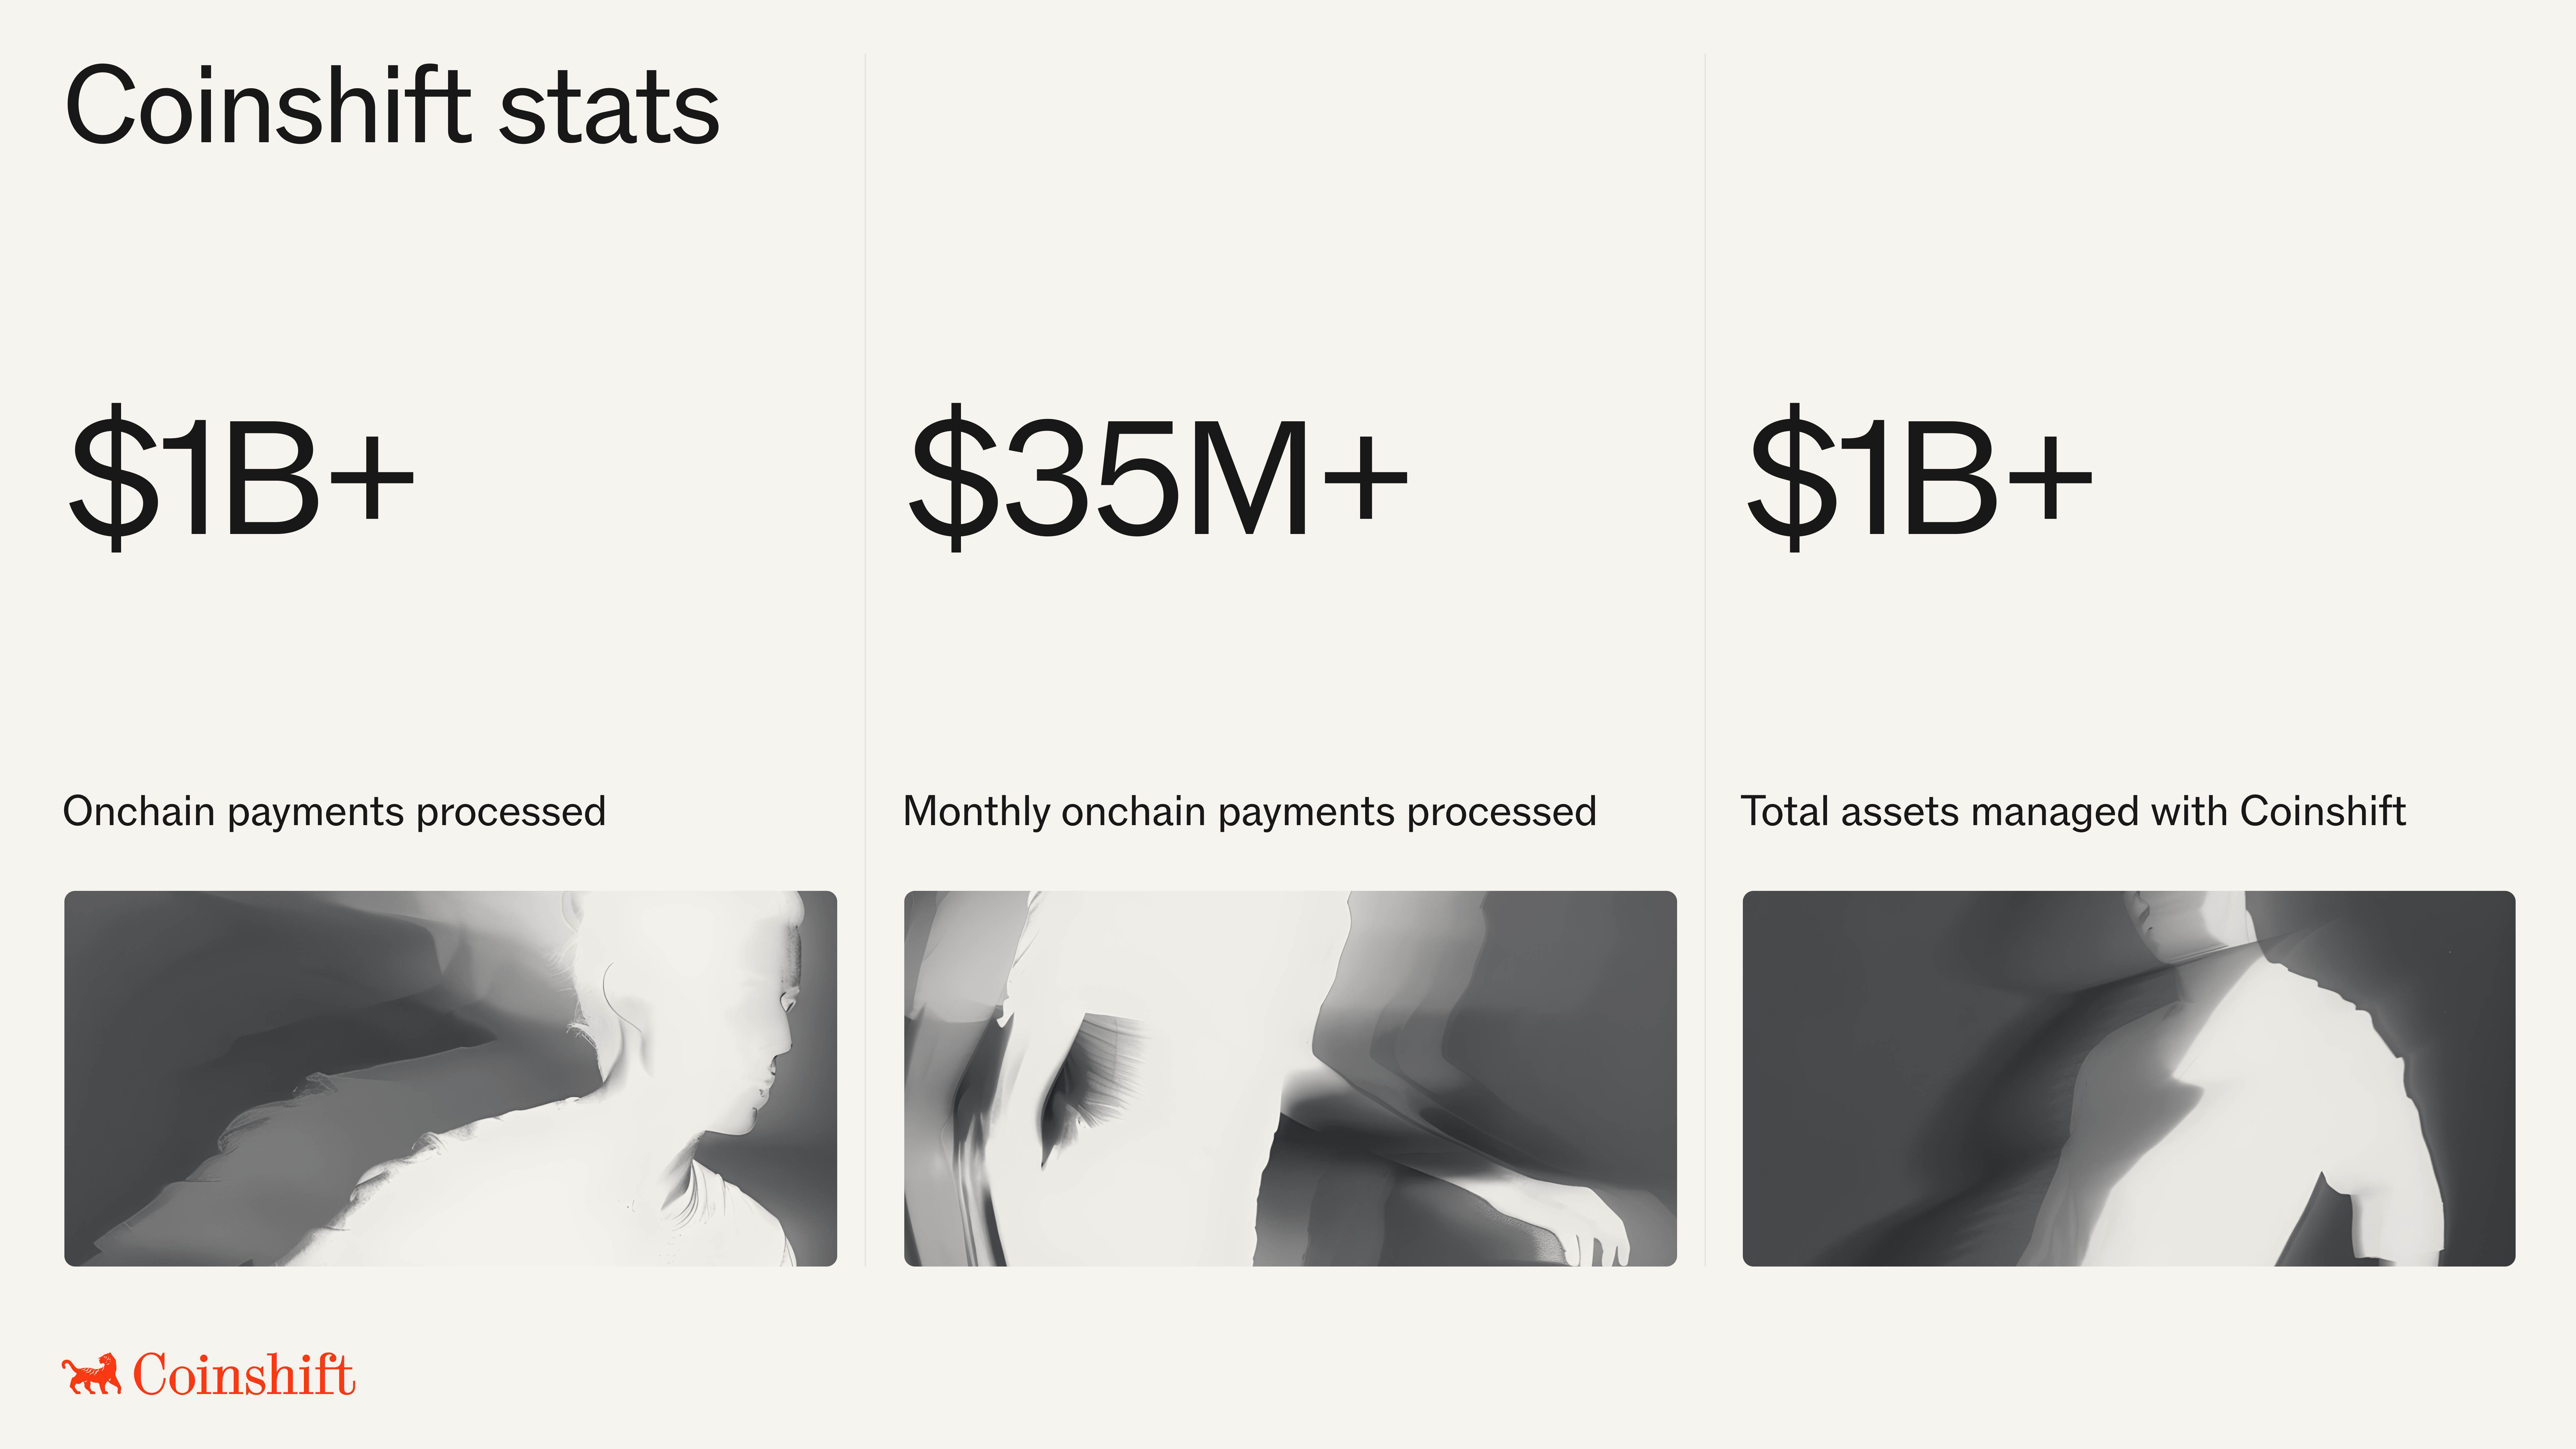
.png?alt=media&token=0f7e3a48-6ea2-41c7-9a9e-14b1590fda81)
.png?alt=media&token=192de0b8-518d-454b-8ad3-04f58d9a2218)


.png?alt=media&token=fd8f0c41-991c-43f0-8318-9e53e46c4e0c)
.png?alt=media&token=85e0b2e8-31ac-4e4f-91d8-b8fd51526242)
.png?alt=media&token=15fdada3-889f-45cf-a840-81afbe2e3d59)

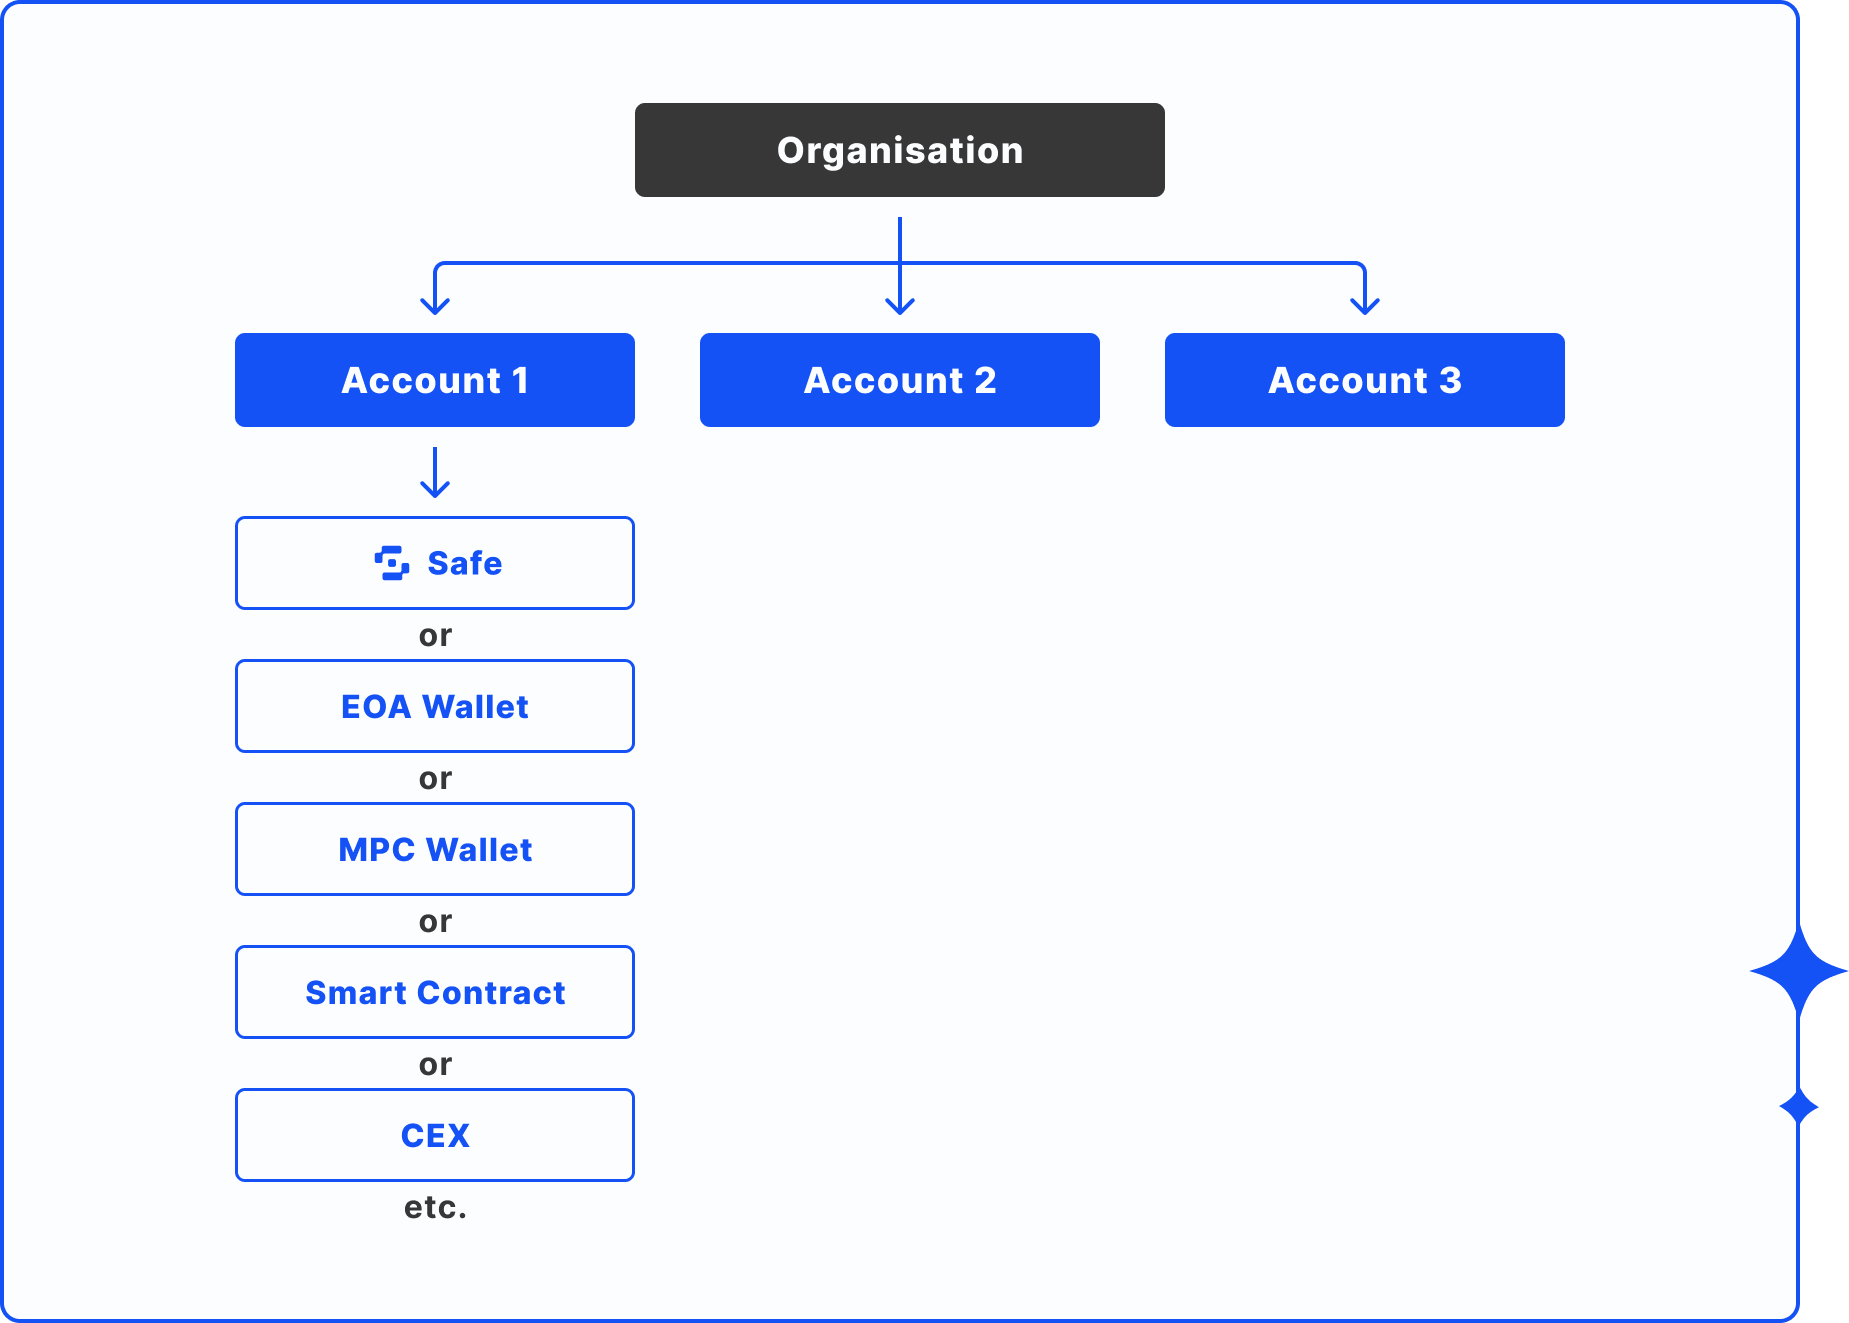


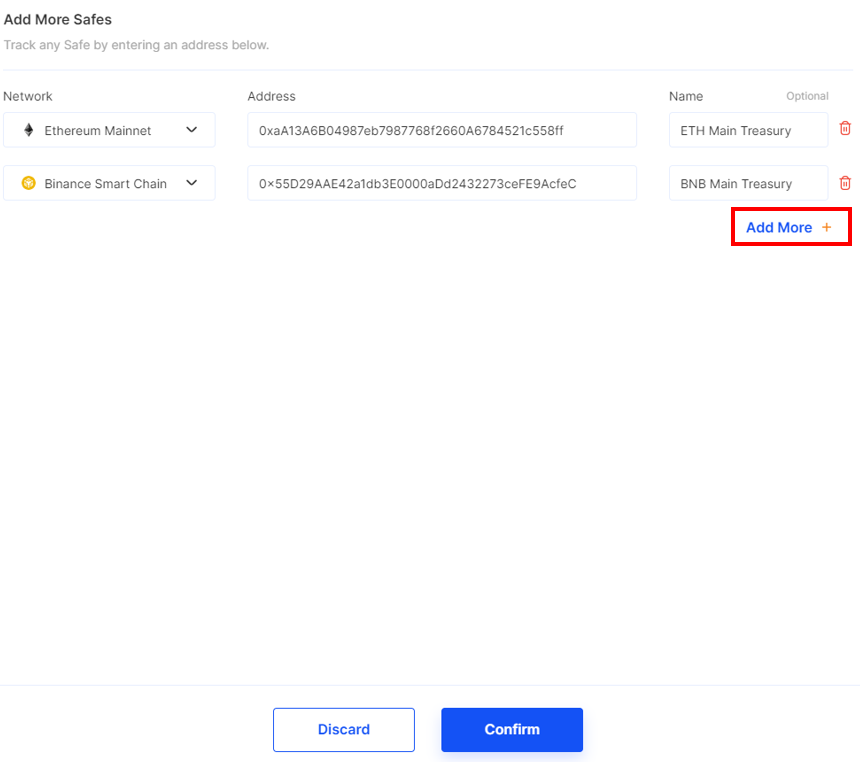


.gif?alt=media&token=3582c1c5-1ece-40d5-a0bd-96b4f95b6727)


.gif?alt=media&token=e17c140f-9b09-40d5-95fd-2117f1e22ae6)